
Today’s tutorial uses the new GO! Carefree Alphabet Lowercase Set (2 die set) #55491 die and the free alphabet machine embroidery designs that can be downloaded from Accuquilt.com. This is not your typical pieced or embroidered quilt design and allows one to add their own personal design touch to the project. Besides the lowercase alphabet set, some additional designs were purchased from the Accuquilt.com website for the complete wall hanging.
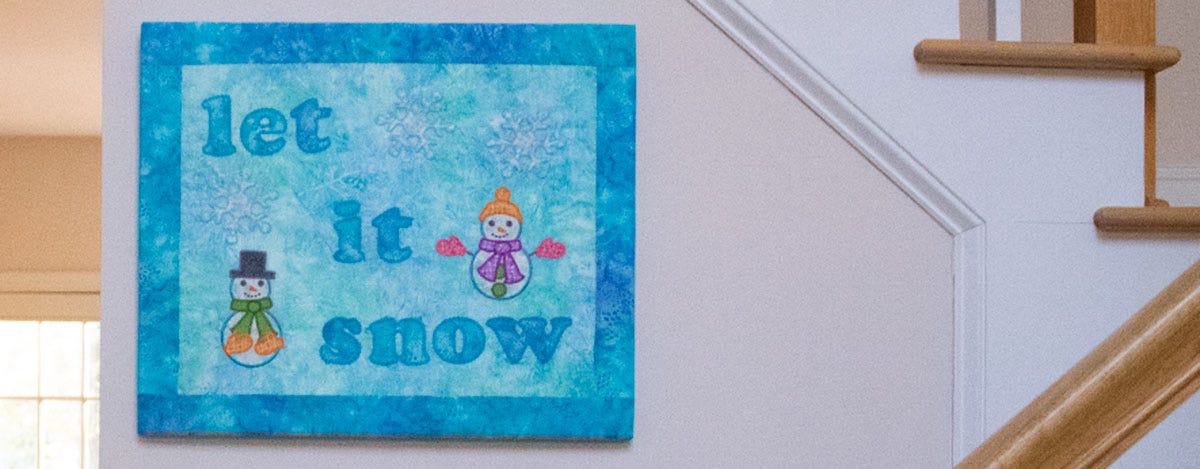
For a long time, I have wanted to create a "Let It Snow" wall hanging. This was the perfect time and opportunity to design something that would work for the upcoming holidays and for this blog. For this wall hanging, I decided to do something different and to mount the finished “quilt” onto a stretched canvas frame. Here is a picture of the finished wall hanging.

Supplies Needed:
GO! Carefree Alphabet Lowercase Set (2 die set) #55491
GO! Strip Cutter-4 1/2" (4" Finished) 2 Strips with Angled Guidelines #55054
Machine embroidery designs for lower case alphabet (automatically added to Downloads in your account when the die is purchased)
GO! Holiday Accessories Die #55321
GO! Holiday Elements Machine Embroidery Set by Marjorie Busby
1 yard fabric for background
¾ yard fabric for background and lettering
Quilt batting 24 x 28”
Assorted fabric scraps for appliqué shapes
Paper backed iron-on fusible for appliqué
Stretched canvas frame 20” x 24”
Machine embroidery supplies including coordinating thread colors and bobbins
- Machine embroidery hoop 6” x 8” (150mm x 200mm) recommended, although this can be done one letter at a time using a smaller hoop
- Stabilizer: Sticky water soluble or sticky tear away stabilizer for the letters and sticky tear away stabilizer for the snowmen and snowflakes. A regular soft tear away stabilizer and spray adhesive can be used if the sticky stabilizer is not available.
NOTE: Test stabilizer before using to be sure it will not shrink when pressed with a hot iron. The entire piece will be pressed in the end so it is important that the stabilizer can withstand a hot iron.
- Water soluble marking pen for marking fabric
- Sharpie or other dark permanent marker for marking paper templates
- Mini iron or acid-free glue stick (Elmer’s purple glue stick or fabric glue stick) to secure embroidery to background fabric
- Transparent and/or painter’s tape
- Thumb tacks (a flat head pin can be used if thumb tacks are not available)
Step 1: Create your design and lay out design templates onto stretched canvas.
For this step, I printed out templates for the embroidery designs using embroidery manager software.
NOTE: This is basic software that comes with every embroidery machine and allows the printing of templates. If you do not use this software, you can cut out the appliqué designs using paper or fabric and arrange the designs on the canvas in a layout that is pleasing to you.
- To make design templates for the letters, determine how many letters can be stitched in a single hoop. My design allowed me to stitch only two letters at a time except for the word “let”. Thus, I was able to open the letters in my embroidery machine and create each set of letters in the machine. If you can only stitch one letter at a time, use each letter as a separate template.
- Mark the center of each appliqué template. I used a black Sharpie marker to make the center markings more visible for marking the background fabric.
- Mark the boundaries of your design using painter’s tape on the canvas. I allowed for a 2” border all the way around my design.
- Lay out and arrange the appliqué templates until you are happy with your design. When you are satisfied with the placement, use transparent or painter’s tape to secure the design to the canvas.

Step 2: Mark the appliqué placement on the background fabric.
- Cut the background fabric at least two inches larger than the actual background will be.
- Place the background fabric on the stretched canvas and secure it into place using thumb tacks in each corner through the background fabric and the canvas.
- Using a water soluble marker, mark the exact center of each appliqué design onto the background fabric. If you have trouble seeing the marks, a light underneath the canvas will help. I used the light on my mobile phone underneath the areas where the background fabric was too dark to see the templates.

Step 3: Prepare the fabric for the appliqué shapes and cut them using the dies.
- Use the manufacturer’s instructions to fuse the paper backed iron-on fusible web onto the wrong side of the fabric for each appliqué. Place the fabric onto the die and cut.
- Cutting instructions are included in the free downloadable machine embroidery designs for the lower case alphabet and in the Holiday Elements machine embroidery set.
Step 4: Secure the background fabric in the embroidery hoop for each design.
- Hoop the stabilizer.
- Mark the center of the design using the marks on the embroidery hoop.

- Turn the hoop over to the back of the stabilizer and insert a thumb tack into the center of the cross hairs marked on the hoop. A piece of tape will secure the thumb tack if needed. A pin can be used instead of a thumb tack if you do not have a flat head thumb tack.

- Carefully place the background fabric center mark of the design onto the thumb tack matching the horizontal and vertical marks on the stabilizer with the horizontal and vertical marks from the template. Matching the horizontal and vertical marks are critical for making sure the letters stitch evenly across.
- Smooth the fabric outward from the thumb tack until it is secure on the sticky stabilizer. The fabric will float over the embroidery hoop.
- Below is a picture of the thumb tack centered onto the background fabric.
SPECIAL NOTE: REMOVE THE THUMB TACK BEFORE MOUNTING HOOP ONTO MACHINE AND BEGINNING STITCHING.

Step 5: Stitch the designs onto the background fabric.
As you can see in this picture, when all three letters were used, the fabric had to be turned 90 degrees so that all the letters would fit. Also note that the fabric is not “inside” the hoop, but floating on top and secured with the sticky stabilizer.

This picture shows that the snowflake was turned at an angle so that it would appear that the snowflakes were “drifting.” The fabric is turned at an angle to match the horizontal and vertical marks. You can also see the center cross marks inside the lettering on the areas that are already stitched.

Step 6: Finishing.
- Tear away any excess stabilizer, rinse the entire embroidery piece in cold water to dissolve the water soluble markings. Let dry flat and steam press right side down onto a wool pad or onto cotton batting or a kitchen towel to preserve the dimension of the machine embroidery and press out any puckers.
- Trim to size and add borders.
- Layer with batting and center over canvas frame.
- Fold edges to the back of the frame, staple securely, and trim any excess batting and fabric.
Finally, this is the wall hanging on the stairs in my entry way—the temporary home for this piece. My plan is to create additional 8 x 8” frames and stitch the large AccuQuilt Snowflakes or some of the Holiday Elements designs onto fabric and arrange them with the let it snow frame and hang them over the mantle in my family room. When we were at Biltmore last summer we purchased a large Jim Shore snowman so this will be the perfect way to showcase both the stitching and the snowman.


