
Have you ever been unsure of what the perfect gift would be for that special soon-to-be-mom in your life? You can now use AccuQuilt dies to make personalized, custom baby gifts in just a few hours! There are so many ways to approach your design, including a ton of appliqué die shapes, but I chose to make cute monogramed baby bibs and burp cloths.
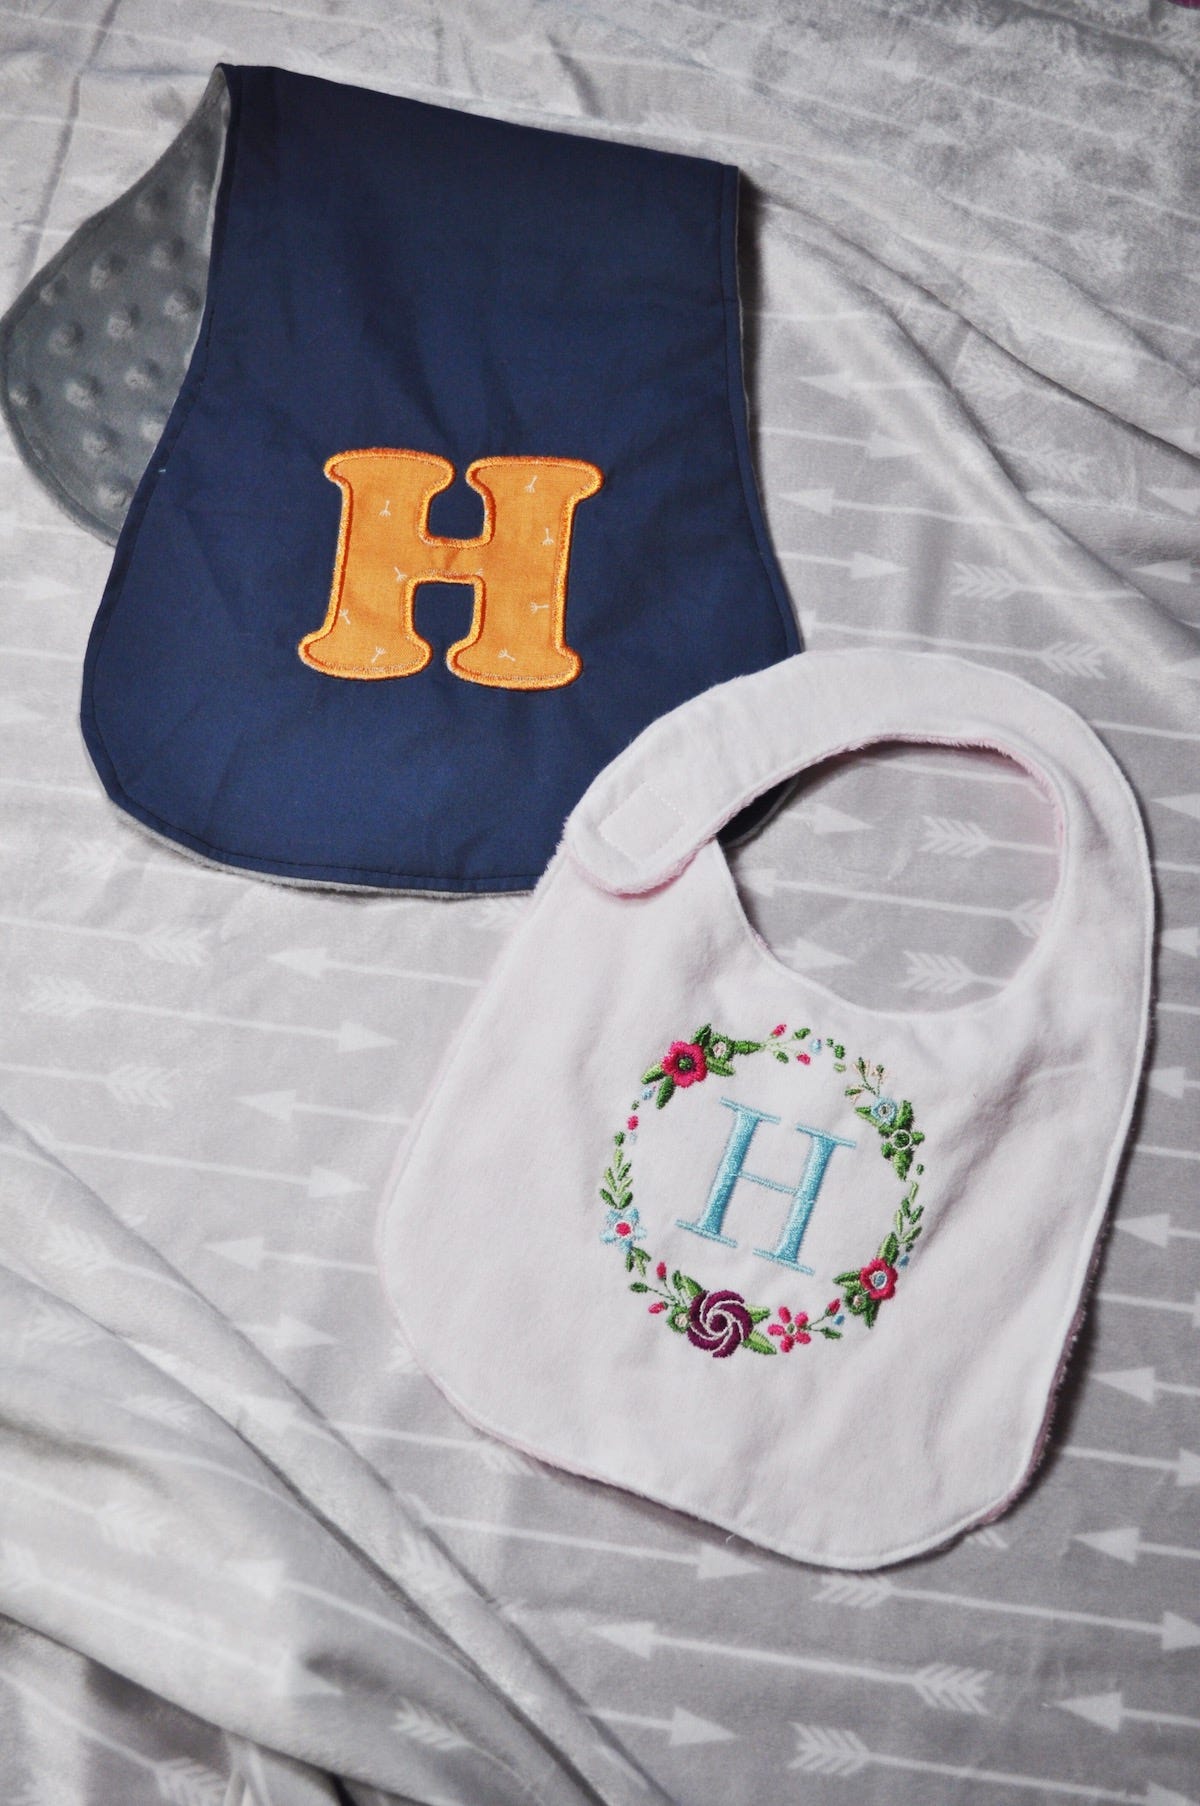
In this blog post, I will show you how to make a personalized baby bib, as well as a personalized baby burp cloth using the GO! Baby Bib (55864) and GO! Burp Cloth (55863) dies. I’ll also show how to use the AccuQuilt GO! Carefree Alphabet Set (55092) and free embroidery designs to make your gifts for the new mom in your life completely custom!
Baby Bib Materials needed:
- Sewing/Embroidery machine
- Thread
- Stabilizer
- 9" x 13" flannel fabric
- 9" x 13" minky fabric
- AccuQuilt GO!, GO! Big or Studio with adapter
- GO! Baby Bib Die (55864)
- Sew on Velcro
Baby Burp Cloth Materials needed:
- Sewing/Embroidery machine
- Thread
- Stabilizer
- 10" x 20" flannel fabric
- 10" x 20" minky or terry cloth fabric
- AccuQuilt GO! Me, GO!, GO! Big or Studio with adapter
- AccuQuilt GO! Burp Cloth Die (55863)
- GO! Carefree Alphabet Uppercase and Lowercase (55092)
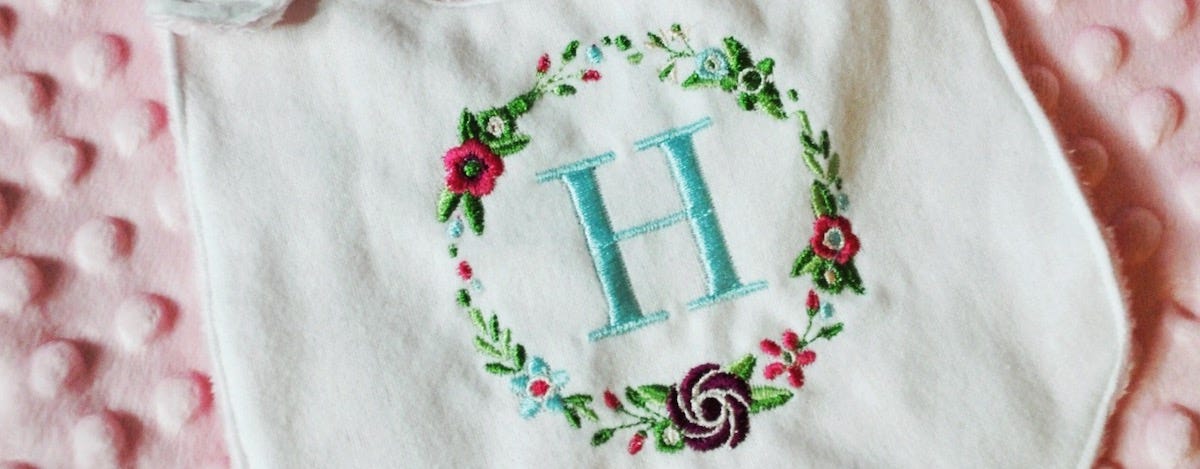
Customizing with AccuQuilt Alphabet:
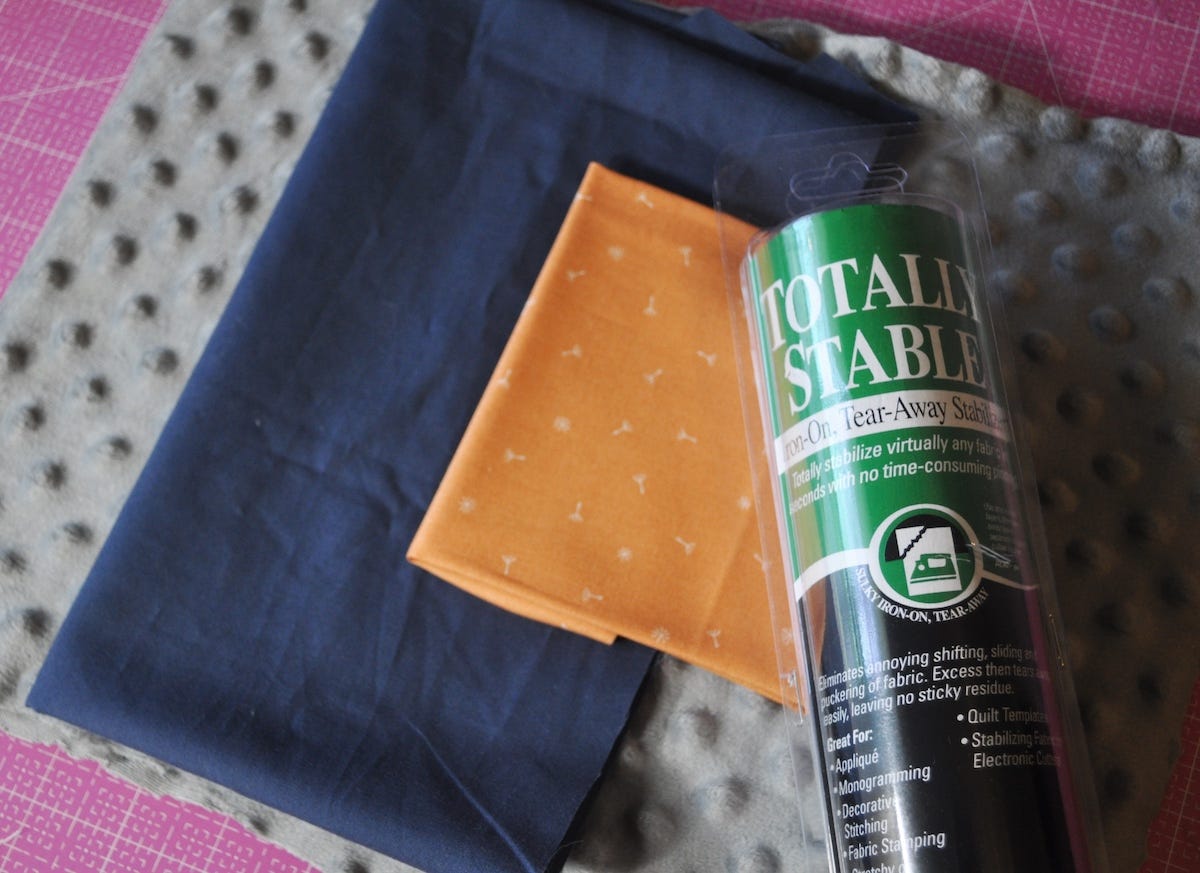
You can easily use the AccuQuilt GO! fabric cutter and the GO! Carefree Alphabet Uppercase and Lowercase (55092) dies to add a monogram to the baby bib or burp cloth with appliqué. You'll want to begin by prepping your desired letter in a fabric of your choice – I went with 100% cotton fabric, but you can use something softer if you wish. I highly suggest using iron-on stabilizer on the back of the accent fabric, and cut the letter out with the AccuQuilt GO! fabric cutter.

If you have an embroidery machine, the embroidery files come FREE for the GO! Carefree Alphabet Set, so you can download the file and have your machine do the appliqué around the edges. Follow this link to download the GO! Carefree Alphabet Uppercase Set Embroidery Designs. If you do not have an embroidery machine, you can still make this project by using a zigzag stitch on your sewing machine to adhere the monogram onto your top fabric.
Constructing the Bib:
The first step in turning your custom personalized design into a cute little baby bib is to cut out the pieces. AccuQuilt released the GO! Baby Bib die (55864) that works with the GO!, GO! Big and Studio with the right adapter. (This die is also available for the AccuQuilt Studio here.)
To begin making the baby bib, I positioned the minky fabric onto the die first right side up, and then placed my customized flannel piece right side down (so they were already right sides together). Be careful to position your fabrics so that your embroidered design is centered and both completely cover the edges of the blades (where the bib will be cut). I used a ruler to be sure the space on the sides were even and the two-tone foam of the die made it easy to know that your fabric lines up with the blades.

Once the two bib pieces are cut, carefully pin them together around all edges. You'll sew around the edges but leave a small two to three inch opening at the bottom of the bib for you to turn it right-side-out.
I used a ¼" seam allowance on mine and am very happy with how it turned out.

Turning it can be tricky, so be prepared for some shenanigans. I suggest using your thumb or the eraser end of a pencil to start it off with the top of the neck strap. Eventually you'll pull the piece out the bottom to get the whole piece turned. Then gently press around the edges until it is flat. Pin together the opening at the bottom and then sew a topstitch around the whole piece.

Next, you'll want to cut off a 1" piece of Velcro and sew it onto the baby bib neck so it can be easily put on and taken off. One piece of Velcro gets sewn onto the end of the neck loop, and the other goes onto the base of the bib where they should connect.

Constructing the Burp Cloth:
The instructions for sewing together the burp cloth are even easier than the baby bib! Once you have your design personalized on the front piece of fabric, you’ll need to cut out both layers with your AccuQuilt GO! or GO! Big by using the GO! Burp Cloth die (55863). Just like on the bib, I suggest positioning the fabric pieces right sides together before you put them through the fabric cutter and be careful to cover all edges of the blades. Make sure to center your design, using a ruler to be sure there is equal distance on both sides of the design.

After the two burp cloth pieces are cut, carefully pin around all edges and sew at a ¼” seam allowance, leaving a 3” space to turn the burp cloth. Once the piece is turned right-sides-out, top stitch around all edges.

These completely custom and personalized baby shower gifts only took me a couple hours from start to finish, and I am super happy for how they turned out!
Have you made any customized or monogrammed baby bibs and burp cloths using the GO! Baby Bib and GO! Burp Cloth dies? Share them with us on Facebook or Instagram with the #AccuQuilt hashtag. Be sure to tag @homemadeemilyjane and @AccuQuilt so we can see your creations!
Subscribe to the AccuQuilt blog so you can see more of my and my fellow GO! Getter tutorials.
Want to print or save this tutorial for later? Enter your email below to download and save!


