
Hi! It’s Steph from Steph Jacobson Designs, and I’m here to share a quick and easy Halloween project using the new GO! Classic 2” Alphabet Uppercase Set (#55559). When you have one of AccuQuilt’s alphabet dies, it’s a great excuse to personalize everything! With Halloween on its way, I decided to make a fun personalized trick-or-treat bag for my adorable nephew, Hunter.

Supplies:
- AccuQuilt Classic 2” Alphabet Uppercase Set (#55559)
- ½ yard Halloween fabric for bag exterior
- ½ yard fabric for bag lining
- 1 yard cotton or nylon webbing for handles
- 2½" strip fabric for letters (choose something that contrasts with the lining fabric)
- 2½ " strip double-sided fusible webbing (I use Heat-n-Bond Lite)
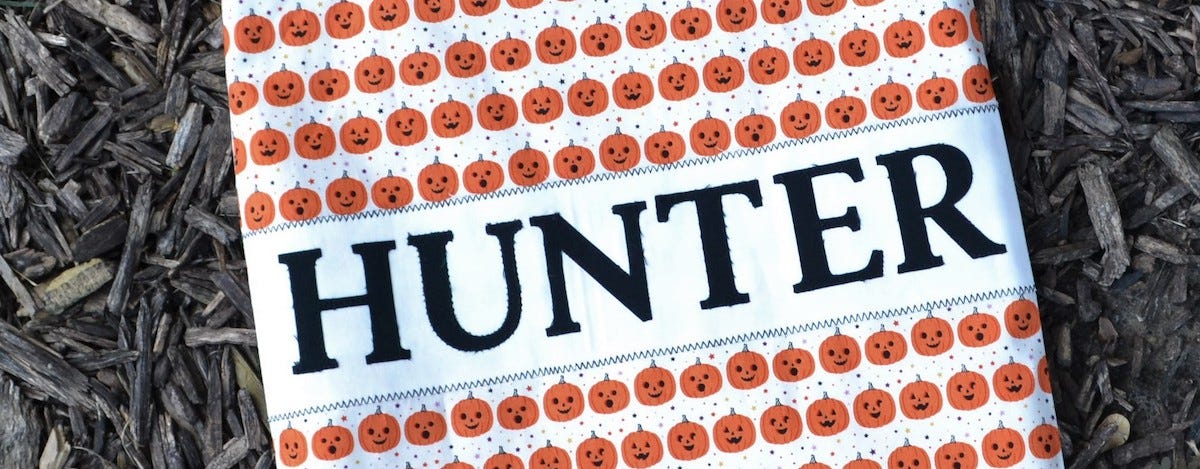
For my bag, I'm using a cute jack-o-lantern fabric (fabBOOlous by Dani Mogstad for Riley Blake Designs) for the bag exterior, a coordinating cream solid (from my stash!) for the interior, 1" black cotton webbing for the handles, and a black solid (also from my stash!) for the letters.

Designing Your Bag
Cut two pieces of exterior fabric 14" wide and 16" tall. Repeat with lining fabric. Set aside. Cut one 14" x 3½" piece of lining fabric or another fabric that will contrast with your letters.

For the letters, cut a 2½" strip of fabric (I'm using black) and a 2½" strip of your double-sided fusible webbing. Apply the fusible to the back of your fabric following the manufacturer's directions. Subcut the fabric into 2½" squares, cutting one square for each letter in the name. I cut six squares since "Hunter" has six letters.

Place a fabric square (fusible side down!) on each letter that you need to cut. Place a 10" x 24" GO! Cutting Mat on top of the die, and use your AccuQuilt GO! or AccuQuilt GO! Big to cut your letters.

Remove the paper backing from your letters and arrange on the 14" x 3½" strip of fabric as desired. I recommend doing this right on your ironing board so your letters don't shift! Fuse letters to the fabric strip according to manufacturer's directions for the product you are using.

Appliqué the letters to the fabric strip as desired. You can use a blanket stitch, zig zag stitch, satin stitch or straight stitch. If you have an embroidery sewing machine, you can download the FREE GO! Classic 2" Alphabet Uppercase Embroidery Designs to easily appliqué your letters.

Arrange the personalized fabric strip on one of your exterior bag pieces, pin, and sew as desired.

I used a zig zag stitch in contrasting black thread.

If you want to add a little embellishment in addition to your personalization, AccuQuilt has a lot of great options. Check out these Halloween and fall appliqué shapes:
- GO! Halloween Medley (55192)
- GO! Cat & Bat (55365)
- GO! Fall Medley (55041)
- GO! Pumpkins (55323)
Constructing the Bag
Place your exterior bag pieces right sides together and sew both sides and the bottom of the bag together using a ½" seam allowance. Clip the bottom corners at an angle being careful not to cut the stitching. Repeat for the bag lining.

Turn the exterior of the bag right side out and press the side and bottom seams. Insert the bag exterior into the bag lining with right sides together. Match the side seams and pin.

To make the handles, cut your nylon or cotton webbing into two 18" long pieces. Insert one handle between the two layers of fabric so that the handle is completely sandwiched between the liner and outer fabric. Measuring over 3" from one side seam, line up the outer edge of the handle at the 3" mark, line up the raw edge of the handle with the raw edges of the fabric, and pin in place.
Repeat for the other end of the handle making sure the handle isn't twisted inside the bag. Repeat with the second handle piece on the other side of the bag. Be sure the two handles line up with one another and are placed in a comfortable spot to be held.

You will have one handle sandwiched between the two bag layers on both the front and back of the bag.

Using a ½" seam allowance stitch around the top of the bag leaving an opening for turning between one of the handles. Backstitch when sewing over the handles to reinforce.

When finished stitching, the top of the bag should be sewn except for an opening between one of the handles. Now for my favorite part! Reach in the opening and carefully pull the fabric and handles right side out through the opening.

Voila! Your bag is almost finished!

Tuck the lining down inside the bag.

Press the top of the bag tucking in the fabric at the bag opening. Using a narrow ⅛" seam allowance, stitch around the top of the bag.

Your bag is done and ready to fill with treats on Halloween!

If Halloween isn't your thing, you can use this tutorial to make a fun personalized library tote bag or Christmas gift bags. The possibilities are endless, and I can't wait to see what you create!


