This Goodie Bag is a Gift All By Itself
Hi, fellow GO! Getters! It's Gina from Gem Hill Quilts. Don't you just love spring? It always feels fresh and new. It is also a time of gift-giving for my family especially this year with upcoming weddings and other special occasions!
So, I think this is a pretty good opportunity to share with you a quick and easy quilt-inspired gift/goodie bag! It looks like a quilt but with no machine - or hand - quilting involved, this gift bag comes together pretty fast!

This goodie bag uses several dies from the GO! Qube 8” Mix and Match Quilt Block as well as Shape 9, the GO! Chisels die from the GO! Qube 8" Companion Set - Classics.
I have used a blue fabric here that reminds me of the sky. There is also a green print with tiny flowers on it as well as a white for picket fences and an off-white for a little contrast.


Additionally, use the GO! Strip Cutter - 2 1/2" (2" Finished) (55017 or 55014) to cut two 2 1 /2" x 16 1/2" strips from the Green print.
For bag straps, I used a 7/8" light blue satin ribbon.

You can also use 1" cotton or polyester belting or make your own from fabric. You will need two 22" lengths.
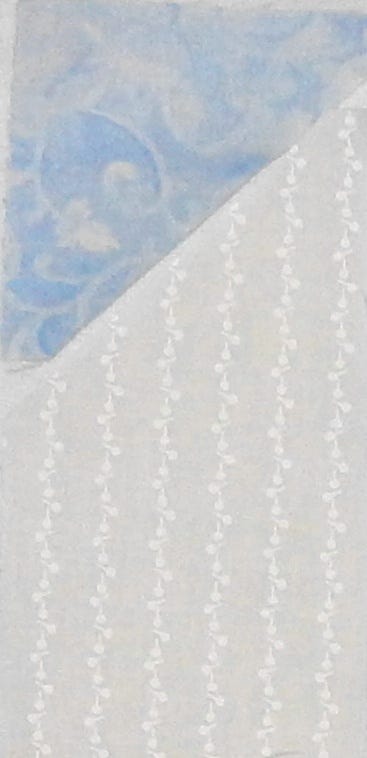
Here's a tip for cutting with Shape 9: GO! Chisels for this project: Make sure the fabric is always right side down.

(NOTE: White fabric in the picture are right side down.)
To make this goodie bag, start by making the outside front and back.
Sew a Shape 5 Blue triangle with a Shape 9 White Chisel to make a rectangle. Make 4 of these.


Layout 2 of these Blue/White rectangles along with 1 Shape 1 Blue square, 2 Shape 8 Blue rectangles, 4 Shape 2 Off-White squares, 6 Shape 2 White squares, 4 Shape 8 White rectangles, 1 Shape 1 Green square, 2 Shape 2 Green squares and 3 Shape 8 Green rectangles as shown. Sew pieces within each row together. Then, sew rows together to make the outside front. Press row seams away from the white fabric. It should measure 12 1/2" x 14 1/2". Repeat to make the outside back.

The next step is to make the sides.
Sew 1 Shape 1 Blue square, 2 Shape 8 White rectangles, 1 Shape 1 Green square and 1 Shape 8 Green rectangle together as shown to complete a bag side that measures 4 1/2" x 12 1/2". Press seams towards the white rectangles. Repeat to make a second goodie bag side.

Next, layout the outside front with one bag side. Sew together. Then, sew a 2 1/2" x 16 1/2" Green strip to the bottom edge. Repeat for the outside back.

At this point, each bag section should measure about 16 1/2" square. Press a heavyweight fusible interfacing onto the back of the bag section. Repeat for the second bag section.

Place the bag sections, right sides together and sew a 1/4" seam on each side. Find the vertical center of each bag SIDE and mark it with a straight line. It should be about 2 1/4" from one raw edge.

Now, fold along these vertical centers so that each bag side is now folded in half vertically. Sew a 1/4" seam along the bottom edge.

To form the bag bottoms, mark a 2" square on the bottom corners on both sides as shown. Do not include the seam allowance.

Flatten one bottom corner into a triangle and match up the marked lines. Pin and sew across the marked line. Do the same to the other bottom corner.


Prepare the lining by folding it in half, right sides together, into a 16 1/4" x 16 1/2" rectangle. Sew a 1/4" seam along the side raw edge and the bottom raw edge. Leave a 4"-6" opening along one edge. In the sample, the opening is on the side seam but it can just as easily be on the bottom seam.

Next, create the lining bottom corners the same way the bag bottom corners were formed.


Press the outside section and the lining along the bottom edges and the bag sides to create that box-like look.
Moving on to attaching the straps! Place and baste the raw edges of the ribbon straps as shown.


Then, place the outside section inside the lining, right sides together. The ribbon straps will be in between the two.

Match the top edges together. Pin and sew a 1/4" seam allowance all the way around.

Turn inside out through the lining opening. Hand or machine-stitch the lining opening closed.

Tuck the lining inside the bag. Finger press and pin the top edge.

With thread to match the blue fabric, sew about 1/8"-1/4" from the top edge to give it a nice finish. And, voila! You are done!

So, if you make this for Easter, appliqué some eggs, bunnies or chicks on the outside! It is easy enough to find a good Easter print that you can fussy-cut. Isn't that fun imagining a hidden Easter egg right at the base of the picket fence? Kids will love it!

Another alternative is to add some flower appliqués such as those made from the GO! Rose of Sharon 2 (55382) as shown here. AccuQuilt has so many great flower dies to choose from!

Just think, you can keep making this goodie bag for different seasons and occasions! Someone having a birthday party? Use a birthday fabric - maybe balloons or confetti fabric. Looking way ahead, how about featuring Halloween or Christmas prints?
Make this quick and easy gift bag today and don't forget to bookmark this blog to make several more!
Come and visit my site to see some of my other projects including several made with the GO! Fabric Cutter.


