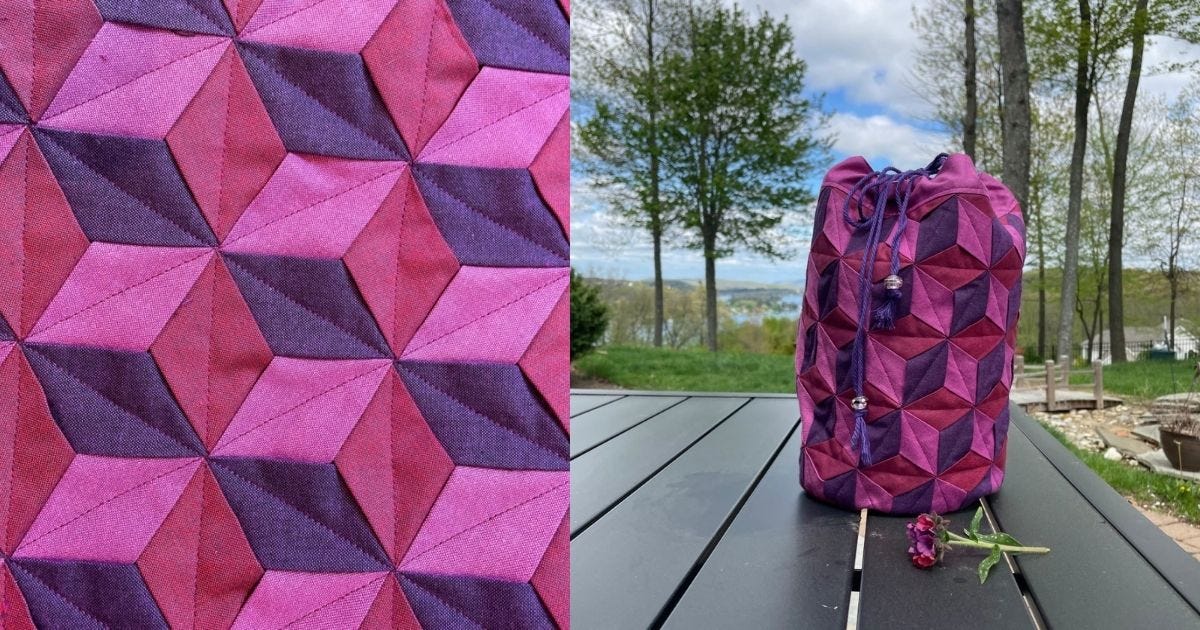
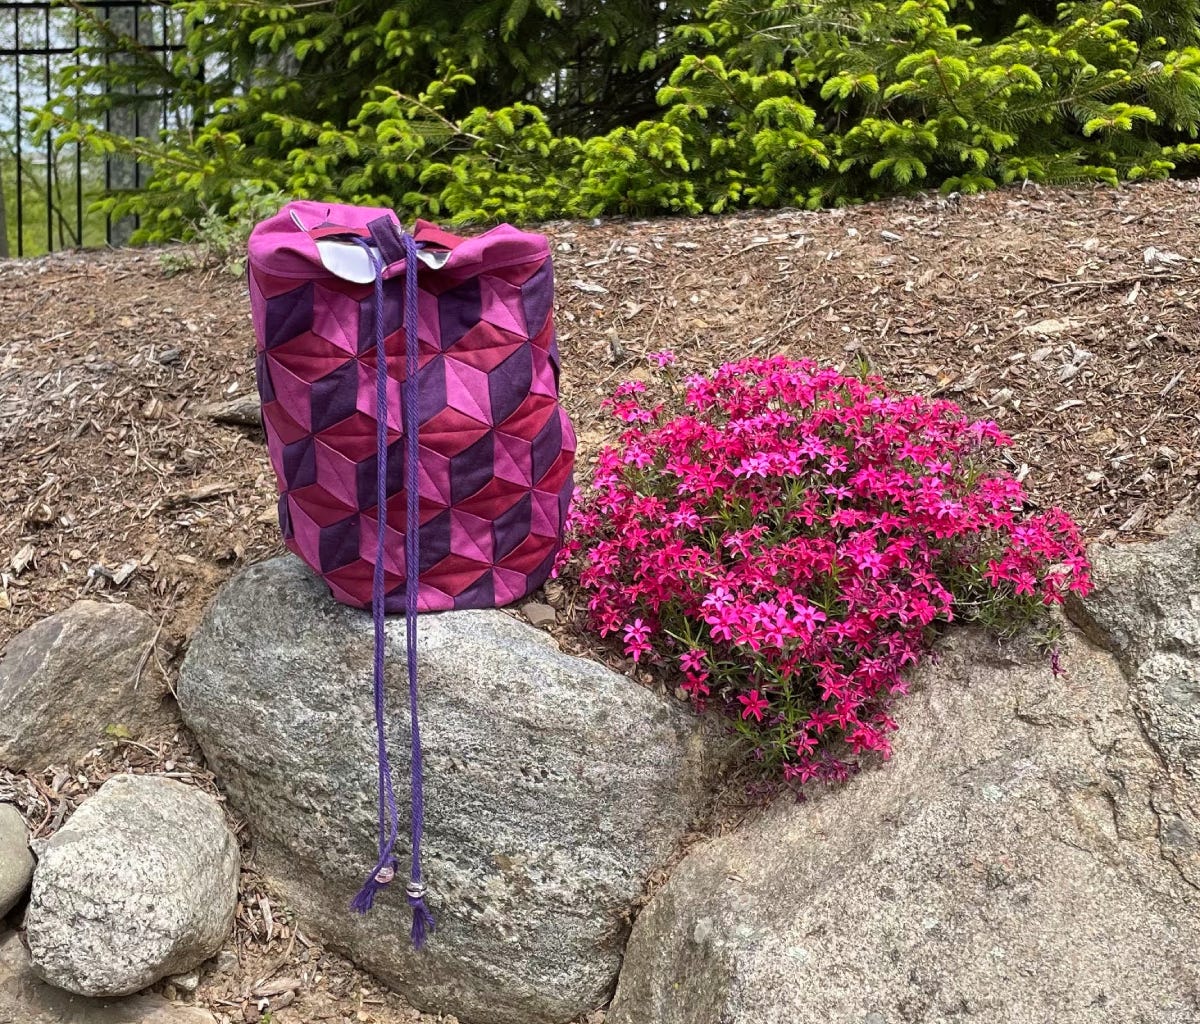
Hi, quilters! It’s Jen from Dizzy Quilter. Today, I want to share my latest project! I made this fun drawstring bucket bag using a woven fabric panel I made from fabric strips.
This pattern is called a triaxial weave, and it gives a fun 3D effect, similar to a Tumbling Blocks quilt pattern. You get all of the graphic impacts with much less work.
It's Sew Easy!
This project takes a little while, but none of the steps are actually that hard. If you don't have any (or a lot of) experience with weaving, Mister Domestic is the master of fabric weaving, and he has a great series of videos to help you learn how to do it yourself.
This project was my first woven panel, and it came out great. It reminds me of the Q*Bert videogame my siblings used to play when we were younger.
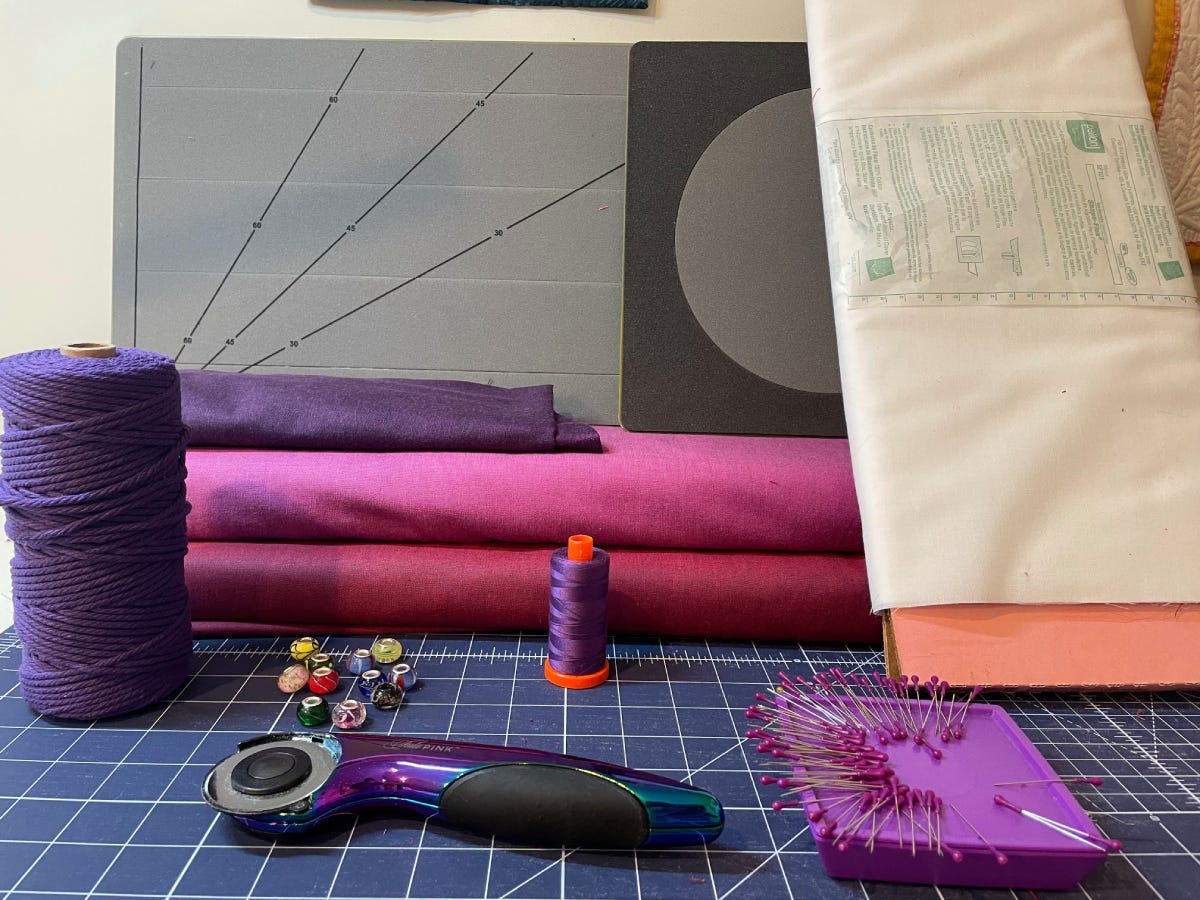
Materials Needed
- GO! Fabric Cutter (I used the GO! Big Electric Fabric Cutter)
- GO! Strip Cutter 2 1/2" (2" Finished) 3 Strips Die
- GO! Circle-8” Die
- 27” x 14” of woven fusible interfacing (I used Pellon Shape Flex 101)
- 3/4 yard each of three colors (I used Peppered Cotton in Aubergine, Garnet, and Fuschia)
- 1/2 yard of lining fabric
- Two 40” lengths of cording
- Beads with large openings
- Foam-core board for building your fabric weaving - at least 26” x 13”
- Masking tape
- Pins
- Sewing machine and other standard sewing supplies
Prepare Your Weaving Board
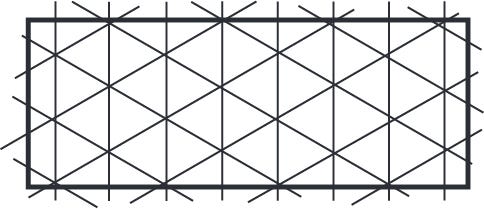
1. Using your quilting ruler, draw a 26” x 13” rectangle on your board.
- Inside the rectangle, you will draw some registration marks for yourself. Beginning in the middle, draw a series of lines 2” apart.
- Using the 30° line on your quilting ruler, mark the other two lines, following the diagram (pictured below). Space them out every 2” as well. Spacing isn’t crucial - you are just giving yourself marks to line up against. Your fabric strips will not line up with every line.
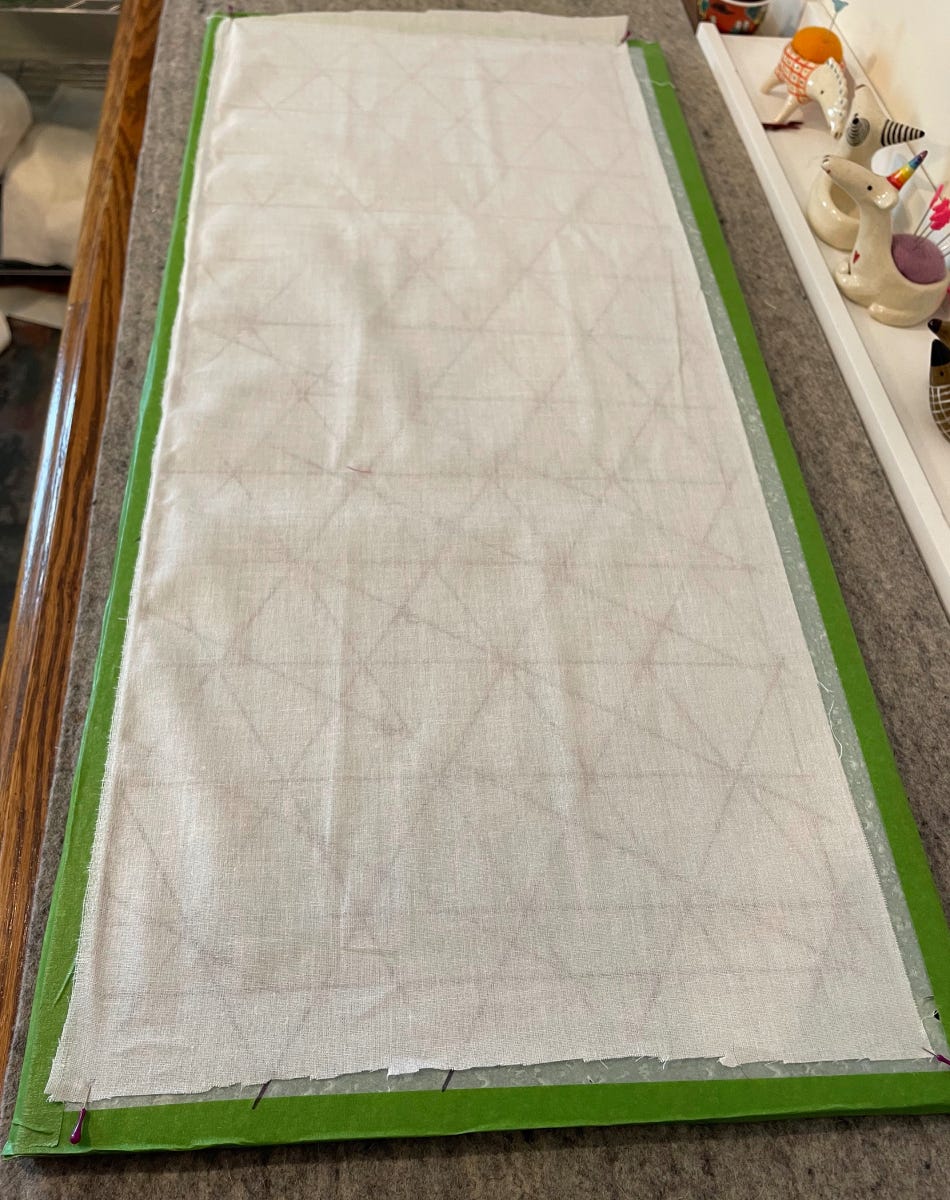
2. Pin your fusible interfacing to your marked foundation, making sure it covers the entire rectangle.
- The fusible (bumpy) side should be facing up - it will hold your layers together.
- Set this aside for now. (Disregard the extra lines you see in the weaving diagram above. I wrote this part of the tutorial after completing these steps!)
Cut Your Fabrics
1. Press your fabric if it is wrinkled from being on the bolt. If you are using a soft fabric, spray starch is helpful to prevent fraying.
- Cut nine 2 ½” x Width of Fabric (WOF) from each of your three colors using your 2 1/2" strip cutter
- Sub-cut two 8 ½” squares from your lining fabric.
- Cut two circles using the GO! Circle-8” Die.
- Cut one 25 ½” x 15 ½” rectangle of lining fabric.
Prepare Your Fabric Strips
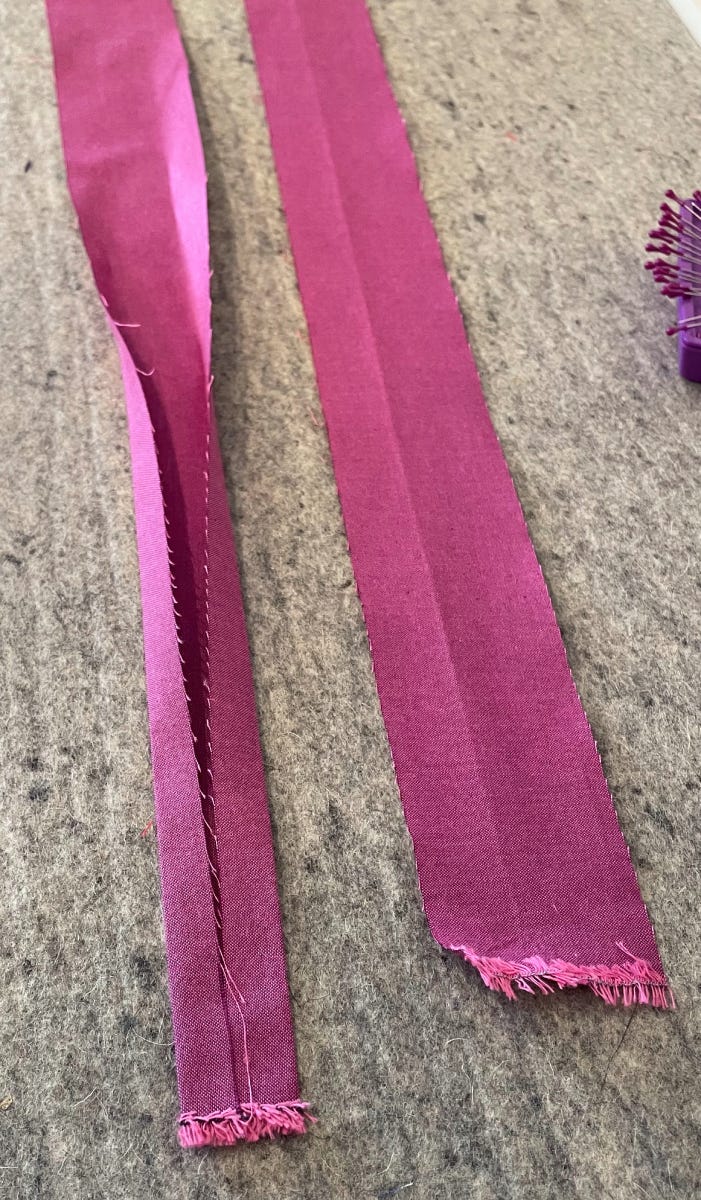
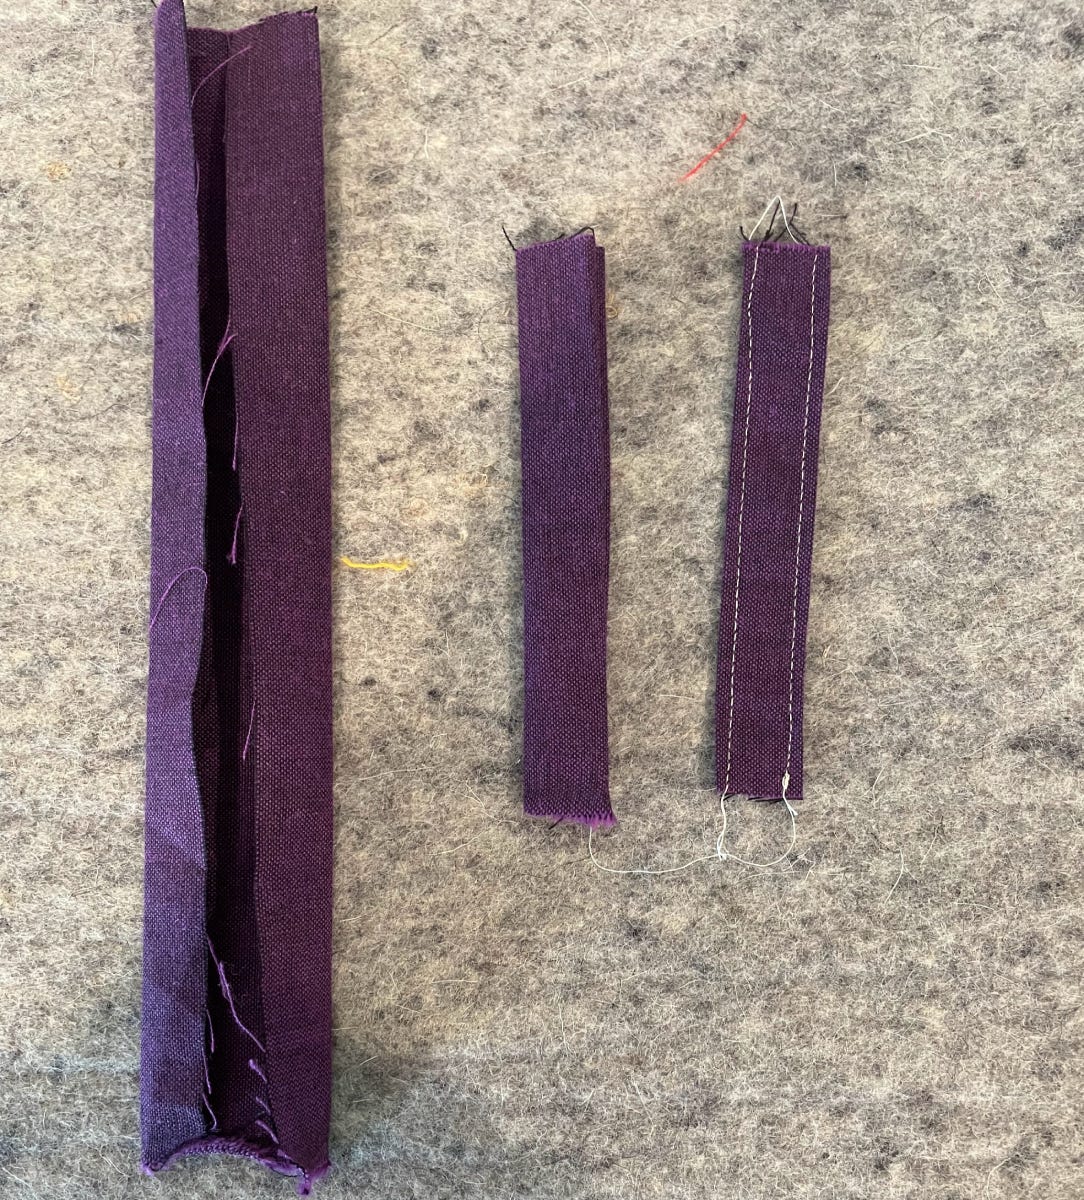
1. Layer a strip right side down on your ironing board.
- Fold the two edges towards the middle, as if you are making a double-fold binding strip.
- Press the folds in place.
2. Repeat these few steps above with all of your strips.
Weaving
I strongly recommend watching this video from Mister Domestic. This is a fun, but detailed, process.
1. Start with your vertical strips. On my piece, I used purple for the first set of strips.
- Beginning in the middle of your panel, pin a strip in place, with one pin on either end.
- Trim the excess fabric off of your strip. Keep using the trimmed piece until it is too short.
- Set the small pieces aside for later (you'll see what they're used for soon!).
- Butt each new strip up against the previous strip, filling the entire rectangle.
PRO TIP: Keeping the fabric slightly taut will give you a more precise woven panel.
2. Starting on the right side of your panel, take a strip of your second color. Identify one of the 30° lines.
- Following the line, weave the strip over one purple strip, under two, over one, under two, etc. until you get to the end of the panel. This is pattern "A."
- The next strip should butt up against the first. For this one, you will go under one, over one, under two, over one, under two, etc. until the end of the row. This is pattern "B."
- With your third strip, start by going under two, over one, under two, over one, etc. until the end of the row. This is pattern "C."
- Repeat the pattern, beginning with the "A" pattern again. Fill in the entire panel.
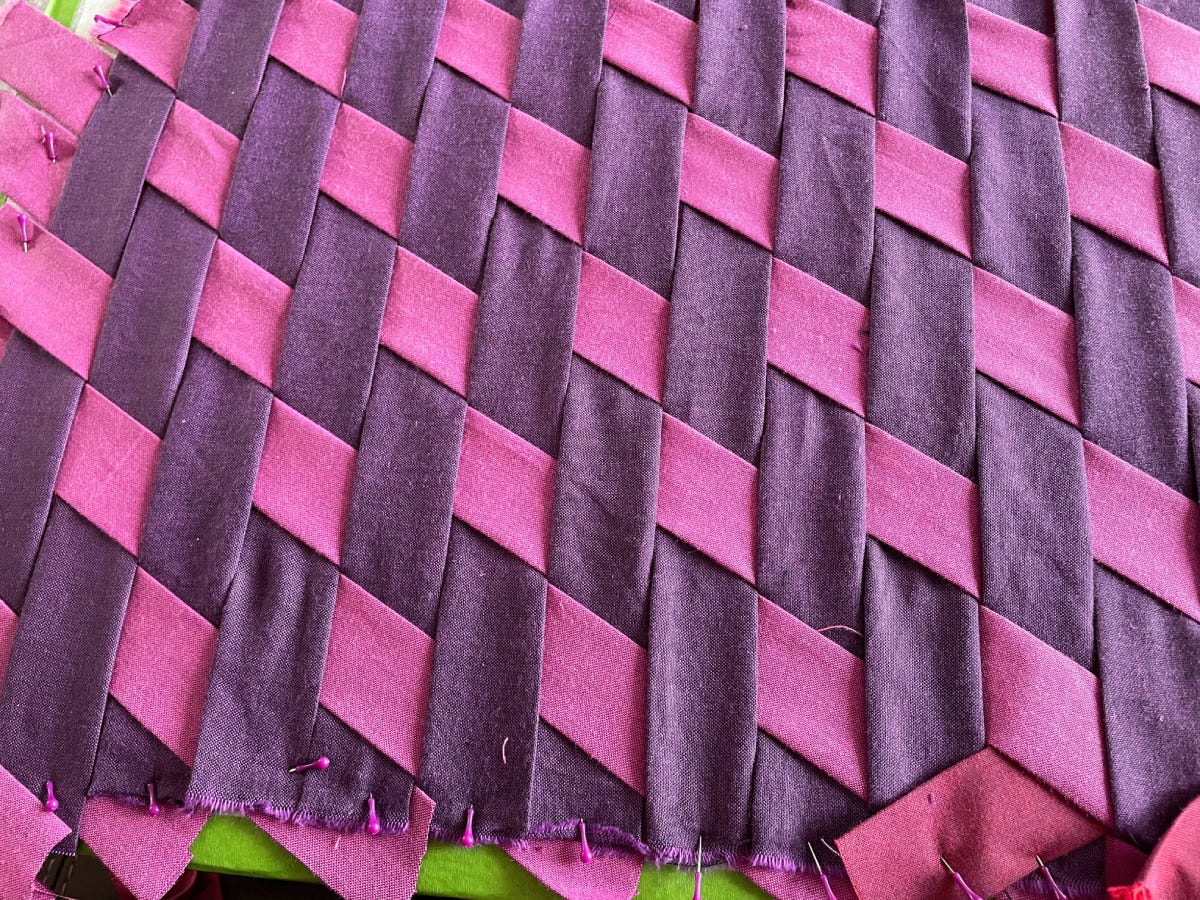
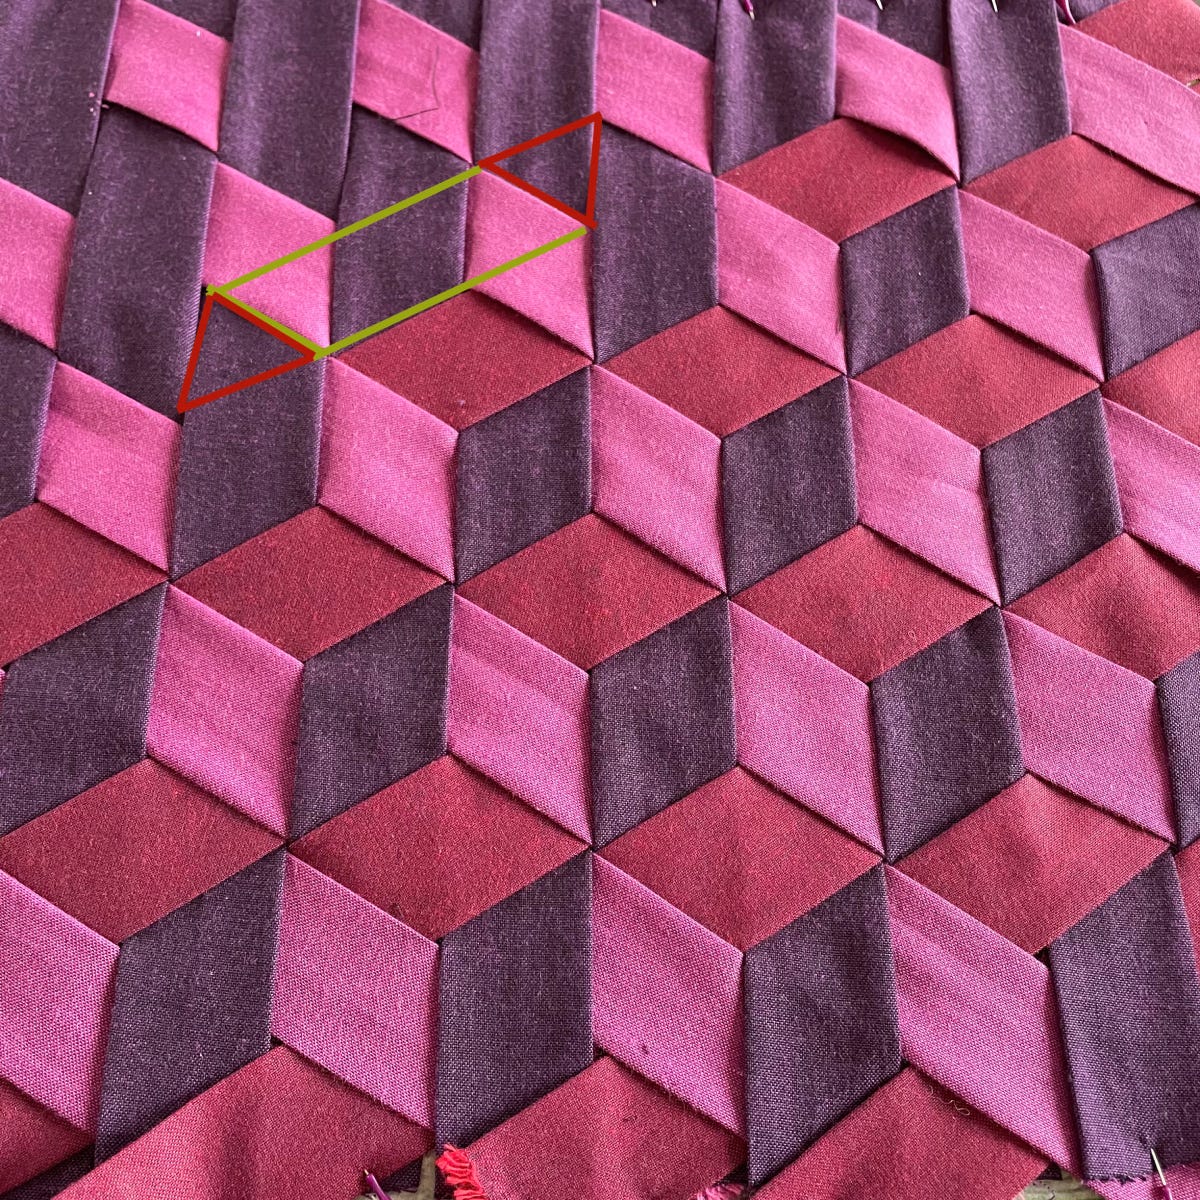
3. Take your third color (used in pattern "C") and weave your strips along the remaining set of lines.
- You need to identify the section I pointed out (pictured below) and weave your strip under this section. It will show at the red triangle and go under the green part. It can be tricky to see how to do this part.
- Weave your strips across the entire panel until you fill it all in.
Adding Fusible Interfacing
1. Press the finished panel to adhere to the fusible interfacing. 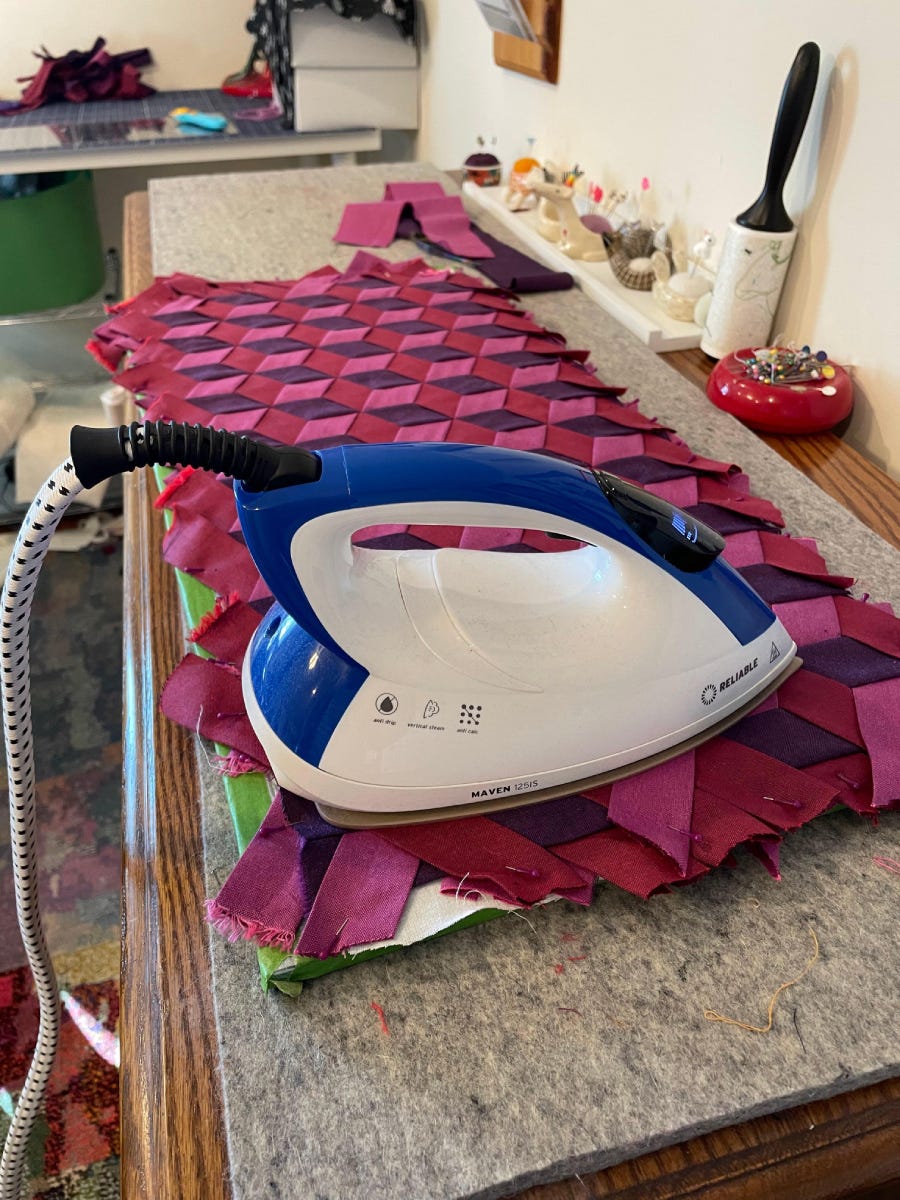
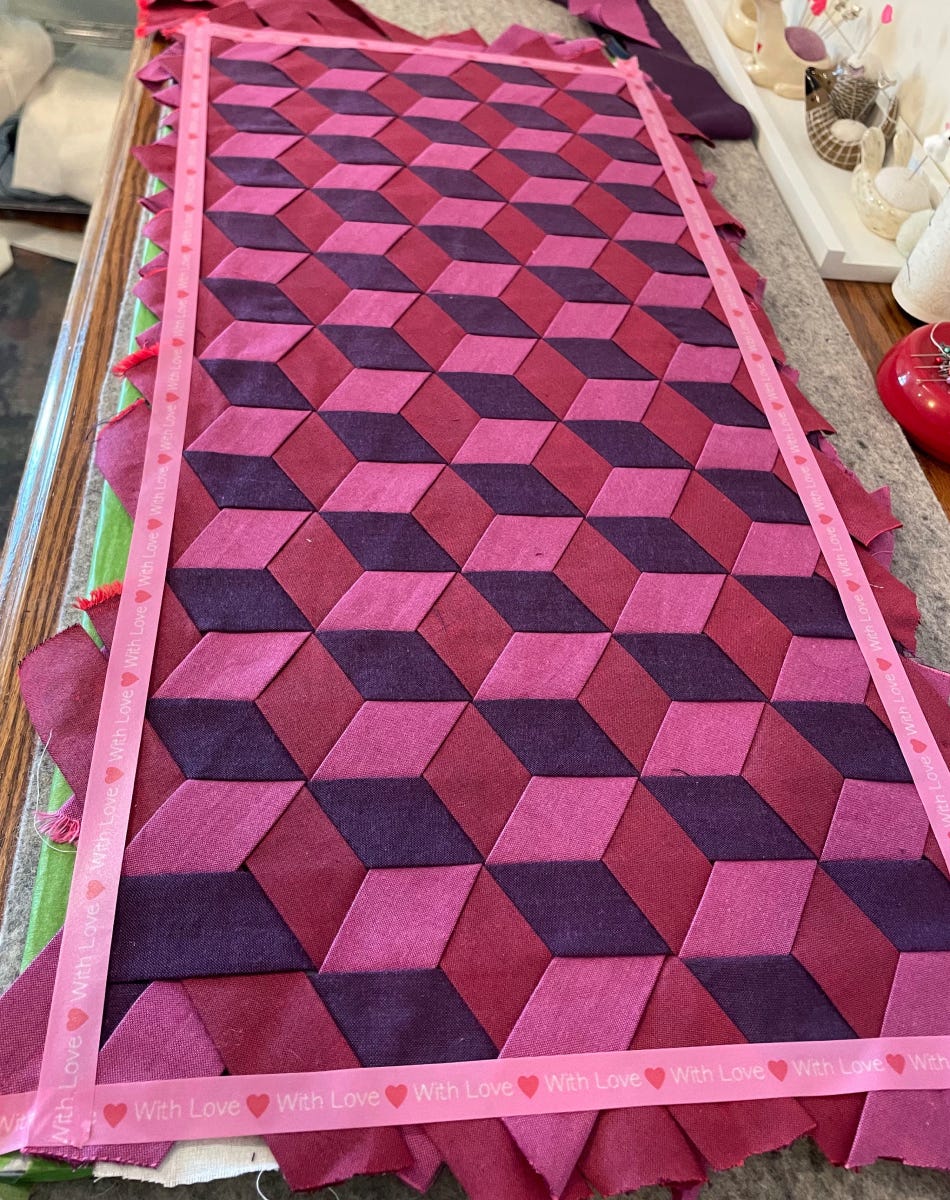
2. Remove the pins, and apply masking tape around the outer edges to secure the loose pieces. I used Washi tape instead since I had a roll that matched my weave's colors.
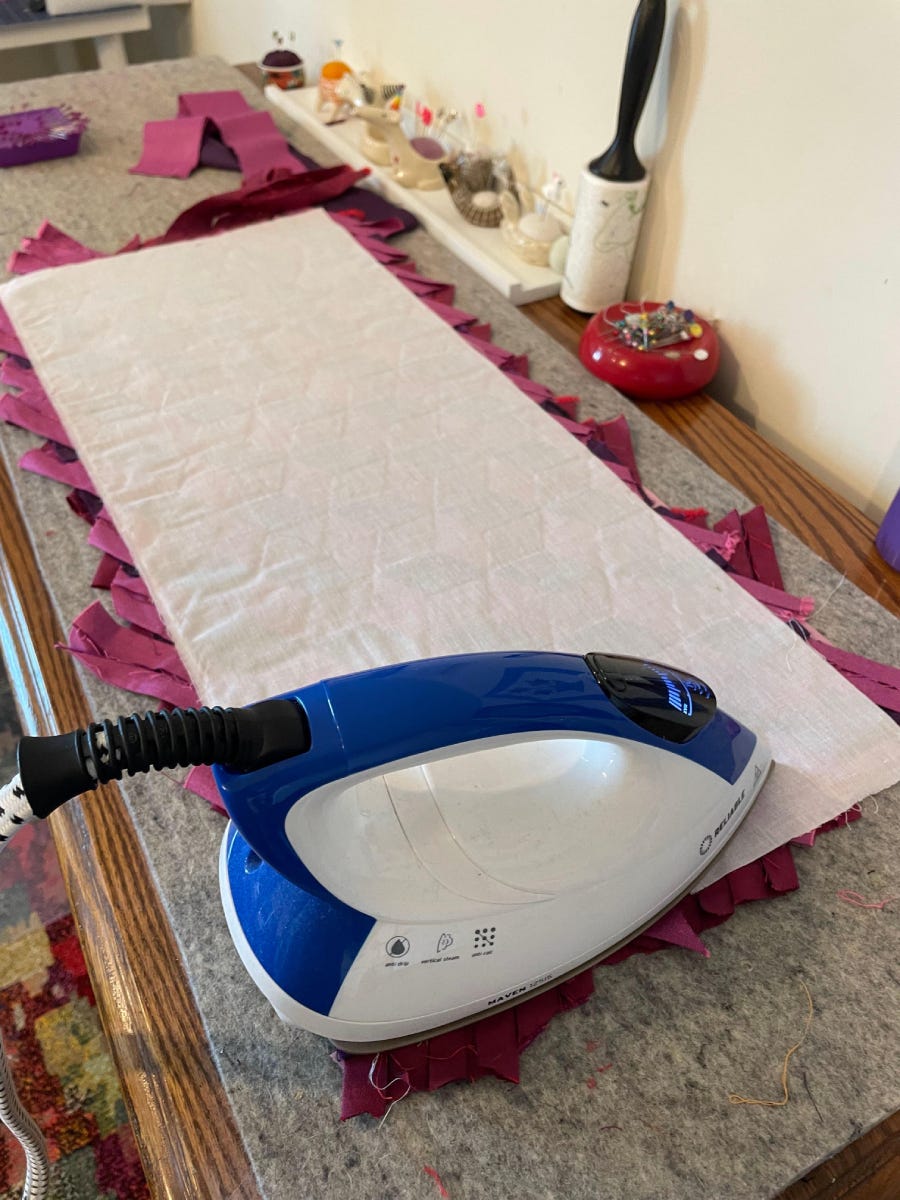
3. Carefully flip your panel right side down onto your ironing surface.
- Press from the back to make sure the interfacing is fully fused.
Sewing/Quilting
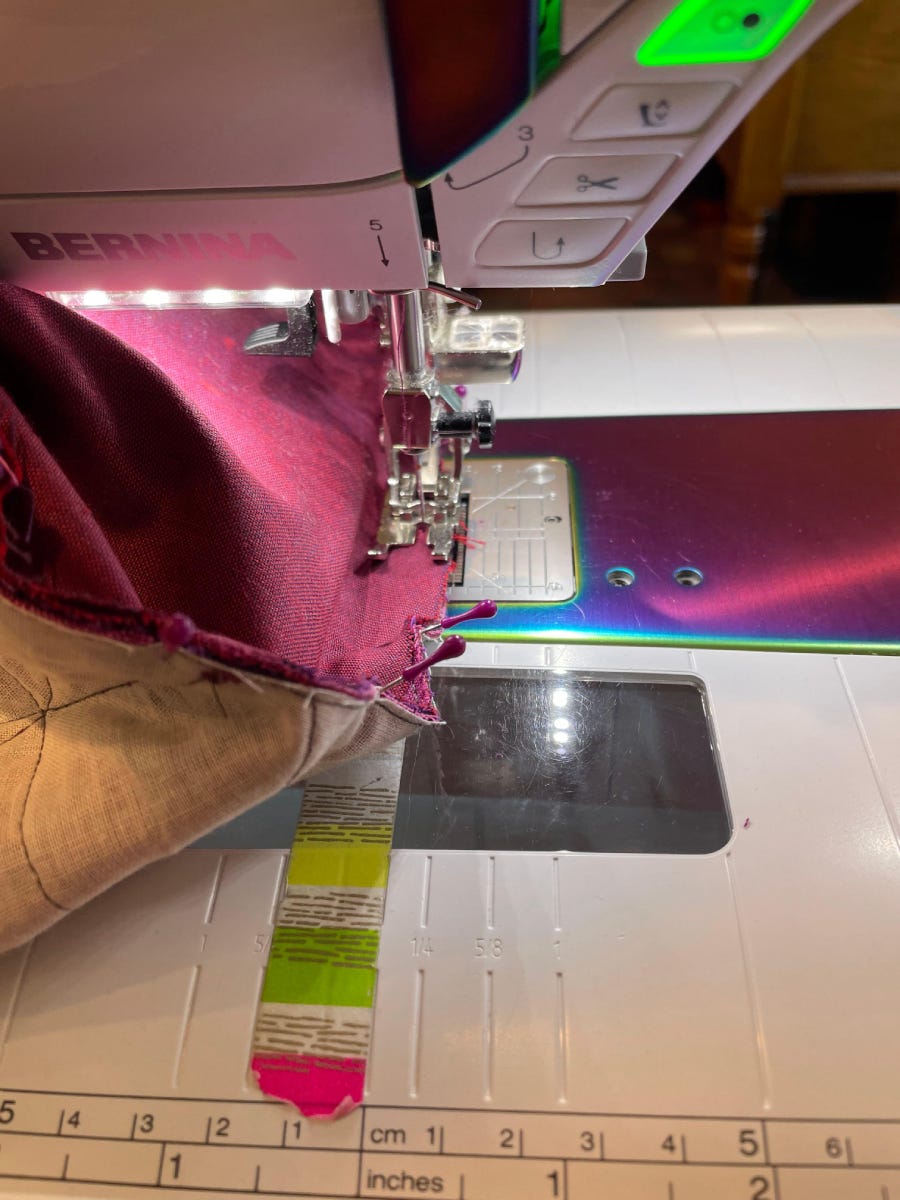
1. Bring the panel to your sewing machine and sew a row of stay-stitching around the outer edge to secure the strips.
2. Remove the masking tape and trim the panel to 25.5” x 13”.
3. Using your walking foot or dual feed foot, quilt as desired. I stitched a row of stitches down the middle of each woven strip, enhancing the diamond effect. 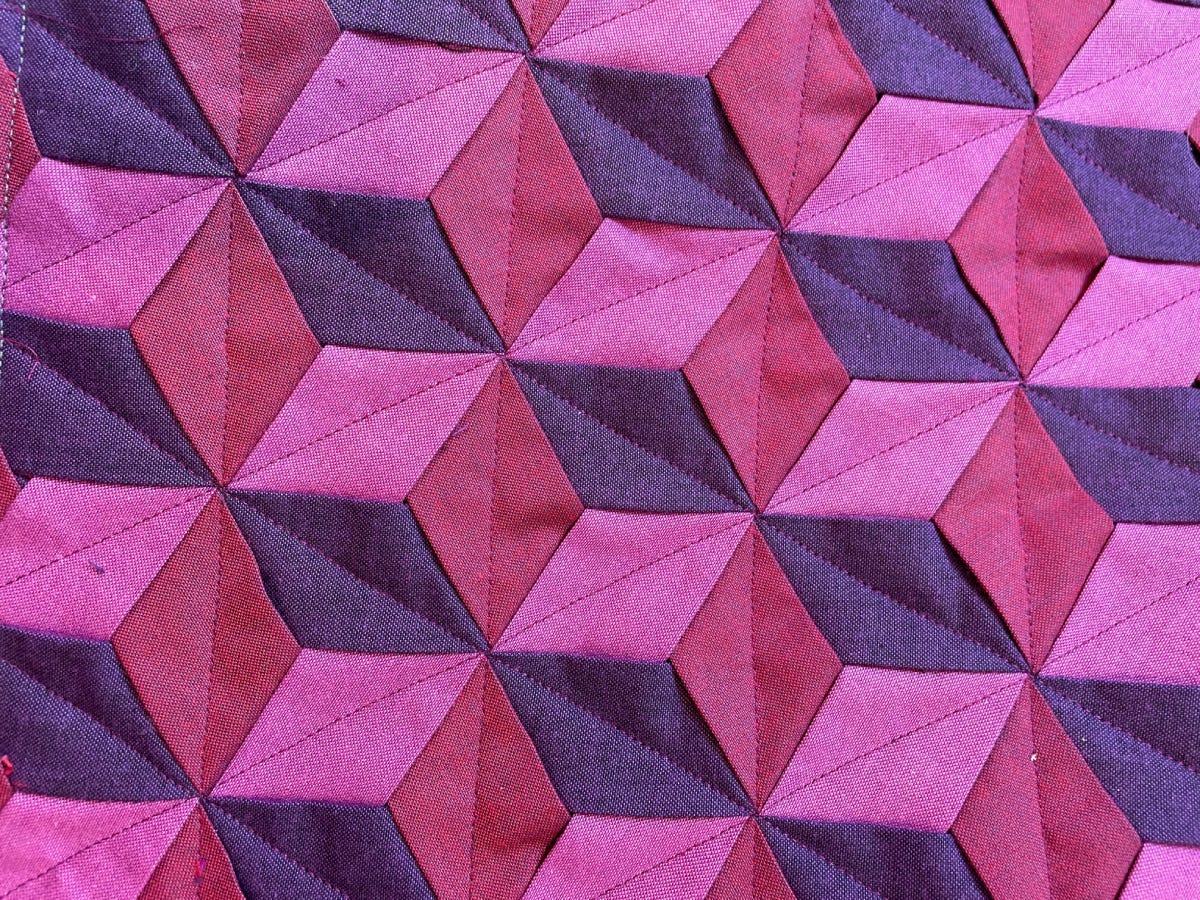
Fabric Tabs
1. Gather eight of your trimmed scraps that measure at least 3” long.
- Fold them in half lengthwise so that the raw edges are inside of the strip.
- Topstitch along both long edges of each piece.
- Cut into 3” lengths.
- Fold them in half and set them aside.
Bag Assembly
1. Attach one of your remaining strips to a long edge of your panel. This will be the top of your bag.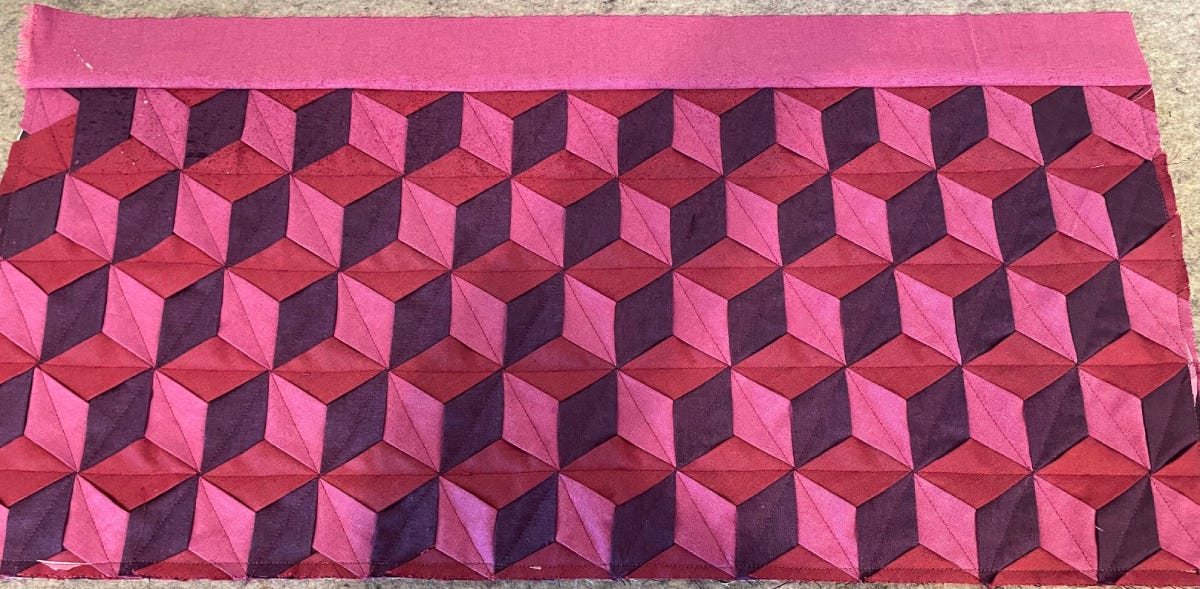
2. Press the seam towards the strip. Topstitch 1/8" away from the seamline to secure the strip in place.
3. Fold the bag panel in half, right sides together.
- Stitch into a tube, using a 1/4” seam allowance.
- Press the seam open.
4. Fold the lining panel in half.
- Stitch 3” up the side, backstitch, skip 4”, and stitch the remaining portion of the seam. This opening will be where you turn the bag right side out.
- Press the seam open.
5. Take the two circles and fold them in half, and then into quarters, pressing to mark the 1/4 circle points. These will be your bag base.
6. Fold your lining in half and again into quarters to get the marks to match up with one of the circle bases.
- Pin thoroughly.
- Start by matching up the 1/4 circle marks, then ease in between the marks. For this step, the tube will be right side in, and you will match up the right side of the circle to the right side of the tube.
7. Repeat steps 5 - 6 with the woven panel and the bottom of the bag.
8. Keep the bag inside out for now.
- Pin the eight fabric tabs that were prepared and pin them to the inside of the bag, raw edges lining up with the edge of the bag.
9. Turn the lining piece right side out and slip it into the bag. The right sides should be together.
10. Pin the lining and bag together along the outer edge. Be sure the fabric tabs stay inside the bag.
11. Stitch around the top of the bag with a 1/4” seam.
12. Turn the bag right side out using the opening that was left in the lining.
13. Stitch the open seam shut.
14. Push the lining into the bag.
- Press along the outer edge, pulling the tabs up fully.
15. Stitch a line of stitches 1/8” away from the top edge to secure the tabs in position.
16. Thread the two lengths of cording through the loops, attaching a bead to the ends before knotting.
17. Enjoy your bag!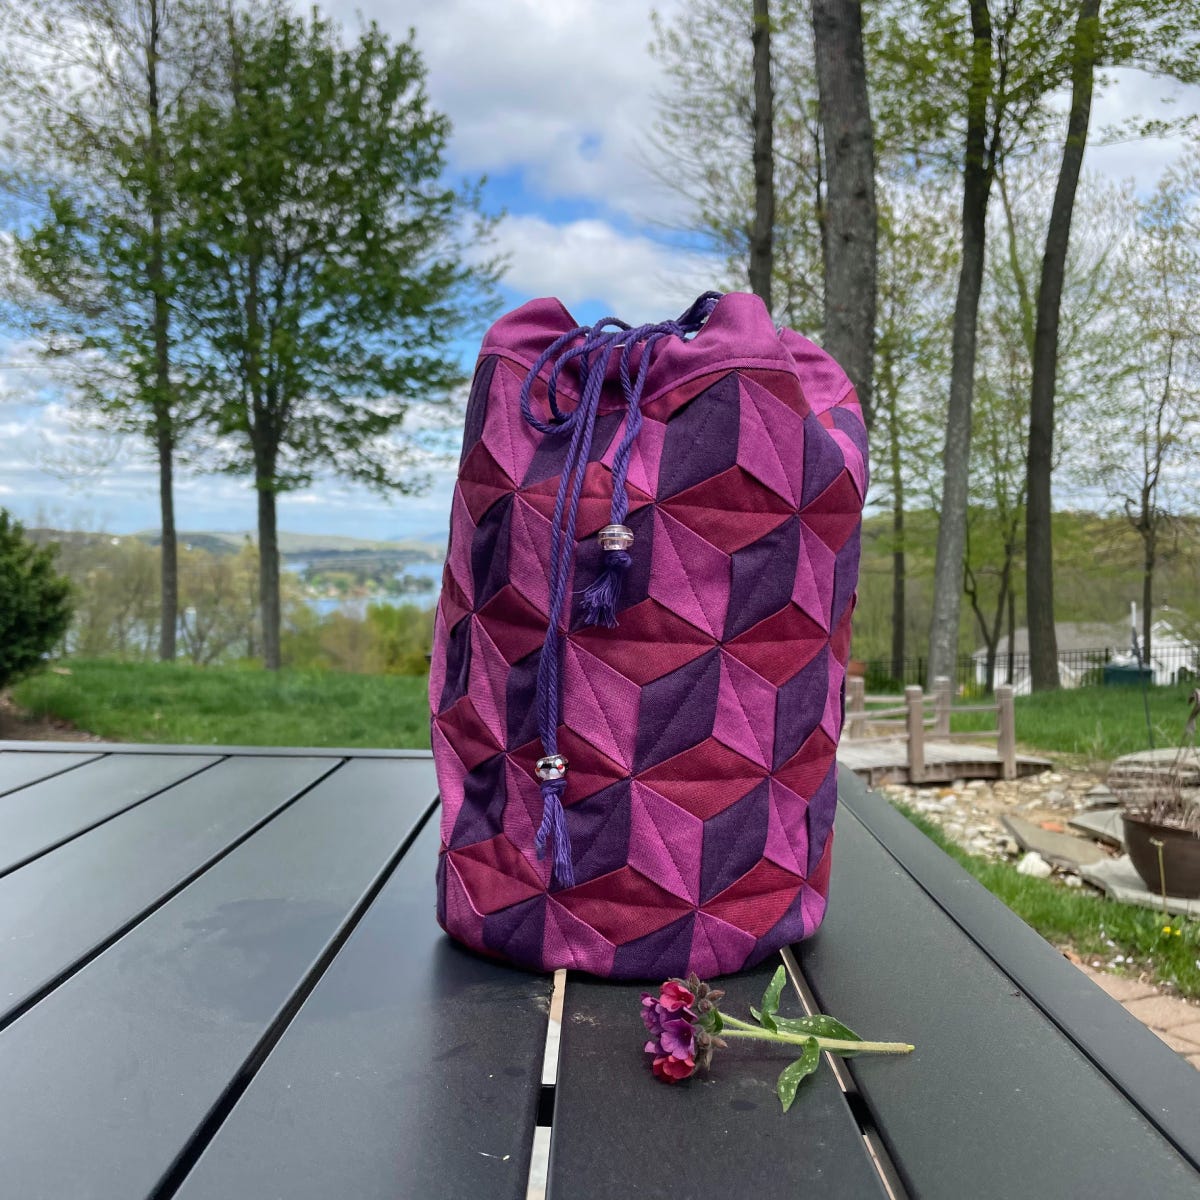
GO! Get Started On A Weaved Drawstring Bucket Bag
I hope this project turns out to be as enjoyable for you as it was for me! If you'd like more assistance and tips, the construction technique is very similar to the GO! Rice Bag Pattern.