
Hi! I’m Jen Strauser from DizzyQuilter.com and did you know that September 21st is a big day for Jelly Rolls? It is National Sew a Jelly Roll Day and today I'm sharing with you the Diamond Braid Table Runner project perfect for celebrating the occasion with your AccuQuilt!
What is a Jelly Roll?
Let's start with the basics. Manufactured by Moda Fabrics, a Jelly Roll is a precut usually composed of 40 strips of 2½" by 42" WOF with a total of 2 3/4 yards of fabric. Junior Jelly Rolls are 20 strips of 2½" by 42" WOF. You can find an array of Moda Fabrics in AccuQuilt's GO! Quilt if you want to look before you buy!
What National Sew a Jelly Roll Day?
Project Jelly Roll was established to celebrate quilters of all ages with an annual special event. It encourages fabric collectors to spend the third Saturday of September to crack into a pre-cut bundle and make something special.
Are your hoarded precuts too special to pop open? Have you been neglecting your LQS (Local Quilt Shop) or have been too busy to run out and pick up a brand new pre-cut bundle? Maybe you have been subjected to “stash shaming” by friends or family who just don’t understand that you NEED 5,327 yards of fabric to make one quilt. Yeah, you only need to use a few yards, but those others are there to make sure you have the perfect fabric whenever inspiration strikes.
Whatever it is that's kept you from cutting up the fabric you fell for, this day is for you. We quilters understand your fabric buying/hoarding decisions and today is all about taking a step toward making something beautiful out of your collection. If you're not sure what to make with your fabric, I have the answer! Let's get started.

Today I’m going to do a little stash reduction and still participate in Project Jelly Roll by making my own 2½” strip collection. I’ve got my AccuQuilt GO! and my GO! Strip Cutter- 2½" (2" Finished) (55017) set up and ready to go. I’m going to pull out my Island Batik fabric stash and pick a group of fabrics to make a fun, quick table runner that looks way more difficult than it is. It took me about five hours to make this, and that included drawing, quilt math, and making mistakes as I figured out what my chicken scratch meant. You can skip right to the making.
If you want a “real” Jelly Roll pre-cut experience, you need to start with yardage. (The largest piece you will need here is ½ yard of black.) When cutting yardage, make sure you cut across the width of fabric, as straight on the grain line as possible. This means you look at your folded yardage, and make sure it is straight. You don’t want to cut a lot of Vs to work with.
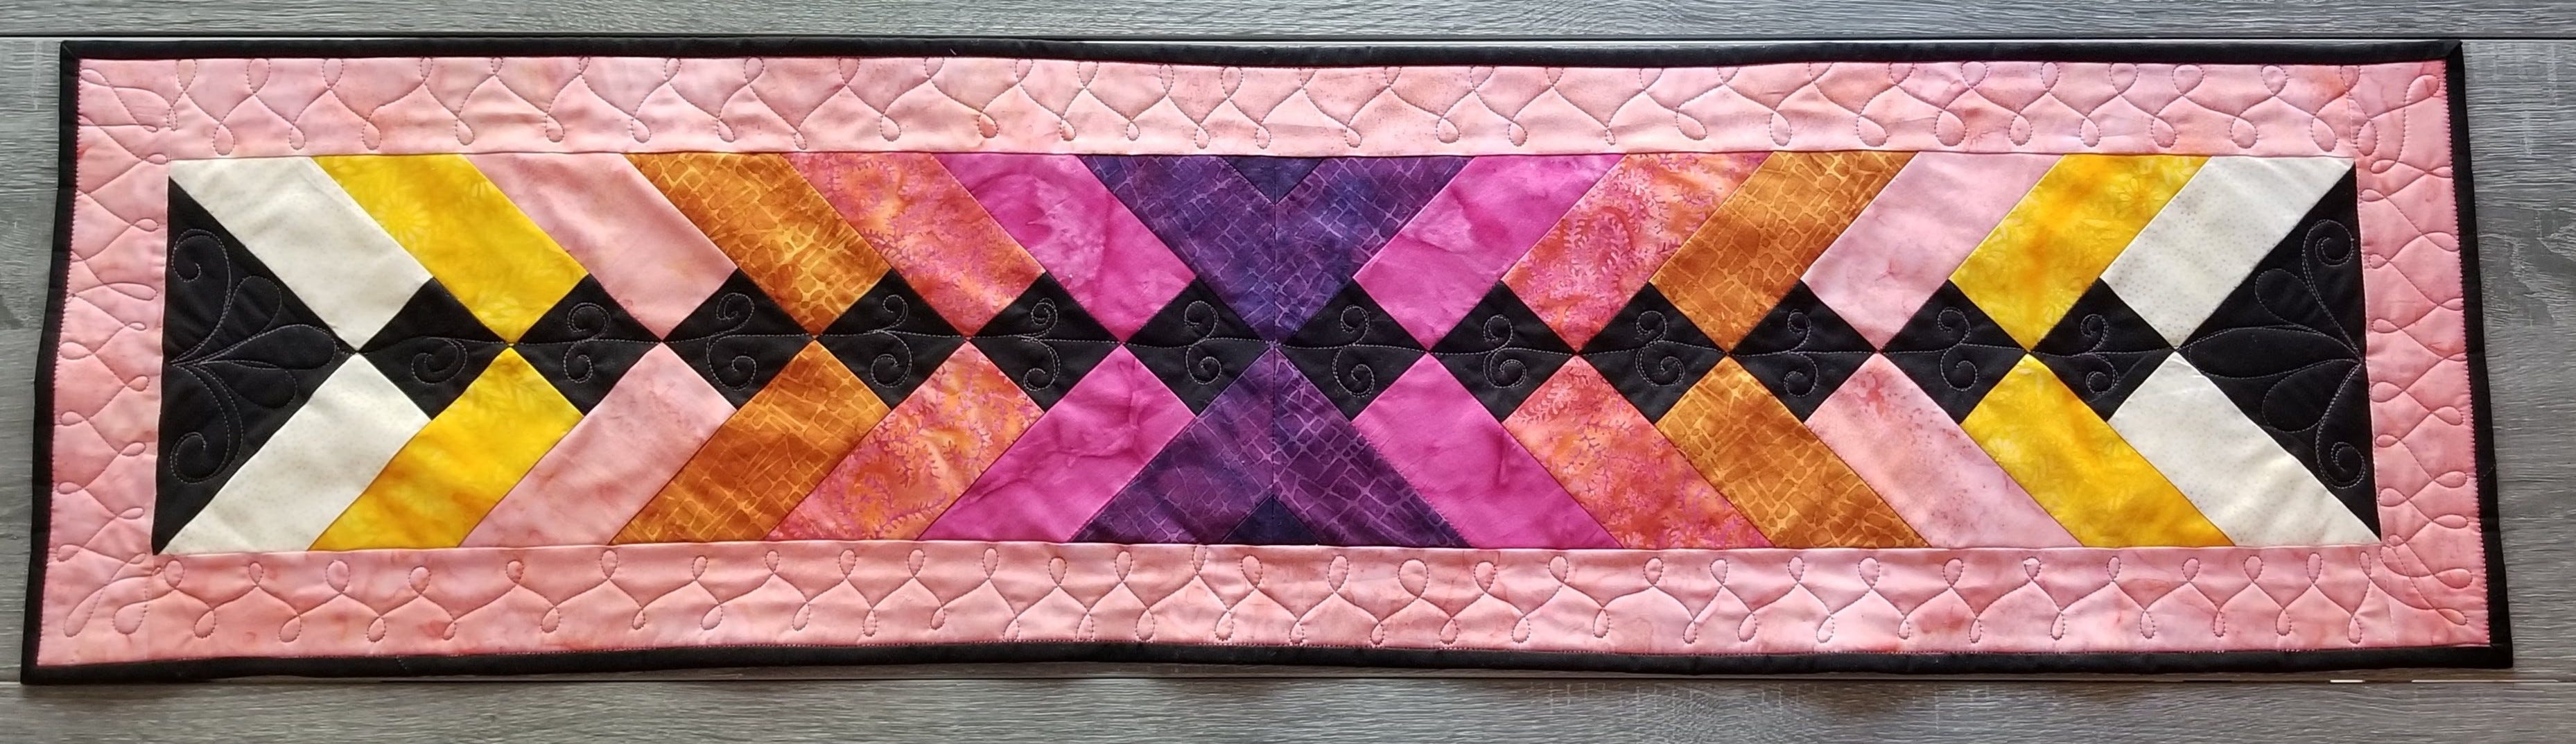
It finishes at 12” x 46”.
Fabric requirements
- 8 - 2½” WOF (Width Of Fabric) strips in a gradation of colors
- ½ yard black
- 3 - 2½” x WOF strips for border
- 1½ yards for backing
AccuQuilt tools
- GO! Strip Cutter- 2½" (2" Finished) (55017)
- GO! Square-2½” (2" Finished) (55059)
Also needed
- Rotary cutter
- Ruler
- GO! Cutting mats
All seams should be sewn with a ¼” seam allowance.
Prepare your fabric
All fabric should be pressed before cutting. This makes for more accurate cutting and piecing.

Cutting instructions
Black fabric
Cut 4 - 6” squares.
Cut one of the squares in half on the diagonal.
Cut the remaining three squares into twelve 2½” squares using your 2½” square die.
Cut a strip that is 8” x WOF. Using your strip cutter die, cut three strips to use as binding.
Colors
From each of your eight fabrics, precut a 3” strip. Stack these on your strip die. I like to do three on each of the outside sections of the die.

Subcut each strip into four 2½” x 7” pieces.
*You do not need more than ½ of a strip of the darkest purple fabric (#8).
Border
Cut a strip that is 8” x WOF. Using your GO! Strip Cutter-2½” (2" Finished) die, cut three strips to use as your border.
This is when I fold up my cutter and put away the dies, to make more room for pressing. With cutting quickly finished, it's time for the fun part!
Piecing
Stack up your fabrics next to your sewing station. I’ve got mine arranged in stitching order. Confusion is real - help yourself out.

I’ve added numbers to this image, so I can refer to fabric numbers 1 to 8 for clarity.

The first step is to join a black square to the end of #2 of each color rectangle and for colors 1 to 6. Press towards the black fabric.

Take a black triangle, and hold it with the square side of the triangle up and to the right. Attach a #1 rectangle to the right side. Press to the black.

Join one triangle unit to one rectangle unit, pinning the intersections.

To help with accuracy, I like to use these fork pins on my intersections.

Check out these corners!

Keep adding pieces to your triangle units, building towards the center of the quilt.

Add a plain rectangle to the right, press, add a rectangle + square unit to the left, press.
When you have attached all of the colors, including #6, things change.
For #7, you add the first one as you did the earlier pieces. The second piece is missing the black square, since we don't need it. Just line it up with the edge of the black square on the quilt and stitch it. Press to the purple.
We are going to draw a registration line on the piece to add the next color. We want to end up with two large rectangular sections to join.

Using the 45 degree angle marks on your ruler, line it up with the seam line in the last rectangle. Scootch it along until you have a ¼” seam allowance from the point of the black square and the edge of the ruler. Draw a line along the edge of the ruler. I used a chalk pen for this mark. (It won’t show, but you definitely don’t want to use something that might run later.)
Attach your #8 rectangles to both sides, making sure they will extend past the marked line. Press to the purple. It should look like a hot mess.

Line up your ruler on the point of your black square. Line up the 45 degree line on your ruler with the seam on the square, give yourself a ¼” seam allowance, and trim.

Join the two pieces. To get the points to line up, I like to drop a pin through each point, and pin them together securely.

I also pin the intersections of the purple strips. Stitch, being sure that your needle goes through the exact points you have pinned. I like to slow down as I approach the pins, then use the hand wheel to slowly lower the needle for a stitch or two, so I don’t hit the pins.
Press this seam open.

We are going to trim up our edges now.

I folded my piece in half right along the center seam. Make sure you have it all lined up accurately. Line up the end of your ruler with the seam line. The points of your black squares should line up along the four inch line on your ruler. Cut the ragged edge off. Repeat for the other side. My photos don't accurately reflect this step. Remember, when I said I made mistakes?
It is all smooth sailing from here.
Measure the center unit of your quilt (mine measured 42½”), and cut your borders to match. Fold the border in half, then half again, and press light creases into your border. Do the same with your quilt top. Pin your border to your top, easing any fullness as needed. Stitch, then press towards the border.
*The entire exterior of the center piece is on the bias. Treat it gently to avoid stretching the bias edge.
Repeat for the remaining three sides.
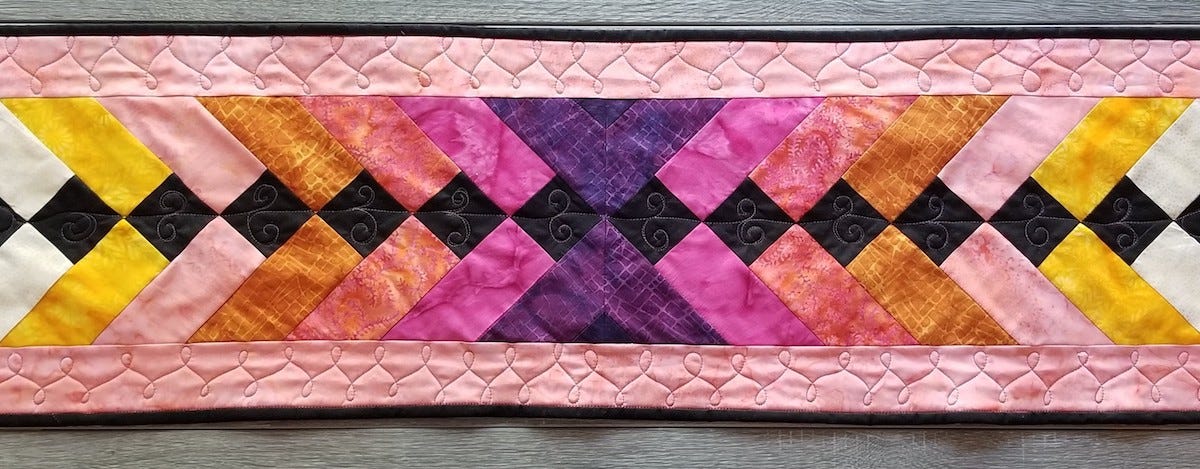
Isn’t it pretty? Layer your quilt back, batting, and top, and quilt as desired. I did some free motion quilting across the center in the black fabric, left the braids alone, and quilted a freehand wishbone in the borders.
If free motion quilting isn’t your thing, there are plenty of ways to highlight your piecing with straight lines.
Bind your quilt, add a label, and admire!
I hope you enjoyed celebrating the occasion with me! If you're making something, be sure to share it with us on Instagram. Tag me @JenStrauser and @AccuQuilt with your creations. We love to see how other quilters use their AccuQuilt GO! Don't forget to subscribe to the blog so you'll know when any of the GO! Getters create another tutorial!


