
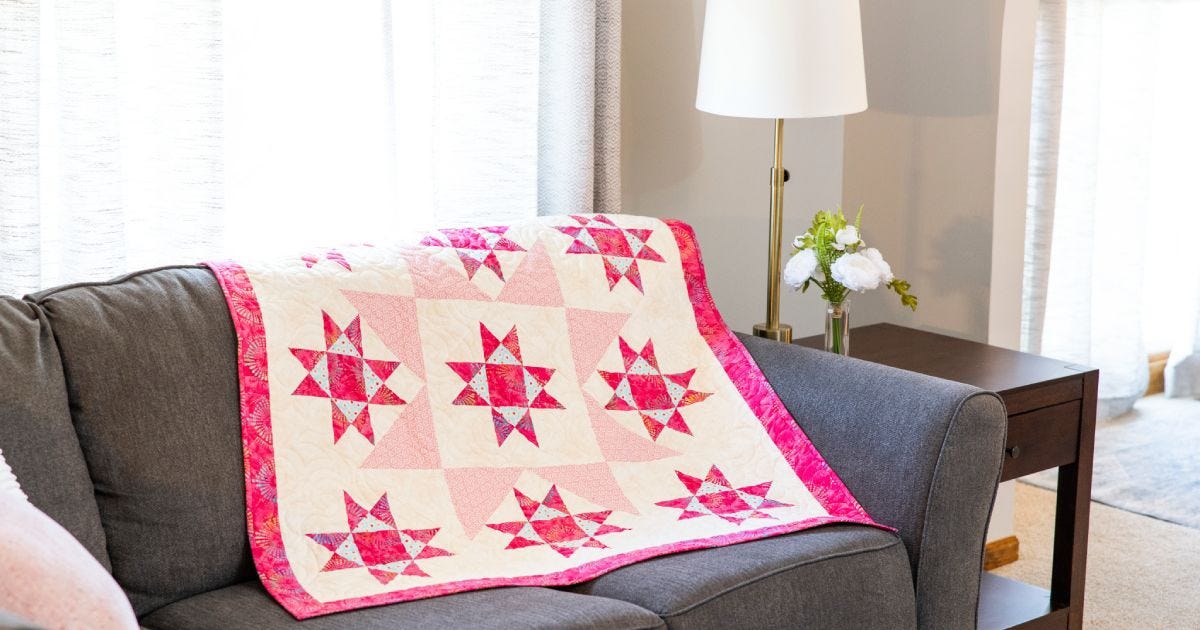
Welcome, quilters! We’re so happy to have you joining us on this quilting journey while we all make our GO! Stars in the Crown Throw Quilts together. Whether you’re new to quilting, an experienced pro or somewhere between, this is a project that we think everyone can love making!

This year, AccuQuilt is partnering with the American Quilter's Society (AQS) in a series of five different quilt-along projects. We kicked off this first project with blog posts and a livestream event on February 1. Pam Heller, AccuQuilt's Cutting Expert, and I are hosting these events. If you missed that show, here’s a recording of it:
All our live shows will be recorded and available to watch any time on our website, Facebook page and YouTube channel. Live shows will be moderated, so we can answer any questions you have while we sew together. We’re also using the Facebook group, AQS Quilting Project Parade, to post pictures of our projects and build our community. If you haven’t already, be sure to join that group, so you can join in the fun and inspiration we’ll all be sharing along the way.
For this project, Pam and I will be using the free, downloadable pattern for the GO! Stars in the Crown quilt using the GO! Qube Mix & Match 8” Block. One of the many wonderful features of the GO! Qube system is its flexibility with seven different sizes to choose from. If you’re not familiar with GO! Fabric Cutters or GO! Qubes, check out this video:
No Fabric Cutter? No Worries!
The kickoff blog posts on both our blog and the AQS blog included traditional, rotary cutting directions for making the same size finished project that Pam and I are creating with the 8” GO! Qube.
So, gather up your supplies and let’s get ready! Here’s my first tip for you: make test units, especially if this is your first time using your GO! Qube. A test block lets you build confidence that you are cutting and sewing your units correctly, and check things, like seam allowance and pressing. It’s always a good idea! Pam and I each made one full star block first before we started work on anything else for this quilt-along!
Fabric Selections
Here’s another look at the fabrics that we picked out!

Pam’s choices started with Painted Ladies by Tula Pink for Free Spirit Fabric. She’s added Tula’s Tiny Dots in Peacock and Flaire with white on white dots for the background.

My choices started with the yellow and white plaid and medium blue dots from Flower Garden by Echo Park Paper for Riley Blake. Then, I added shades of Grunge by Basic Grey for Moda Fabric - Lemongrass and Clear Water.
Let’s Get Started
Today, we’re going to be making the two units we need for the star blocks, and they’re some of the most frequently used units in quilting: Flying Geese and Square on Point or Square in a Square units. Let’s get cutting!
Flying Geese

Did you know that there are Flying Geese to be found in each and every GO! Mix & Match Qube? Shape 4, the Quarter Square Triangle (QST), forms the center or “body” while Shape 5, the small Half Square Triangle (HST), is used for the wings.
Our first step will be subcutting our fabric for die cutting. You’ll find all this information in the pattern instructions. You’ll be using your background fabric for Shape 4, which, for me, is light blue. The star points will be made with Shape 5. In the pattern instructions, that’s the dark pink, but in my fabric, that’s the yellow and white plaid. Basically, you’ll be cutting Width of Fabric (WOF) strips that are a 1/4” larger than the shape you are cutting on either side, but again, this information is in the pattern instructions. For Shape 4, your strip will measure 5 1/2”.
Cover the shape with your fabric. These are non-directional shapes, so you can fanfold your fabric so that you have up to six layers of cotton on the die. Make sure all the blades are covered by your fabric, top with a mat and cut. You’ll need a total of 36 of these shapes.
Next up, you’ll follow the same basic cutting methods with Shape 5, and cut a total of 72 of these.
Now, we sew! Here’s where chain-piecing comes in. You’ll be sewing one Shape 5 HST onto the two short sides of Shape 4 QSTs.

I like to sew all of the right side pieces on, then press all those seams open before moving onto sewing the left side pieces on.

Once the left side pieces are sewn on, press that seam open also. You should have a total of 36 Flying Geese units that should measure 2 1/2” x 4 1/2” if you are using the GO! Qube Mix & Match 8” Block or the rotary cutting directions.
A Note About Fabric
As you have seen, I am using a plaid fabric. I know that working with strips, checks or plaids can be a little intimidating, but it doesn’t have to be! Here’s my tip: when you prep/subcut your fabric strips for die cutting, be sure your strip is squared up with the lines on the fabric. This may very well mean that you cannot fold your fabric in half or quarters and simply cut with a ruler, so you’ll need to cut just one layer at a time to make sure you are straight with the pattern. After that, it’s easy to get perfect cuts either with your dies or traditional rotary cutting. If you start to notice you are off the lines, stop and cut your edges. I promise it will be worth it in the end!

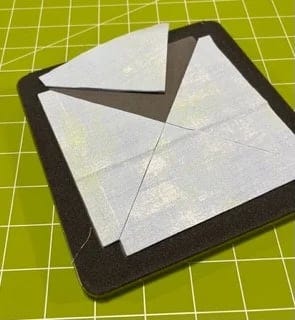
This unit is often called a Square in a Square by quilters. To create this unit, we’ll need Shape 6, the Square on Point. The size of this square has been engineered to work perfectly with Shape 5, so quilters don’t have to do extra math – yeah! Shape 6 will be the center of your star block, so medium pink in the pattern instructions and the yellow plaid in my version. Shape 5 will be green in the pattern instructions and the medium blue dots in my fabric.

Here’s a chance to relax and sew. You’ll sew the HSTs onto the opposite sides of the square, then stop and press the seams open before moving on to sew the triangles onto the other two sides.

Once that’s done, press those seams open. You’ll need a total of nine of these units. If you are making the 8” version, with the GO! Qube or by rotary cutting, the squares will now measure to 4 1/2”.
That’s it! Now, sit back and pat yourself on the back because you’ve completed the first part of this quilt-along! Next week, we’ll cut the final shape for these blocks and put them together.
Be sure to post pictures of your completed units on the AQS Quilting Project Parade Facebook group page, so we can all enjoy the process together! I'm loving all the different fabric choices and can't wait to start seeing how they come together.


