


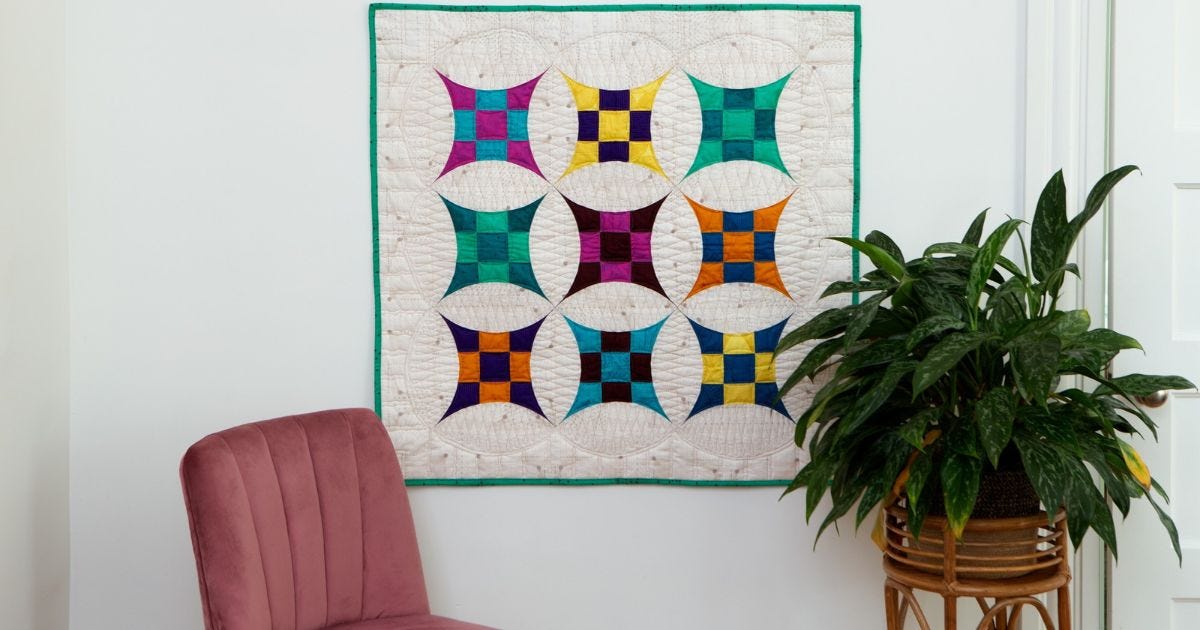
Alright, take a deep breath, everyone because we’re about to have some quilty fun sewing curves. Yes, I did say fun! So many of us avoid sewing curves, but this block is not only a show-stopper block that’s great for working with so many other blocks, but it’s really easy to sew. Let’s get started!
It's Just a 9-Patch!
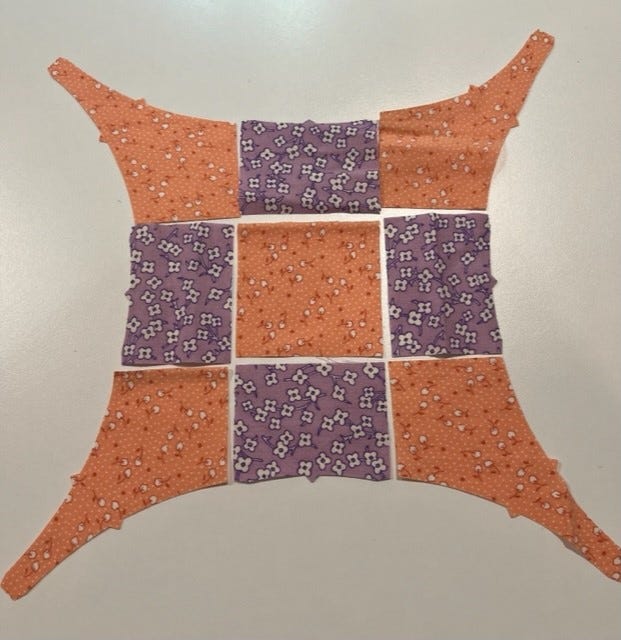
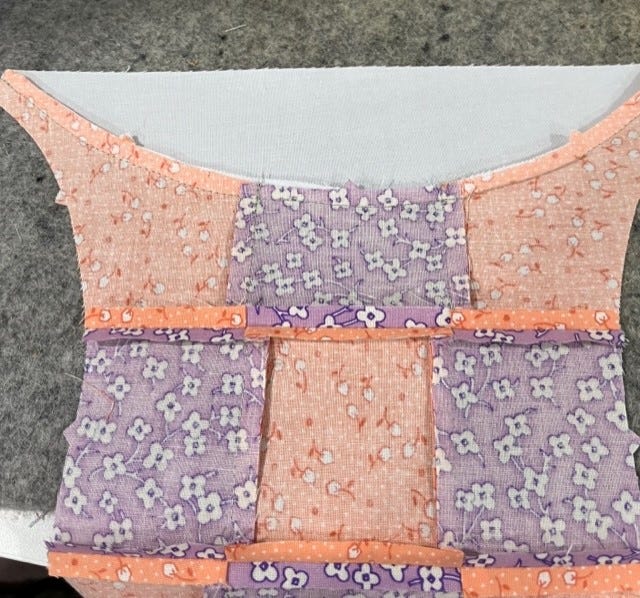
At its core, this block is a 9-patch, with nine shapes sewn together in three rows of three. You’ll want to start by laying out your center pieces.
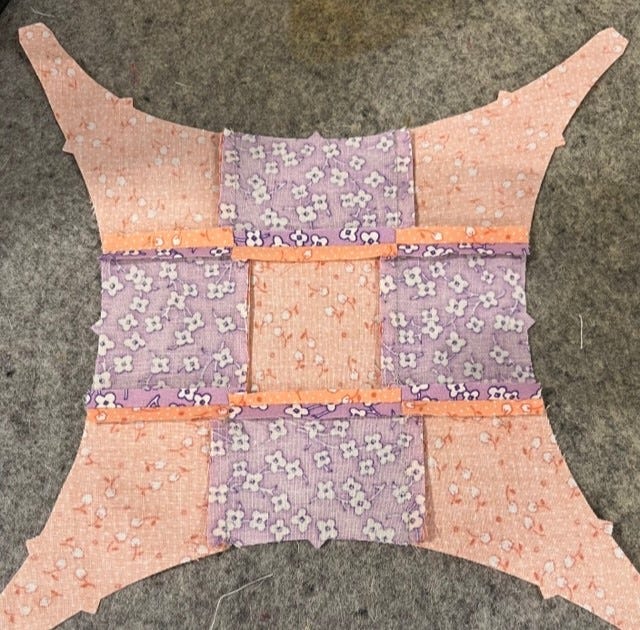
We’re starting by sewing these center pieces together. With Shape A in the center, be sure your Shape B pieces are laid with the notch to the outside. This notch is important for sewing our curved background piece on.
Now, here’s my first tip: I don’t normally backstitch when sewing units together to go into a block, but I actually suggest you do just that when sewing this center section together, so you won’t have to worry about any seams coming open when you sew your curves.
The pattern calls for pressing all the seams open, but I like to press the seams between pieces in opposite directions so that I can nest those seams. Then, once the three rows are together, I press those seams open. This is personal preference time, so you may want to try both and see which works the best for you.
Curve Time
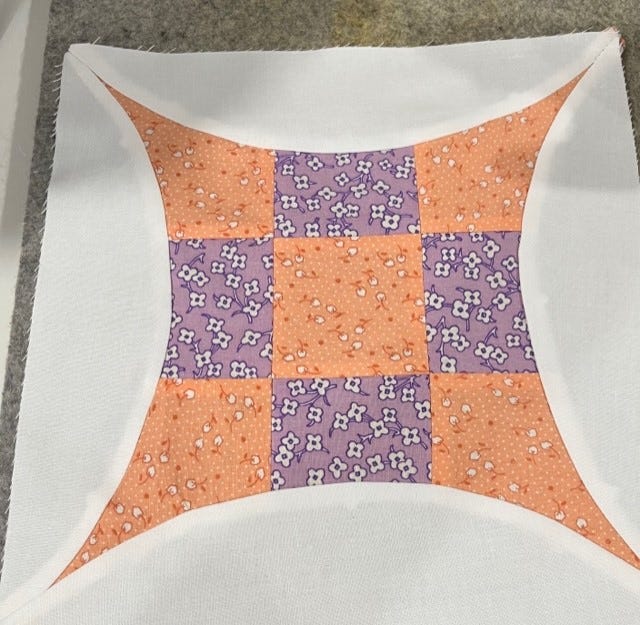
Now’s the time! Take your center section and match it up with a curved background piece. You’re going to want to sew these all with a “smile on top,” which is the center section.
Start by pinning the center notches together, followed by the outer two. I also like to pin the beginning and end of the seam.
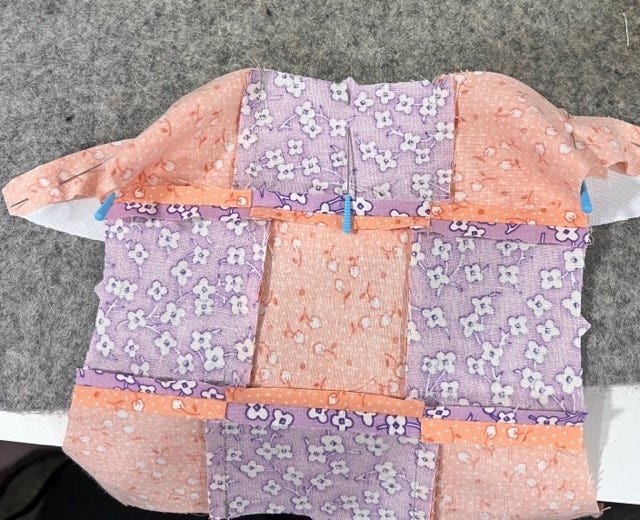
This is a good time to use a “leader” to help you get each piece started sewing perfectly. Your leader can be a scrap of fabric or, if you’re really organized, some other quilt pieces that you need to sew together. Start slowly, making sure you get a good, clean start, and then sew to the first notch and remove the pin. If you see your top layer of fabric starting to bunch up, stop sewing and with your needle down in the project, raise the foot to release the tension. Then, put the foot back down and keep going.
Think of yourself as just guiding the fabric through the machine as you go, not fighting with it. This is a nice, gradual curve and it will flow nicely, I promise.

Just keep going to the end, and back stitch for good measure. You’ll want to sew the background pieces to opposite sides. Once your first two opposite sides are sewn, press the seam to the outside of the block and then do the next set of sides. Give it a final press and your block is done!
If you’re nervous about getting started, I suggest grabbing some fabric you don’t love and trying a test block or two.
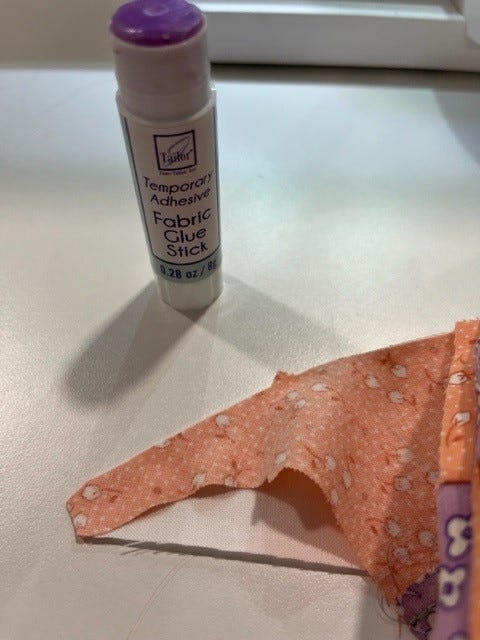
Not a Pinner?
If pinning isn’t your “jam,” you might want to try gluing those curves! Using a Fabric Glue Stick, you’ll want to match up the notches, beginning and end just like you would with the pins. Then, set that block aside and let it set while you glue another block or two before going back to sew the first one. You can even glue the entire seam if you want to! I haven’t had any issues with the glue making my needle sticky so far!
Keep Calm and Sew On!
That’s it - your first block is done, and you only need to finish eight more for this pattern. Personally, I’ve got so many fun fabrics to use that I feel like I may just be making a larger version of this quilt! If you have any questions along the way, be sure to check out the replay of today’s AccuQuilt Live show.
We hope you’ll join the AQS Quilting Project Parade Facebook Group and share pictures of your progress there, along with questions and tips. This online community is such a great way to connect with other quilters. AccuQuilt Cutting Expert Pam Heller and I just love it! Be sure to post your pictures using the hashtag #AQSews, too.
Don't forget that if you need help along the way, you can watch a replay of today's show at any time on Facebook, AccuQuilt's website and YouTube, so take a deep breath because you've got this!
Next week, we’ll put this top together and talk about finishing tips!


