
Materials Needed
- GO! Tumbler Die
- For the fabric needed, use the 4" finished or 3" finished sizes
-
Thirty 5” x 5” squares of colored fabric for the center of the topper
-
Six 5” x 5” squares of background fabric
-
Two 2” x 17 1/2” strips of background fabric
- Backing fabric
Assembly Instructions
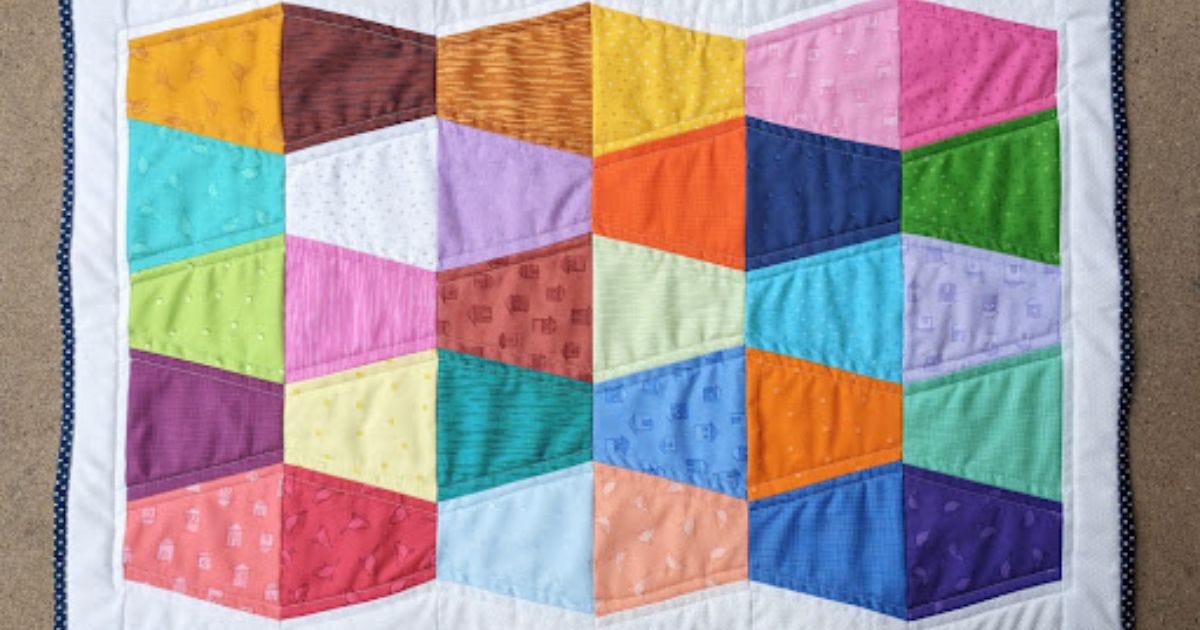
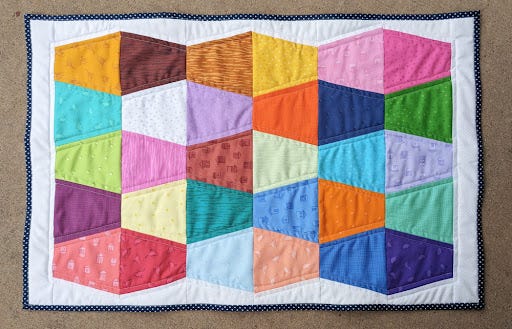
This table topper finishes to 18” x 27”.
1. Cut 30 Tumbler blocks using the GO! Tumbler Die out of your colored fabric for the center of the topper.
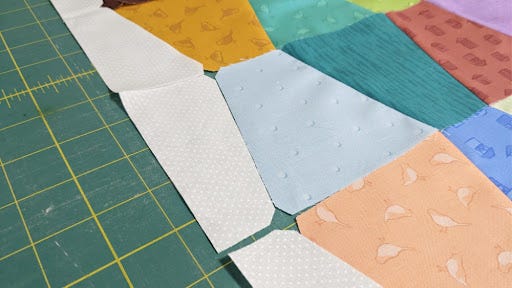
2. Cut six Tumbler blocks using the GO! Tumbler Die out of your square background fabric. Measure and cut these six Tumbler blocks in half, so you now have 12 halves.
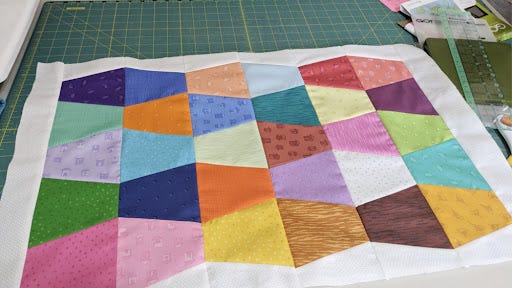
3. Lay the Tumbler blocks in the pattern that you like, with the background half tumblers on the sides. You will have six rows of five full Tumbler blocks with the half background Tumbler pieces on each end.
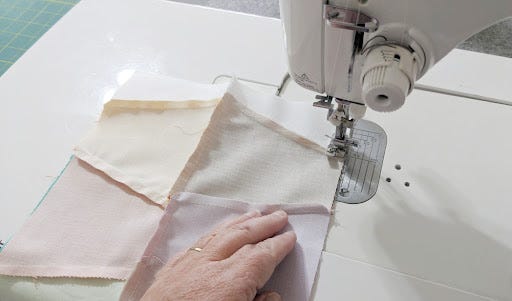
4. Sew the Tumbler blocks together. Then, sew them into rows. Press the rows.
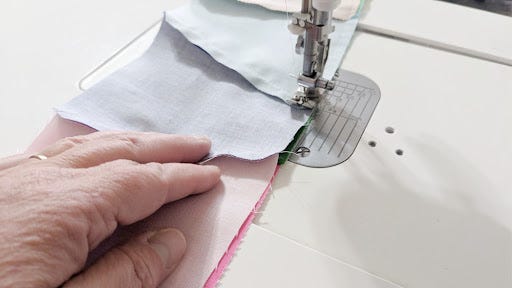
5. Sew the rows together, lining up the seams.
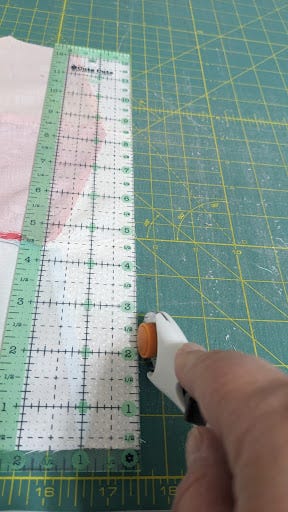
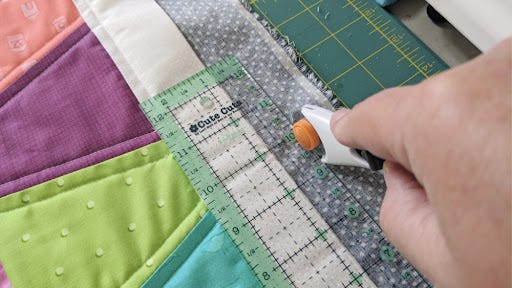
6. Sew the two strips to the top and bottom of the top. Press and trim the top so that the edges are straight and nice.
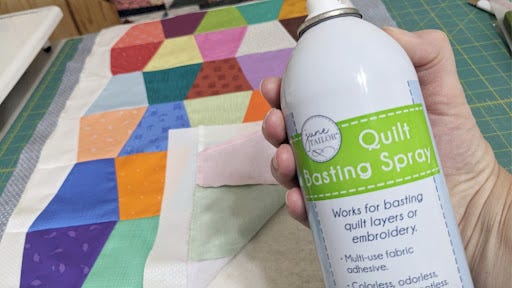
7. Layer the backing, batting and Tumbler table topper. Use spray adhesive to secure the layers for quilting.

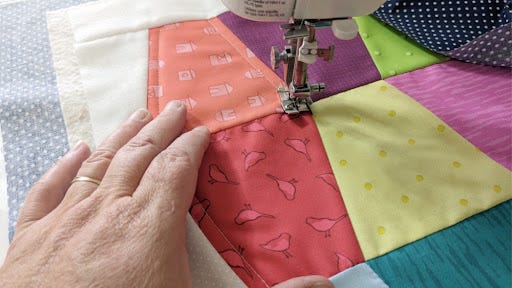
8. Quilt as desired. I did straight line quilting on my machine to keep it simple and get it done quickly.
9. Trim the batting without snipping the backing fabric.
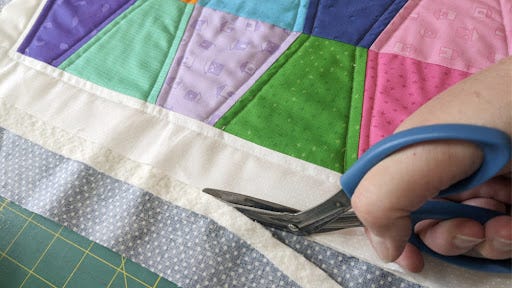
10. Cut the backing fabric 3/4” from the top edge.
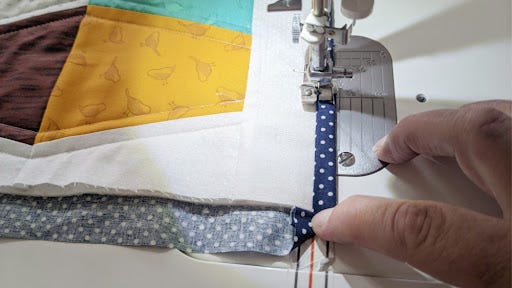
11. Fold the backing edge once, lining it up to the edge of the top.
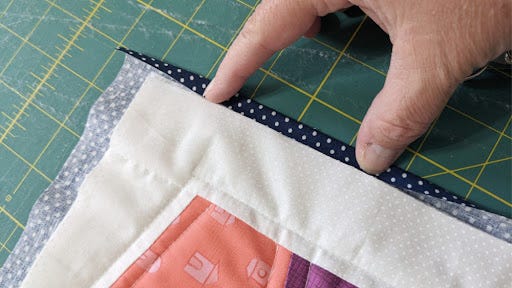
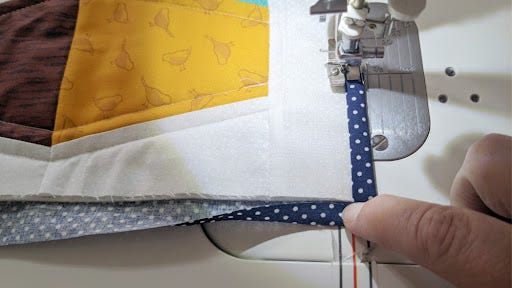
12. Fold the backing edge a second time. This will go on top of the Tumbler top at 1/4”. Then, stitch the binding down.
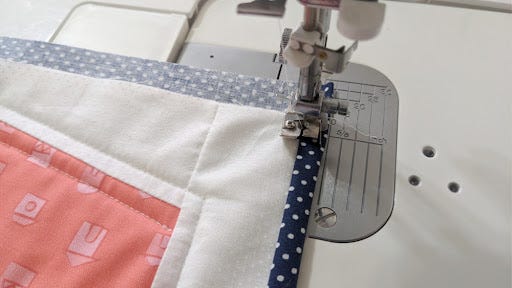
13. Continue to double fold and sew to the corner.
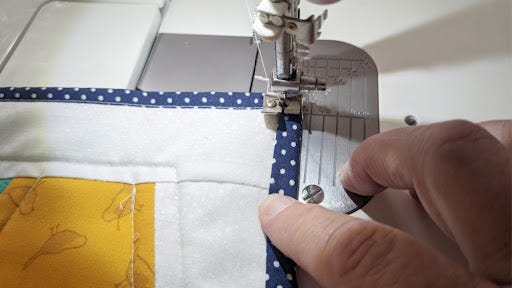
14. At the corner, take it and fold it up, making a diagonal on the outside.
15. Again, fold once, lining up the backing edge with the Tumbler top edge. Fold a second time so that it folds on top of the top.
16. Leave the needle in the down position, pivot to the next side and continue sewing.
17. Repeat the backing edge steps for each corner.
18. Enjoy your new Tumbler table topper!
If you make your own version of this tutorial, please share a photo of it on social media and tag @patchworkposse and @AccuQuilt. Don't forget to use the hashtag #AccuQuiltBuilt. I’m excited to see how your Tumbler table topper comes together!


