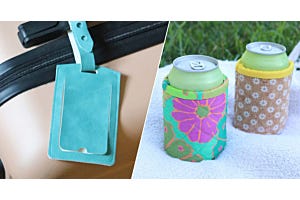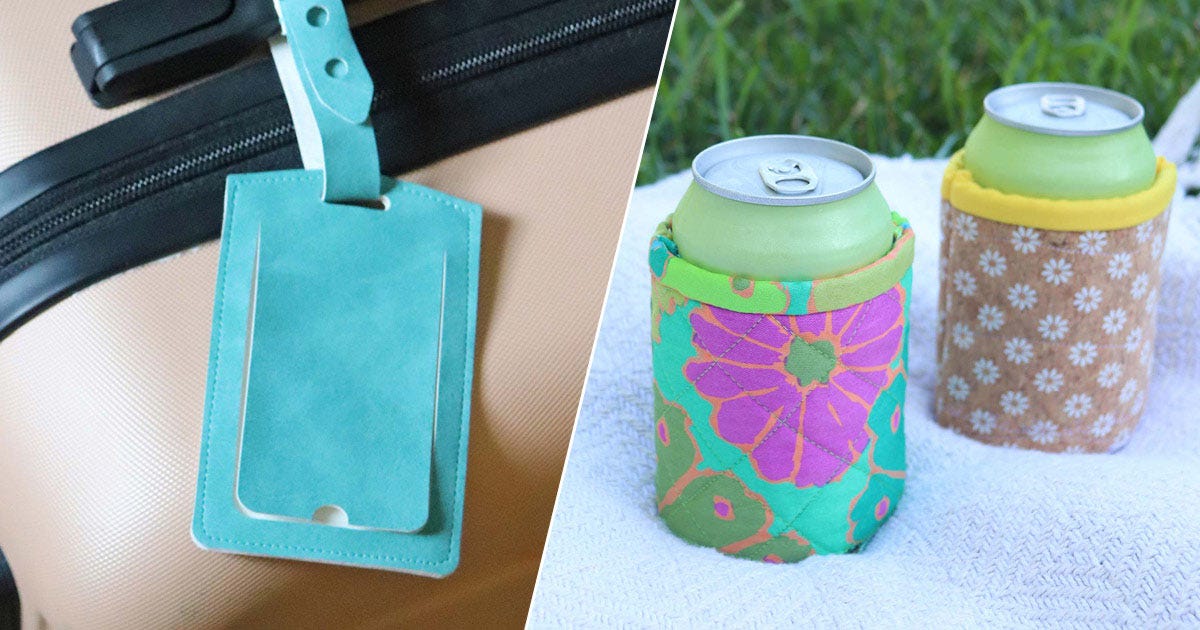
Looking for quick and easy sewing projects you can cut and sew in no time? Whether you’re gearing up for your next trip or hosting a backyard bash, the new GO! Luggage Tag Die and GO! Can Cozy Die are perfect for fast, giftable DIY projects that are fun to make and practical to use.
Let’s take a closer look at what makes these dies a must-have for every quilter and sewist.
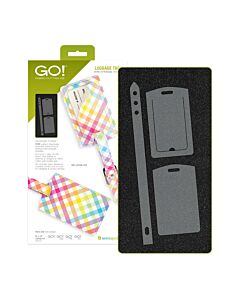
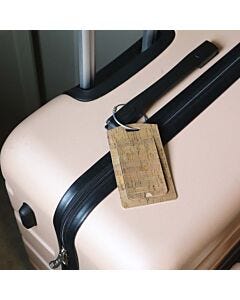
What is the GO! Luggage Tag Die?
The GO! Luggage Tag Die (55922) helps you create custom, durable luggage tags that make identifying your bags a breeze. This beginner-friendly die is great for cork, faux leather, or cotton with fusible web, and it's fat quarter-friendly, too!
-
 GO! Luggage Tag DieSpecial Price $69.99 Regular Price
$84.99You Save $15.00 -
 GO! Cutting Mat 6" x 12" 2 PackSpecial Price $36.99 Regular Price
$42.99You Save $6.00 -
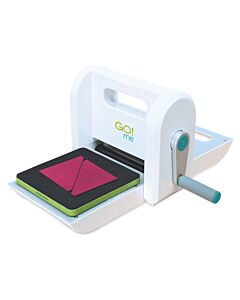 GO! Me® Fabric Cutter Starter SetSpecial Price $149.99 Regular Price
$179.99You Save $30.00

Why makers love it:
- Compatible with all GO! Fabric Cutters
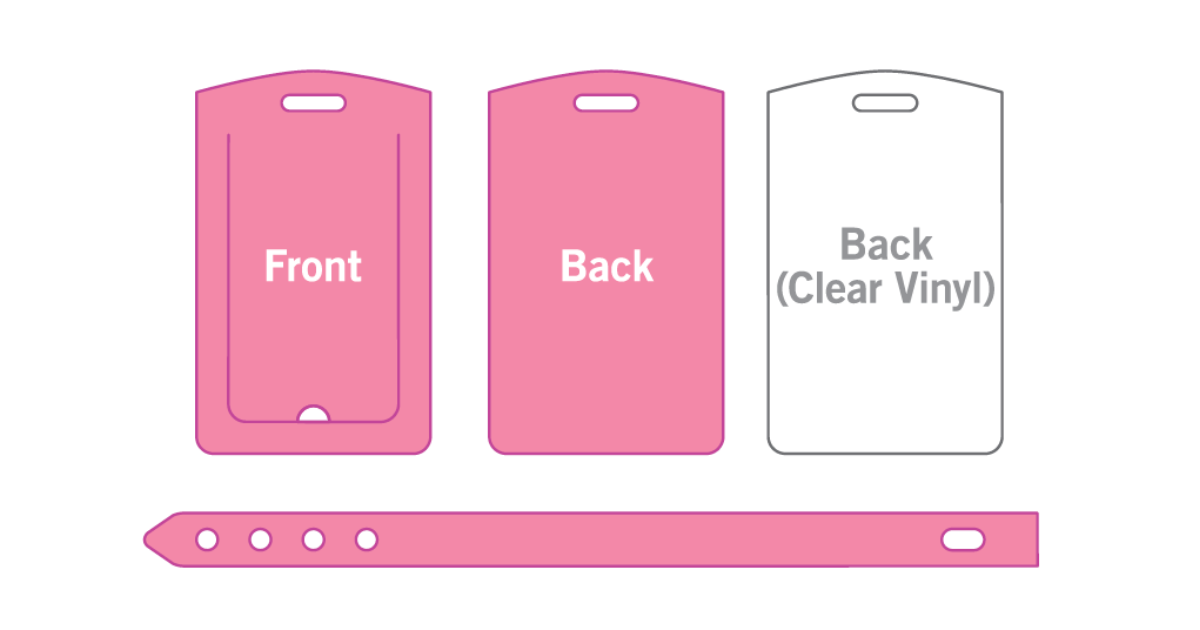
- Cuts all the pieces for one complete luggage tag in one pass
- Includes shapes for the front, back, privacy window and strap
- Built-in seam allowances and rounded corners for easy sewing
- Compatible with clear plastic or vinyl for a professional look
- Ideal for scrap busting and gift making
Tip: You can even personalize it with the included free address card template available at accuquilt.com/55922.
Free patterns for the GO! Luggage Tag
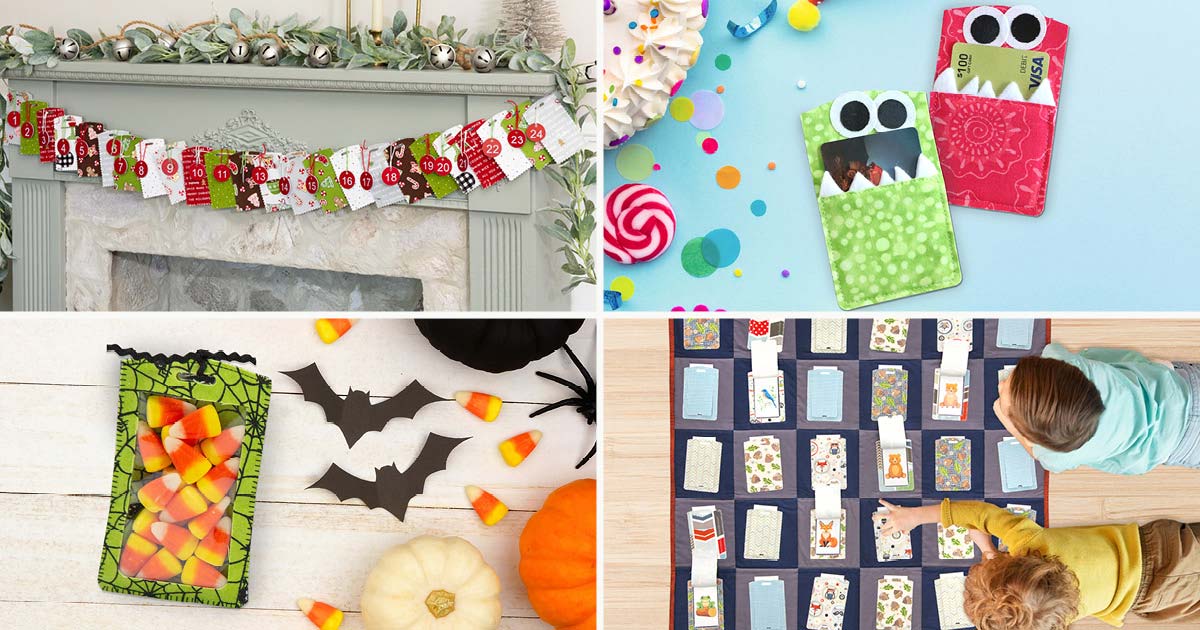
Looking for inspiration? These five creative and free patterns use the GO! Luggage Tag Die to make everything from classic travel tags to holiday gift ideas and kid-friendly projects.
-
 GO! Luggage Tag PatternSpecial Price $0.00 Regular Price
$2.99You Save $2.99 -
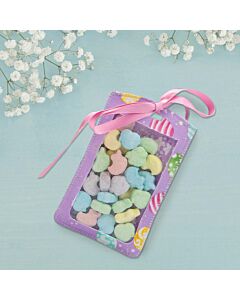 GO! Candy Gift Tags PatternSpecial Price $0.00 Regular Price
$2.99You Save $2.99 -
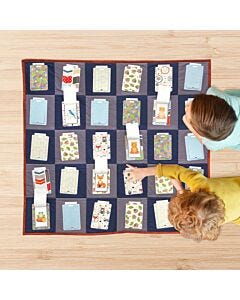 GO! Memory Match Play Mat PatternSpecial Price $0.00 Regular Price
$2.99You Save $2.99 -
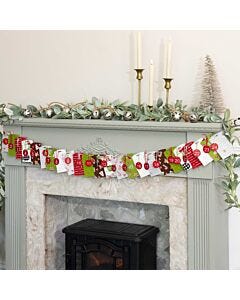 GO! Advent Calendar PatternSpecial Price $0.00 Regular Price
$2.99You Save $2.99 -
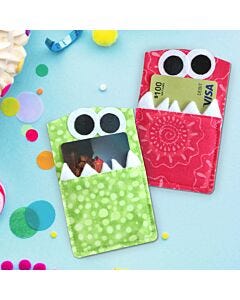 GO! Monster Gift Card Holder PatternSpecial Price $0.00 Regular Price
$2.99You Save $2.99
How to Assemble and Sew GO! Luggage Tag
Step-by-step assembly instructions
STEP 1: Cut your materials
- Cut an 11” x 4¼” rectangle from cork, faux leather or fabric with fusible web.
- Cut a 5” x 3¼” rectangle from clear vinyl or stiff plastic for the privacy window
- Optional: Cut 2 strap pieces and sew them right sides together creating a strong, double-sided strap.
STEP 2: Die cut the shapes
- Lay your material over the die shapes. One pass through your GO! Cutter will give you the front, back, strip and privacy window pieces.
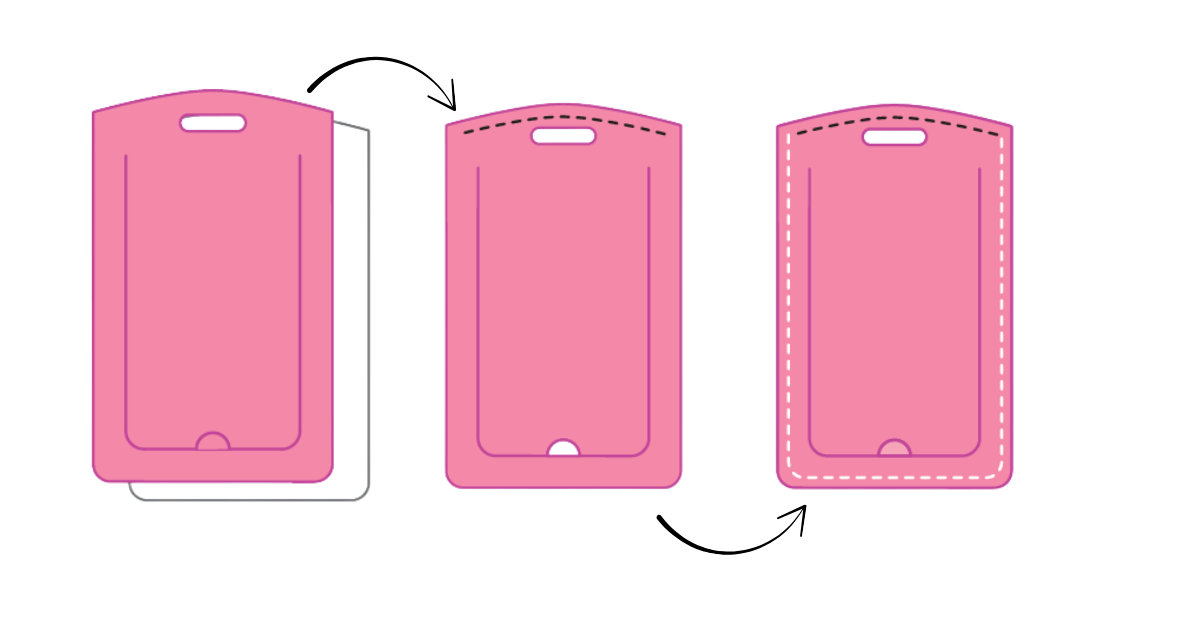
STEP 3: Attach the privacy window
- Place the clear vinyl piece on the wrong side of the front tag piece.
- Stitch close to the top curved edge to secure.
STEP 4: Assemble the tag body
- Place the back and front pieces wrong sides together with the vinyl in between.
- Sew around the two sides and bottom edge, leaving the top open to insert the address card.
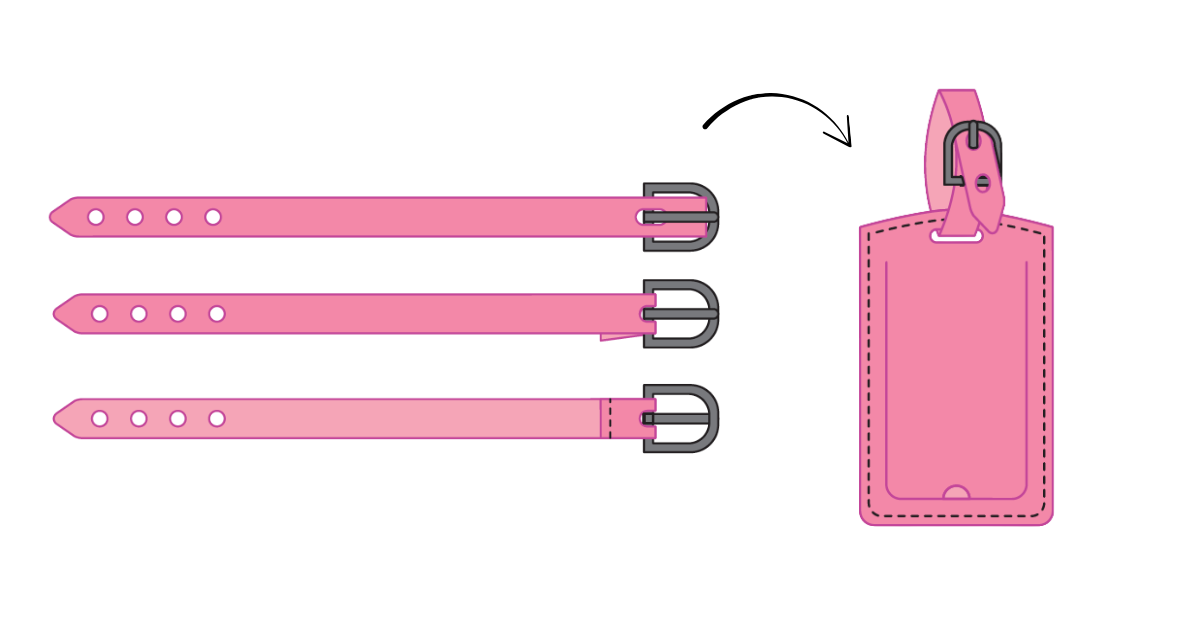
STEP 5: Make the strap
- Cut two strap pieces and sew them right sides together for a sturdy double-sided strap.
- Insert the buckle prong through the strap hole and sew it down.
STEP 6: Finish the tag
- Loop the strap through the tag’s top slot and buckle.
Congratulations! Now you’ve got a stylish luggage tag that’s ready for your next adventure! To print these instructions, download at accuquilt.com/55922.
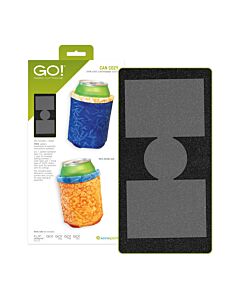
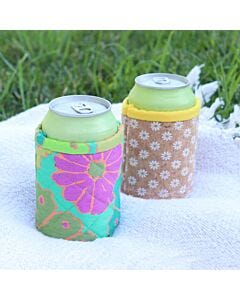
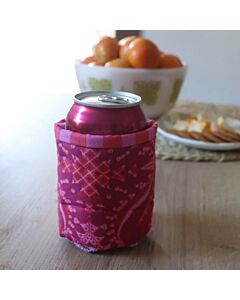
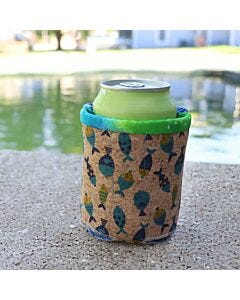
What is the GO! Can Cozy Die?
The GO! Can Cozy Die (55933) makes it easy to stitch insulated beverage holders that keep your drinks hot or cold. It’s perfect for parties, cookouts or thoughtful handmade gifts.
-
- GO! Cutting Mat 6" x 12" 2 PackSpecial Price $36.99 Regular Price
$42.99You Save $6.00 - GO! Me® Fabric Cutter Starter SetSpecial Price $149.99 Regular Price
$179.99You Save $30.00
Why makers love it:
- Compatible with all GO! Fabric Cutters
- Cuts one complete can cozy shape in a single pass
- Designed for quilted fabric sandwiches using insulated batting
- Built-in seam allowances and rounded corners for fast finishing
- Great way to use up scraps and fat quarters
- Ideal for team gifts, party favors and holiday hosting.
Tip: Pair it with dies like the GO! Oven Mitt, GO! Mini Oven Mitt or GO! Towel Topper to make a themed kitchen or party set.
Free patterns for the GO! Can Cozy
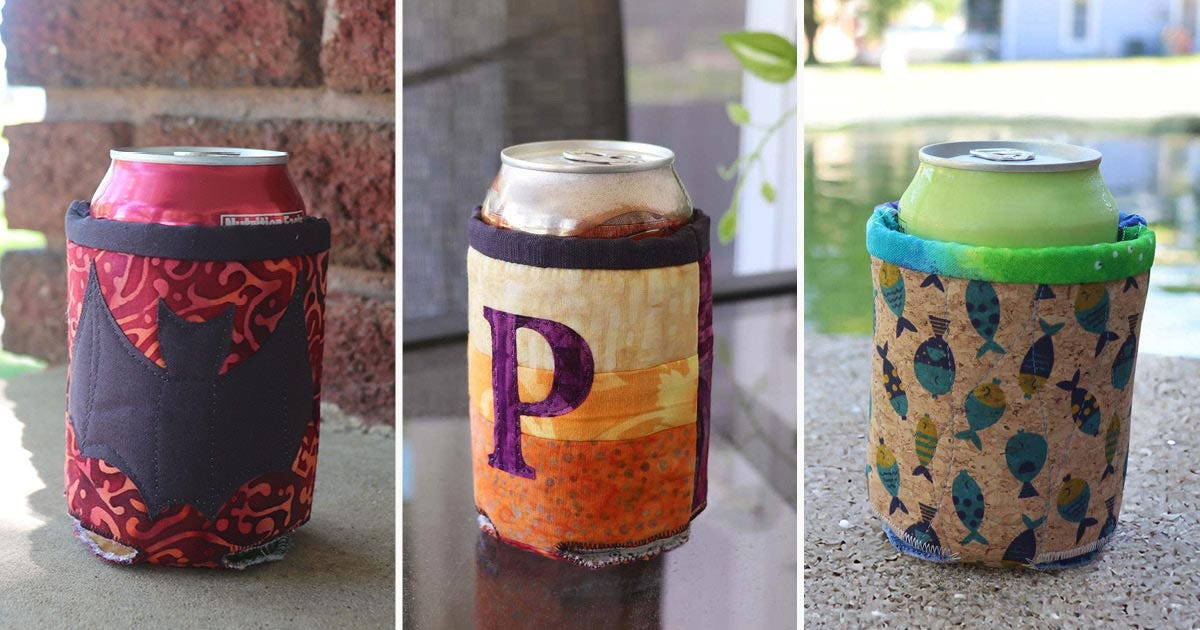
Get ready to wow your guests or gift recipients with these five fun and functional can cozy designs! Each pattern below is made with the GO! Can Cozy Die and includes step-by-step instructions for assembling insulated drink holders that are as stylish as they are useful. From stash busters to themed party sets, there's a pattern here for every season and reason.
-
 GO! Can Cozies for All Seasons PatternSpecial Price $0.00 Regular Price
$2.99You Save $2.99 -
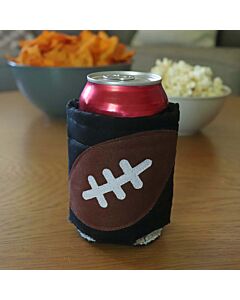 GO! Play Ball! Can Cozy PatternSpecial Price $0.00 Regular Price
$2.99You Save $2.99 -
 GO! Can Cozy Stash Buster PatternSpecial Price $0.00 Regular Price
$2.99You Save $2.99 -
 GO! Hostess with the Mostess Can Cozy Set PatternSpecial Price $0.00 Regular Price
$2.99You Save $2.99 -
 GO! Playful Can Cozies PatternSpecial Price $0.00 Regular Price
$2.99You Save $2.99
How to Use the GO! Can Cozy Die
Step-by-step assembly instructions
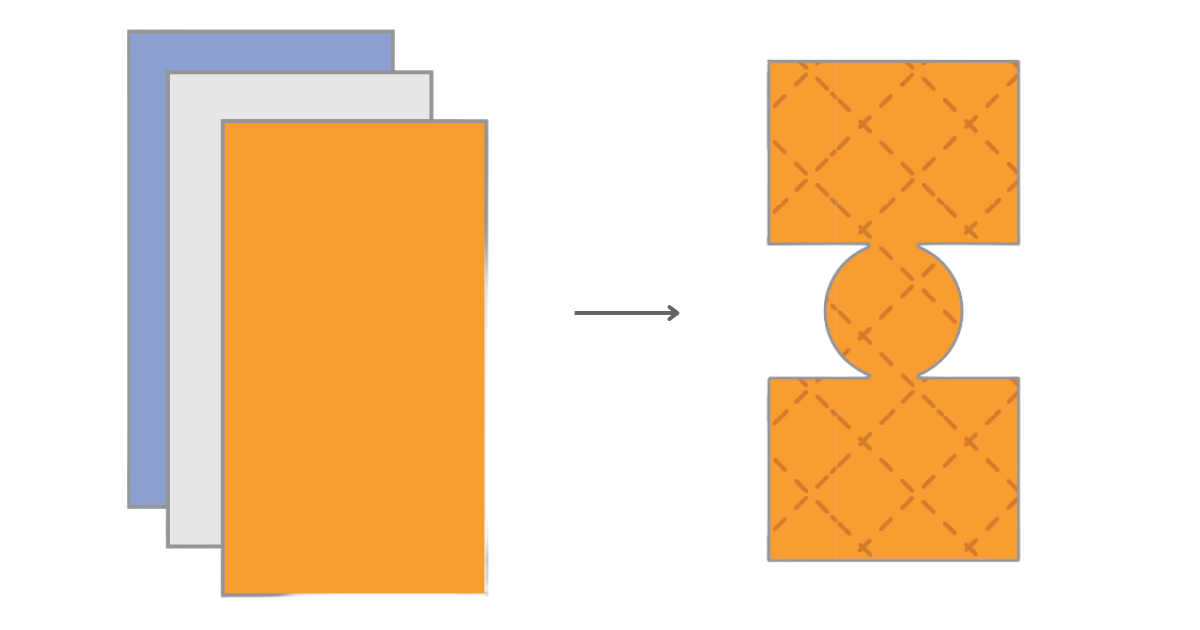
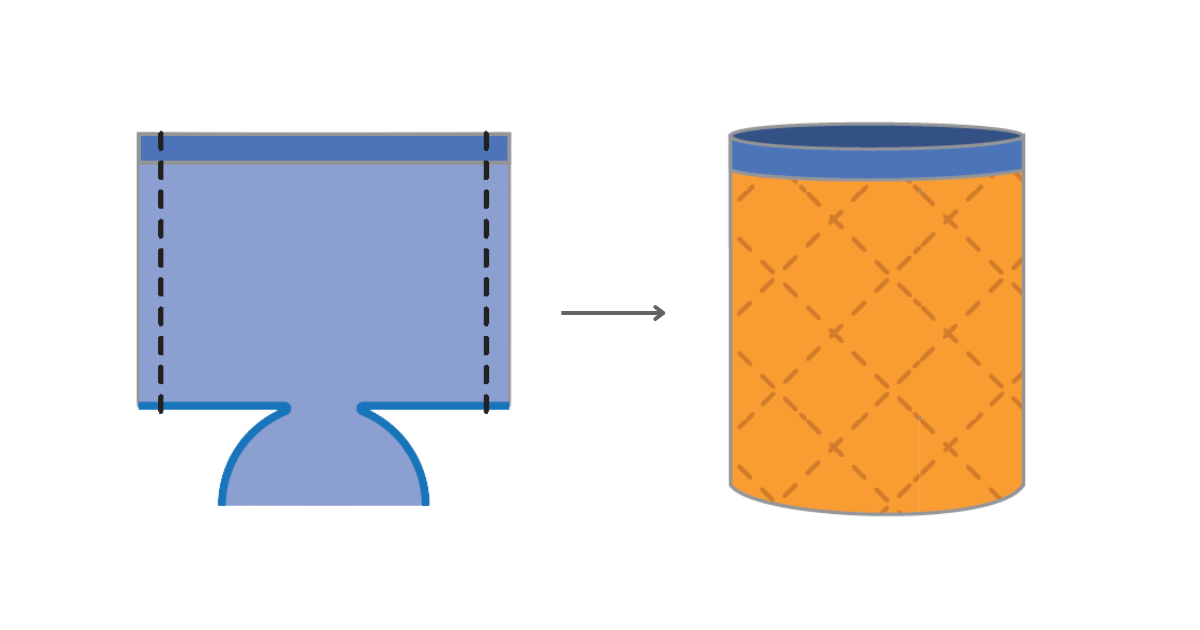
STEP 1: Prepare your fabric sandwich
-
- Cut two pieces of fabric and one piece of insulated batting, each measuring 6¼” x 11¼”.
- Layer them with the batting in the middle and the fabric right sides out.
- Quilt as desired.
STEP 2: Die cut the shape
- Place the quilted sandwich over the die and cut one can cozy shape.
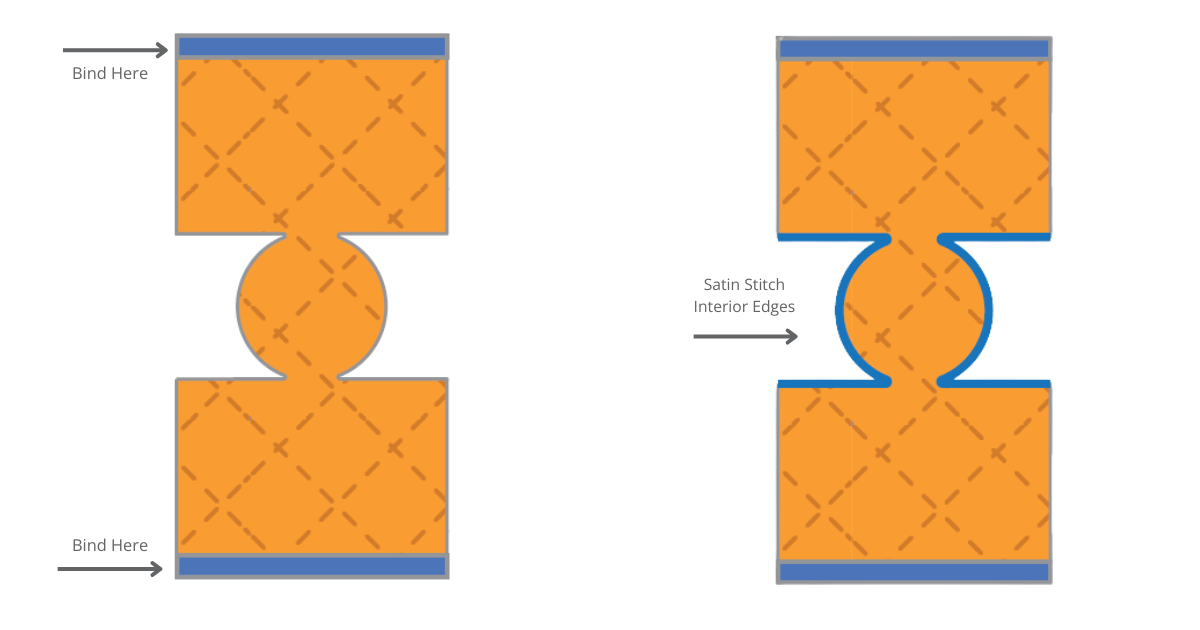
STEP 3: Bind the top and bottom edges
- Use your favorite binding method for a polished look.
STEP 4: Add Decorative Stitching
- Stitch around the interior edges using a satin stitch.
STEP 5: Sew the side seam
- Fold the cozy in half, right sides together.
- Sew the two short sides with a ¼” seam allowance.
- Backstitch at the beginning and end for durability.
STEP 6: Turn and enjoy.
- Turn the cozy right side out and it’s ready to use!
Who knew making a can cozy could be SEW easy? To print these instructions, download at accuquilt.com/55933.
Why should I try these new dies?
If you love making small, quick projects that are practical, personal and perfect for gifting, these two dies are a dream come true. The GO! Luggage Tag Die and GO! Can Cozy Die offer endless creative possibilities.
Start your next project today!
Head to accuquilt.com to grab your new dies, download free patterns and start stitching!