


Quilting for beginners doesn’t have to be overwhelming, especially when it comes to selecting fabric. Part of the fun in making a quilt is shopping for fabric, so enjoy yourself and your first fabric purchase. If you’ve never been in a quilt shop, we suggest you get acquainted with the store first. Perhaps just look at the fabric the first time you go. Then you should feel the good quality fabric and compare it to fabric with a lower thread count. It’s really the same concept when it comes to your bed sheets or clothes. More expensive clothes tend to not only look better, but they feel better to the touch. As for sheets, well we all know what a thrill it is to sleep in wonderful, high quality cotton sheets. If you don’t, you’re missing out!
With that said, we have 7 helpful tips below on not only how to select quality fabric, but also how to prepare your fabric before starting on any quilting project.
TIP 1: Choose Quality Fabric
Choosing quality fabric is one of the most important steps in the quilting process. If you’re starting off with the cheapest fabrics on the bolt, then you’re already heading for a less than positive quilting experience.
The most commonly used fabric for quilting is often refereed to as "quilters’ cotton." Quilters’ cotton consists of 100% cotton fiber and has a thread count of 68 x 68 threads per square inch. The thread count, which determines the quality and weight of a fabric, is higher in quilters’ cotton than in light-weight cotton. Quilting cotton is easy to sew and holds a crease well, so it's easier to press seams flat. Plus, the higher thread count makes the fabric more durable and less likely to ravel or fray. In contrast, light-weight cotton is more likely to ravel and shrink, and is overall less durable.
TIP 2: Select Fabrics with Contrast
Usually quilt patterns list their fabric requirements in terms of contrast (value)--light, medium, dark. Contrast in your fabrics is important to your quilt design because it highlights the shapes in your design and gives them depth. For example, a dark triangle on top of a dark background will give you little to no contrast, making your design seem one dimensional and visually uninteresting. However, a light triangle on a dark background will give you strong contrast, making your triangle pop and drawing the attention of the viewer’s eye.
A good way to see if the fabrics you‘ve selected for a project have good contrast is to take a black and white photo of the fabrics lying next to each other, which you can easily do with any phone camera. By removing the color, it’s easy to see if you have a good assortment of light, medium and dark fabrics, such as in the image below. If you do not have a camera readily accessible, you can also photocopy your fabrics and do the same exercise.

TIP 3: Learn the Color Wheel
Before selecting your fabric colors, it’s important to familiarize yourself with the color wheel. The color wheel shows that colors exist on a spectrum and each color has a relationship with the others. At a minimum, remember the primary colors of red, blue, and yellow and know that the colors directly across from them on the color wheel are their “complementary colors.” For instance, red is complementary to green, blue is complementary to orange, yellow is complementary to purple (violet), and so on.
There is a ton of information available on color theory, but there are two main concepts that you definitely want to keep in mind when it comes to color. First, colors directly opposite each other on the color wheel (complementary colors), such as red and green, work well together and have high contrast. Secondly, colors that are next to each other in the color wheel (analogous colors), also work well together because they are created from the same colors.

The Color Wheel


If you really want a shape to stand out on your quilt, use some colors that are near each other on the color wheel for a background, and then add a complementary color in order to give your quilt that “pop” and prevent it from looking dull. Below, the GO! Bed of Roses Quilt features two shades of green coupled with green's complementary color, red. Your eye is immediately drawn to the red shape.
 GO!
GO!If you are using prints in your project, match them up with solids in similar shades for a cohesive look like the GO! A Little Birdie Told Me Quilt below.

TIP 4: Picking Fabric Scale
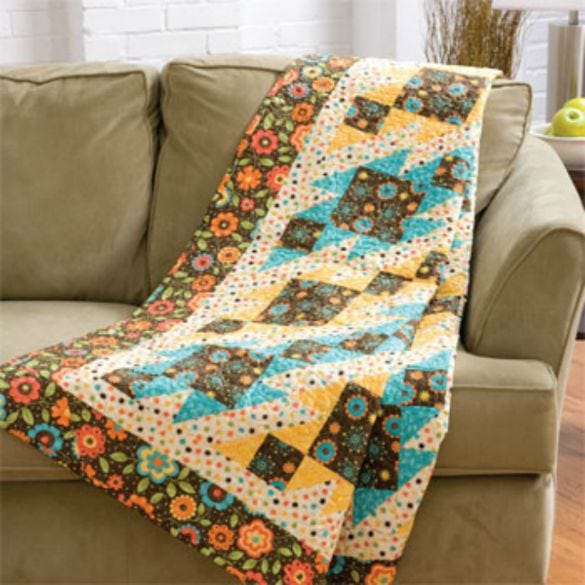
Fabric options have improved immensely over the years. Before, fabrics would only come in solids and small prints. Today, you can get all sorts of prints, big or small. To get a balanced and more interesting quilt, you should use a variety of scales/sizes of prints. It will make an incredible difference in your quilt and draw admirers in easily, just like a piece of art. Some of the best-looking quilts incorporate printed fabrics that vary in scale. For example, below is the GO! Flash of Lightening Quilt that features a variety of different-sized prints.
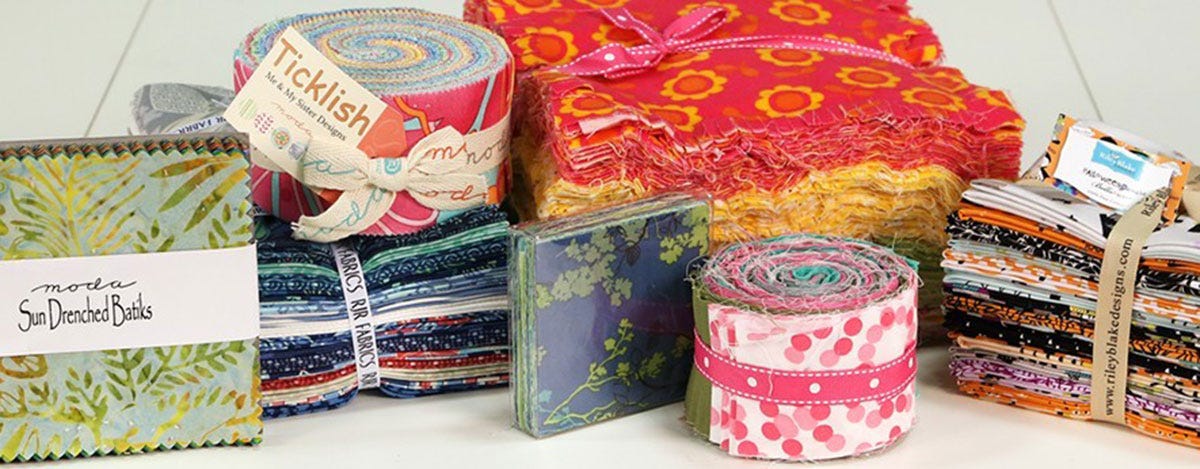
TIP 5: Buying Pre-cuts
If you find it challenging to pick out fabric, another option for you are fabric pre-cuts, which enable you to purchase an entire collection of fabric in a variety of sizes. Since the fabrics in pre-cuts are all from the same collection, they are made to work together. Some of the most popular pre-cuts are made by Moda Fabrics and have names like Fat Quarters (18” x 22” square shapes), Charm Packs (5” x 5” squares) and Jelly Rolls (2.5” strips).
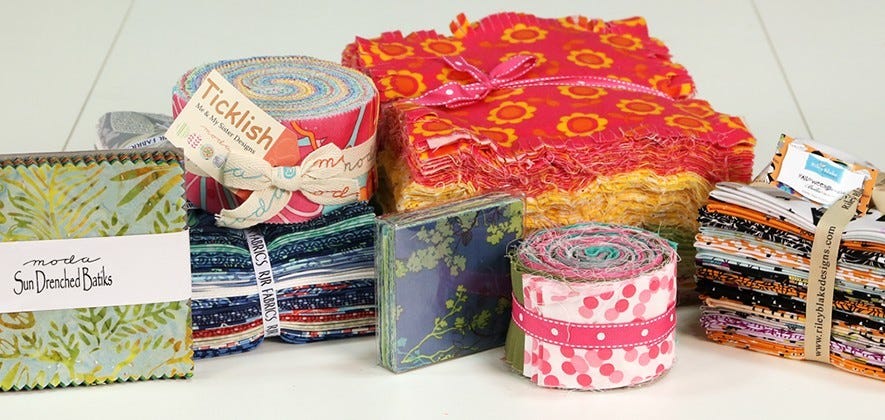
Fat quarter bundles are the cream of the crop to many quilters who buy pre-cuts because they measure 18”x 22” (square in shape) and give you the most flexibility to cut a variety of different shapes. It makes cutting squares, rectangles, or triangles much easier. If you had a yard of fabric, a fat quarter would equal one quarter of that yard.
Charm packs typically measure 5”x 5” and come in coordinating patterns, so they are great for patchwork quilts. Some quilters buy charm packs just to get a “taste” of a new fabric release. Charm packs allow you to do fast and easy quilting, requiring little cutting. In fact, you can opt for no cutting at all and simply sew all of the squares from your charm pack together by rows and then into columns. Additionally, charm packs are probably the most affordable pre-cuts you can purchase today.
Once you build up your fabric stash, you can also create your own pre-cuts using AccuQuilt fabric cutters and dies.
TIP 6: To Prewash or Not
One of the biggest debates among quilters is whether or not to prewash your fabric, and most will tell you that it depends. Sometimes, it’s just a matter of personal preference. Many people who hand quilt prefer washing their fabric first, so it’s a little softer and looser when they begin hand quilting it. Generally, it’s recommended to prewash red or purple fabrics because they are most prone to bleeding. And if you want to reduce the chance of uneven shrinkage or bleeding of color when a quilt is finished, then you should prewash. But if you like to work with fabrics that still have the sizing and finish from the manufacturing process, then you would not want to prewash.
Here are a couple of options for prewashing fabrics that bleed. One option is to soak your fabric for about an hour in cold water and one cup of vinegar. Another option is to wash your fabric in cold water and throw a couple of color catchers in the wash. Whatever you do, do not put your fabric in the dryer on high after washing it, as your fabric will shrink faster than your favorite wool sweater. We recommend hanging your fabric to dry. However, some quilters will put their fabric in the dryer and then remove it while it’s a little damp.
TIP 7: Pressing Your Fabric
Properly pressing your fabric is essential to successful quilting. You’ll want to press your fabric before cutting it. One key thing to keep in mind is to allow the weight of the iron to do the work for you. If you move the iron back and forth vigorously, you could stretch the fabric. A good rule of thumb is to press your fabric in the middle (in between the cut ends) since there is less stretch in this part of the fabric. Pressing is also essential for accurate piecing, so be sure to press every seam before another unit is added. Pressing seams to one side (toward whichever fabric is the darkest in order to prevent a shadow on the lighter fabric) is standard practice for most quilters, but if you have a lot of seams coming together at one point, then pressing them open helps to distribute the fabric more evenly. Here’s a great article making the case for why seams should always be pressed open, especially for machine piecing, and why pressing seams to one side is a “residue of hand piecing.”
We hope the above tips will remove any anxiety you feel about selecting fabric. You will come across a lot of fabric options as you venture off to quilt shops, so we can't stress enough the importance of having fun. However, if you still have a little angst, here are two bonus tips for you: If all else fails, just pick fabrics in your favorite colors or fabrics that give you the “tingly inside” feeling. Further, if you’re making a quilt for a certain room in your home, choose fabrics that will complement the décor in that room.
Here are some great websites and blogs that also have excellent tips for you as you begin your quilting adventures!
http://www.e-quilterscorner.com/blog/2014/10/20/10-tips-help-you-choose-fabrics-your-next-quilt/
http://www.quiltropolis.net/articles/quality-quilting-fabric.asp
http://blog.keepsakequilting.com/2012/04/fabric-quality-matters/
http://www.craftsy.com/blog/2013/08/prewashing-fabrics-pros-and-cons/\http://www.craftsy.com/blog/2013/08/prewashing-fabrics-pros-and-cons


