
Are you ready to get started? I’m so excited to be sharing one of all-time favorite dies with everyone through this quilt-along series! Before we jump right in, here are a few basics about this quilt-along:
- You don’t need to have a GO! Fabric Cutter and the GO! Glorified Nine Patch-9" Finished Die to participate. Check out the blog from September 20 for traditional cutting instructions and free templates to download.
- Yes, we’re sewing curves, but these are easy curves to practice on, and you’ll soon be a pro.
- AccuQuilt Cutting Expert Pam Heller and I will be available to help you every step of the way with blog posts, live shows that you can watch any time and through the AQS Quilting Project Parade Facebook Group.
- However you choose to cut your project, be sure to download the free pattern from AccuQuilt's website for assembly directions.
Let's GO!
The GO! Glorified Nine Patch-9" Finished Die is a Block on Board (BOB) die, meaning that all the shapes you need to create this block are on just one die board. This die is a 6” x 24” die, which means that it will work with any GO! Fabric Cutter, including the GO! Me. If you’re using the die, be sure to have a 6” x 24” cutting mat available.

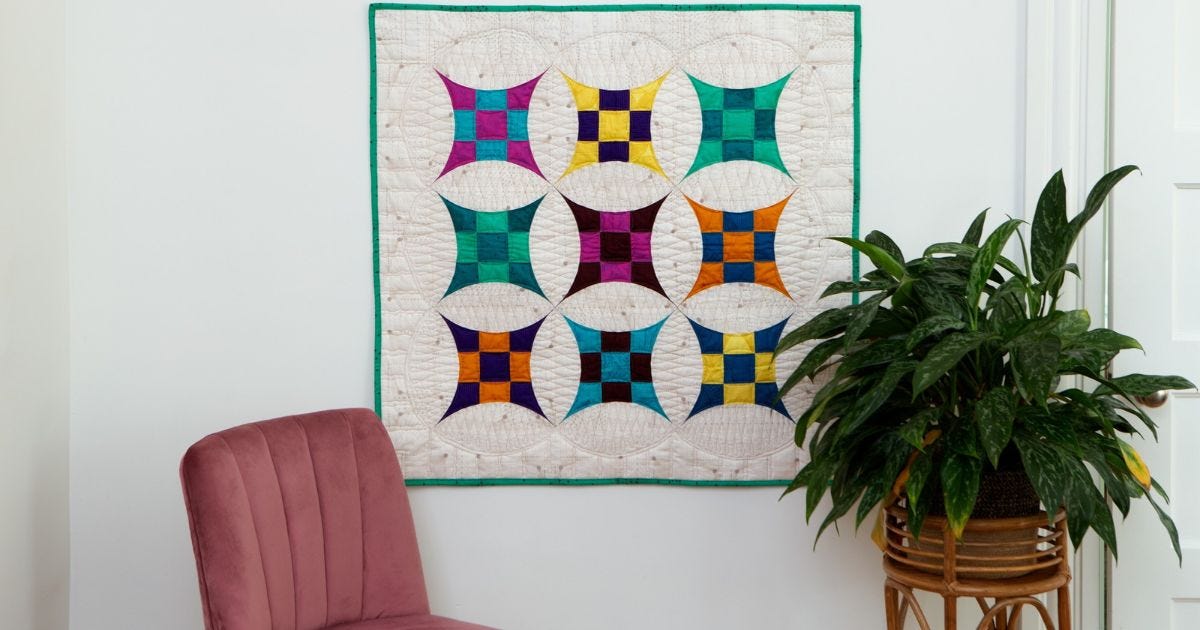
The pattern calls for nine different Fat Eighth (9” x 21”) cuts of fabric, making a total of just nine blocks. I happen to have Fat Quarters and some chunky sized scraps, so I may make mine a little larger, but we’ll see. Be sure to download a free copy of the pattern for all the fabric requirements.

Follow the cutting directions in the pattern as well. For each block, you will need one of Shape A for the center, four of Shape B, four of Shape C and four of Shape D, which is your background fabric. You can mix and match your fabrics to your heart’s desire, making this project as scrappy as you would like.
Depending on how many different fabrics you are using, this might be a good time to do a little bit of math and calculate the number of pieces you need of each shape if you are varying from the pattern to save yourself from over-cutting!
If you haven’t selected your fabrics yet, be sure to check out the project introduction blog from September 20 for some tips that might be helpful.
Here's a tip for saving your fabric: use the cut and shift method for cutting Shape C on the die. Rather than fanfolding, cut a strip of fabric and shift it along the die, as in the picture below. You can stack up to six layers to cut at at time, and don't forget to use a 6" x 6" cutting mat!


Once your fabrics are cut, you have a variety of choices for how you keep them organized. If you’ve planned for certain fabrics to go together in blocks, you might want to keep them together by block instead of sorting them by shape. I’m planning to use my favorite high-tech method of sorting - plastic sandwich bags - for this project.
You can sort by shape or by blocks. I've picked out certain fabrics to go together, so I'm storing mine by block.

Okay, quilters, pat yourself on the back because we’re all done for now! Now, I do have a little homework for you so that you’re all ready to sew next week. First, be sure to join the AQS Quilting Project Parade Facebook Group and share pictures of your progress using the hashtag #AQSews. This community has grown with every quilt-along project this year and I love seeing what everyone is doing with their projects.
Next, here are a few items that might be handy to have when we start sewing:
- Small pressing mat and iron
- Wooden clapper
- Pins - with your favorite pin cushion, of course
- Stiletto
- Fabric Glue Stick
Remember that Pam and I will be cutting our blocks on AccuQuilt Live October 4 at 12/noon CT. That show will be recorded and available for you to watch later at any time. So, until next week – happy cutting, quilters!


