
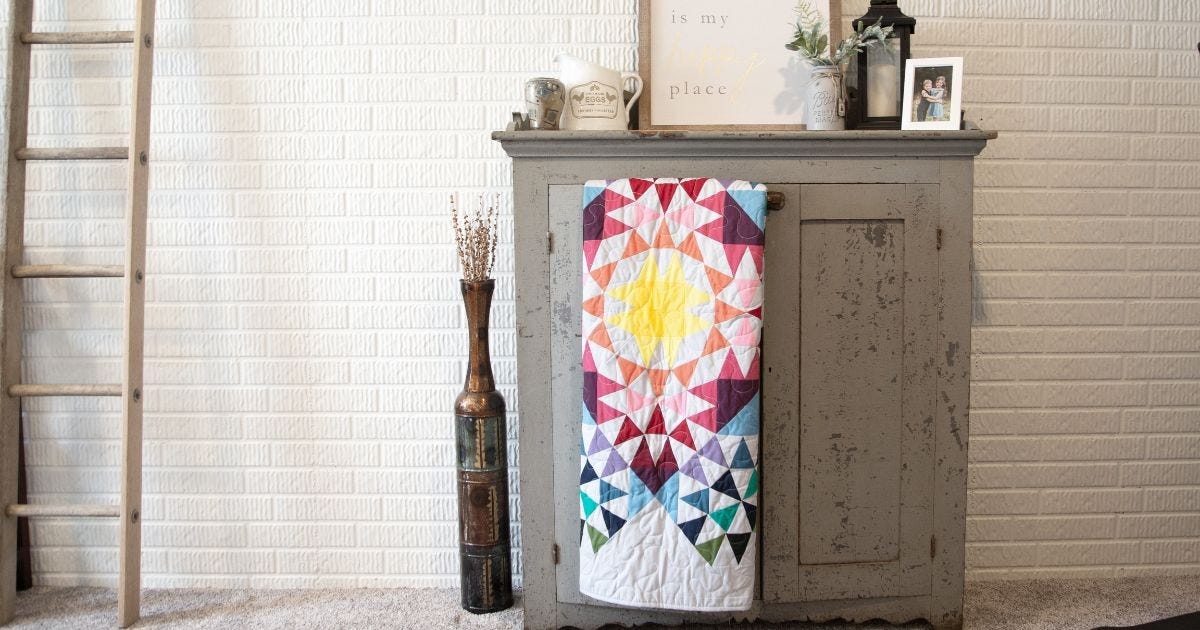
On Wednesdays, starting on June 2 at 12/noon CT, AccuQuilt's Cutting Expert, Pam Heller, and I have been taking you step by step through making this fun project that’s just bursting with color and creative possibilities. These shows are recorded and available to watch anytime on AccuQuilt’s website, Facebook page and YouTube channel. We’re all staying connected through the AQS Quilting Project Parade Facebook group as well and using the hashtag #AQSews on all our social media posts about this quilt.
In case you missed last week, we started out by working on the eight "cool" blocks needed for this project, getting us ready to make the final four "warm" blocks today! We’re using the titles of "warm" and "cool" for our blocks to match the pattern, but you’re free to use any color and combination you dream up in your own quilting head.
Speaking of the pattern, be sure to download a free copy of the pattern before you get started. While you’re there, jump over to the page for the GO! Morning Star-12" Finished Die and download the coloring page that’s part of the “Block Assembly Directions” found there – if you haven’t already. I think we’ve all found how helpful these resources are!

So, Let's Sew!
The blocks we’re working on today are the four “warm” blocks that form the center of the design. These blocks will sew together exactly the same as the “cool” blocks we created last week, building triangles from triangles.
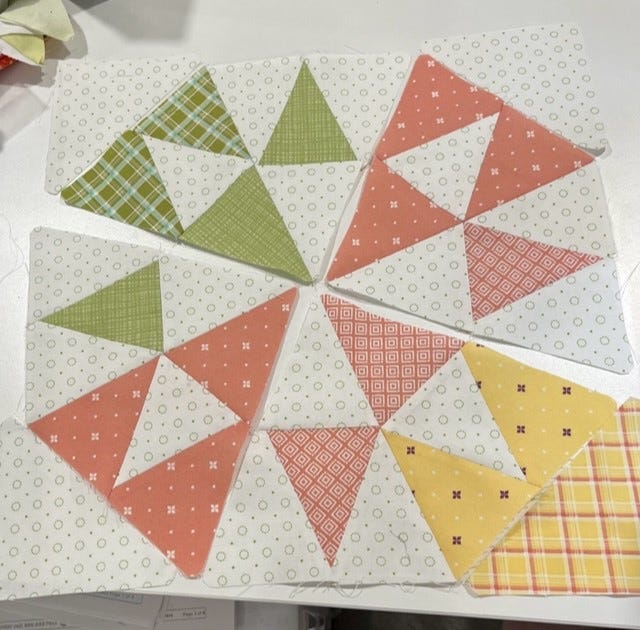
I like working on one or two blocks at a time. I can still chainpiece, but with 12 different fabrics, it’s easier to keep on track with one at a time. Once my eight triangles are built, they’re sewn together in pairs following the pattern and Block Assembly Directions. Then (and only then), it’s time to sew the corner half square triangles in place. You’ll finish the block from here as you would a 4-patch block.
Take a Look
Once you’ve got one or two of your "warm," or center, blocks done, I suggest laying them out on your design wall, floor, bed or whatever you use with your completed “cool” blocks. I like to stand back and look to be sure the overall design is working with the color placement. It’s also helpful to take a picture on your phone and look at that as well – it’s amazing how different it will look to you!
Here's a look at some of my blocks during the process all together.

I’ve gone through some changes in my color placement and have ended up adding more of the background to the project, so I really encourage you to take this extra step!

Setting Triangles
The blocks will be set on point for this quilt, so that means setting triangles are needed to finish off the sides and corners. We’re using the GO! Setting Triangles–12” Finished Die, but there are rotary cutting directions in the introduction blog that you can also use.
Setting triangles are tricky because of two things: math and lengthwise grain of your fabric. Luckily, we’ve done the math for you with the die and the alternate directions for this project, but with the GO! Setting Triangle Dies in my library, I find it really opens my creative options for all the projects I make.

The second reason I love these dies is how they are designed to put the lengthwise grain on the outside of your quilt, which will stabilize it and help keep it laying straight and flat. Traditional methods for creating setting triangles involve cutting a square and cutting it from corner to corner on the diagonal. This puts the stretchy bias to the outside of your project. You can stabilize this by adding an outer border (as in this pattern), but you will need to be careful when sewing on that border!
The Corners Aren't Corners
This pattern doesn’t utilize the corner triangles for the corners, so be sure to read and follow the pattern here! For this design, you’ll be pairing up two side setting triangles to create one large corner triangle. Yes, this does place some bias cuts on the corners, so again, take care in adding the narrow border to your quilt.
Cutting setting triangles with the die is simple to do. First, lay a clear ruler on top of the shape on the die and add a 1/2” to that measurement. Then cut a Width of Fabric (WOF) strip that size. You’ll want to lay the fabric on the die with the selvedge edge running at the same angle as the long side blade for the shape on the die as it goes through the cutter. Easy!

Sew, Sew, Sew
Next week, we’ll be pulling everything together: sewing our rows, cutting, adding the outer border and talking about ways to finish the project, including ideas for quilting and binding, so be sure to join us then!
Don't forget to share pictures of your progress with everyone so that we can all be inspired by each other in the AQS Quilting Project Parade Facebook page. This is such a fun community of quilters from all over the world that you won’t want to miss this part of the quilt-along experience! Always tag your pictures with the hashtag #AQSews on any social media, so we can see what everyone is creating. On July 5, I’ll be sharing some of your projects during AccuQuilt Live and in this blog, so don’t forget to post your pictures!
Happy stitchin’!


