

If you missed the introductions to this project, be sure to check out the AccuQuilt Live show from May 24!
All our shows are recorded, so you can watch them any time on our website, Facebook page and YouTube channel. Further details can be found in my blog post from that day or on the AQS blog post about this event. It’s important to note that AccuQuilt Cutting Expert Pam Heller and I will both be making this project using the GO! Morning Star-12" Finished and GO! Setting Triangles-12” Finished dies, but both introduction blogs include links for templates for traditional rotary cutting. We want everyone to be able to jump in and have fun with us on this project!
-
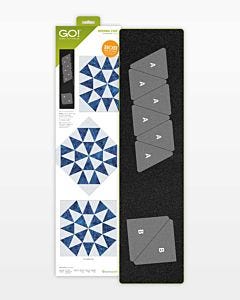 GO! Morning Star-12" Finished DieSpecial Price $62.99 Regular Price
$104.99You Save $42.00 -
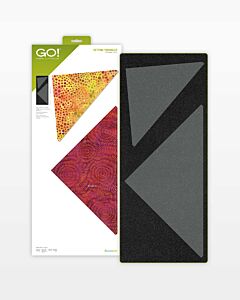 GO! Setting Triangles-12" Finished DieSpecial Price $109.99 Regular Price
$129.99You Save $20.00
First Things First
Although I’m itching to make my first cut, let’s go over some helpful tips first!
- No matter how you will cut your project, be sure to download the free pattern
- Use GO! Quilt to plan your fabric placement
- Print two GO! Morning Star coloring pages (last page of the Block Assembly Directions found on the product page on AccuQuilt's website)
All three of these are free resources that will be handy for cutting and sewing this project.
Just Two Blocks
At its heart, this complex-looking quilt is made with just two different blocks: four warm blocks and eight cool blocks. Keep those numbers in mind because we’ll have a little math to do coming up.

Once I had my fabrics selected, I arranged them in order from the center out and numbered them. Then, I went to GO! Quilt and “built” the design there.
Since I wanted to be very organized, I printed out the coloring pages mentioned above, one for the warm blocks and one for cool. I even wrote “warm” and “cool” on them with the number of blocks needed (remember: math is coming).
I filled in numbers for each fabric where it fits in the blocks and made a guide for myself with numbered swatches of my fabrics.
From here, math is easy. I counted the number and color of each shape needed to complete one block and multiplied that by the number of blocks to create my personalized cutting guide. For example, for Fabric #1, I need one of Shape B in each warm block. Since I will make four warm blocks, I need to cut four of Shape B in Fabric #1.
The number of pieces you’ll need from your background should match the pattern. For now, we’re focusing on cutting just the block pieces; we’ll tackle setting triangles later.

Organizing Those Pieces
Once cut, you’ll want to keep your pieces organized by color. This is where the numbering system comes in really handy. One of my favorite methods is a different plastic zip bag for each, but there are plenty of ideas out there:
- Divided boxes
- Magnets and metal trays
- Foam core pin boards
- Muffin tins
- Silverware drawer organizers
The perfect method is the one that works the best for you! I’m using 12 prints plus my background, so I’m taking my organizing pretty seriously for this one.

Finally, It's Time to Cut
With all your organizing, your cutting process should be smooth sailing! Gather up your fabric, that math you did earlier and your pattern/cutting directions from the blogs and we’re ready to GO!
I would suggest cutting your fabrics in your numerical order just to help you stay organized. For my four warm blocks, I only needed to cut four of Shape B from my Fabric #1, leaving space for me to cut Fabric #2 at the same time. Remember: you can cut up to six layers of your quilting cotton at a time on the dies, so that will help you make quick work of your cutting.
Some of you may remember that I love plaid fabric, so of course, a few plaid prints found their way into this project! Working with plaid or check fabric is easy to master - just be sure to square up your fabric before you start cutting, using the lines in the fabric. I fanfolded my yellow plaid over the shape and made sure it was lined up - it worked like a charm!

Rotary Cutting Tip: Your Shape B/Half Square Triangles (HSTs) will be used to create the corners for the blocks, which is why you’ll be cutting your squares apart from corner to corner now and not after they are sewn together, as you normally do when creating HST units.
Die Cutting Tip: There are six of Shape A on the die. If you find yourself needing, for example, eight from one fabric, I suggest measuring a strip that can cover four of the triangles and be fanfolded to give you the eight you need and not over-cut.
Lengthwise Grain Reminder
Remember that whenever you cut using a die with crosswise blades, you should keep the lengthwise grain/selvedge edge of your fabric parallel to the long side of the blades as the die goes through the cutter. This is due to mechanics of die cutting. If you are using traditional rotary cutting, this will not apply to you.

All Done - For Now!
That’s it for Week 1! Next Wednesday, we’ll start sewing our blocks together, but until then, we hope you’ll share pictures of your progress with all of us on social media using the hashtag #AQSews in your description of the picture, so we can all share with each other.
We also encourage you to join the AQS Quilting Project Parade Facebook Group. This is a wonderful way to connect with a global, virtual community of quilters. You’ll find plenty of information and inspiration being shared here. Pam and I will be popping on from time to time answering your questions and sharing our pictures, too!


