


Hi Everyone! I’m Vicki from Vicki’s Crafts and Quilting and I'm one of the newest AccuQuilt GO! Getters! I am excited to help you get ready for your holiday baking while using two of the newest dies: GO! Classic 2" Alphabet Uppercase Set (55559) and GO! Gingerbread Cookie (55682).
Everyone needs a new apron and matching hot pads to start off the baking season in style! Today I will show you how to whip these up in no time. Remember these will also make wonderful gifts. Let's get started!

Dies Used:
- GO! Classic 2" Alphabet Uppercase Set (55559)
- Go! Gingerbread Cookie (55682)
- Go! Rick Rack (55056)
- GO! Strip Cutter 2½" (2" Finished) Strip Die (55014 or 55017)

Other Supplies you will need:
- One apron: You can choose to make your own (here's a pattern you can follow) or purchase one like I did. If purchasing, it is a good idea to prewash it.
- Fabric for two Pot Holders: two 9" squares of main fabric and two 9" squares of backing fabric, and two 2½" x WOF strips for binding
- Fabric for appliqués (red, green, brown)
- Thread (brown, green, red, white)
- Buttons
- Ribbon
- Fusible web (use your favorite brand)
- Batting-four 9" squares (I used two of 80/20 and two of Insul-Bright)
Cutting Appliqué Shapes
First you will apply fusible web to the back of your fabrics before cutting with your AccuQuilt. Follow manufacturer's directions for this.


When using a directional die such as the alphabet die be sure to lay your fabric right side up. Remember when using the fusible, it acts as a half layer of fabric, therefore only using 4 layers.

The Apron
Place your die cut rick rack on the bottom of your apron and fuse in place following the fusible manufacturer's directions. Do the same for your gingerbread cookies and the word "COOKIES" using the photo below for placement.

Machine appliqué in your favorite way. I chose to use a small satin stitch. You can use a favorite stitch on your sewing machine to add detail to the gingerbread cookie before appliquéing around his outside and add buttons and a red ribbon to dress him up. The inside of one of the O's can be cut into a heart shape to add a bit more cuteness! If you have an embroidery sewing machine, you can download the FREE GO! Classic 2" Alphabet Uppercase Embroidery Designs to easily appliqué your letters.

The Potholders
For each potholder, layer a backing, two layers of batting (I used one layer of 80/20 and one of Insul-Bright) and the main fabric. Quilt all these layers together. I used straight line quilting.

For the first potholder, keeping in mind you will be trimming to 8" square, fuse one of those outside pieces of the rick rack (the ones I mentioned don't throw away) on the bottom of the potholder. Fuse the gingerbread cookie above that then appliqué in place.

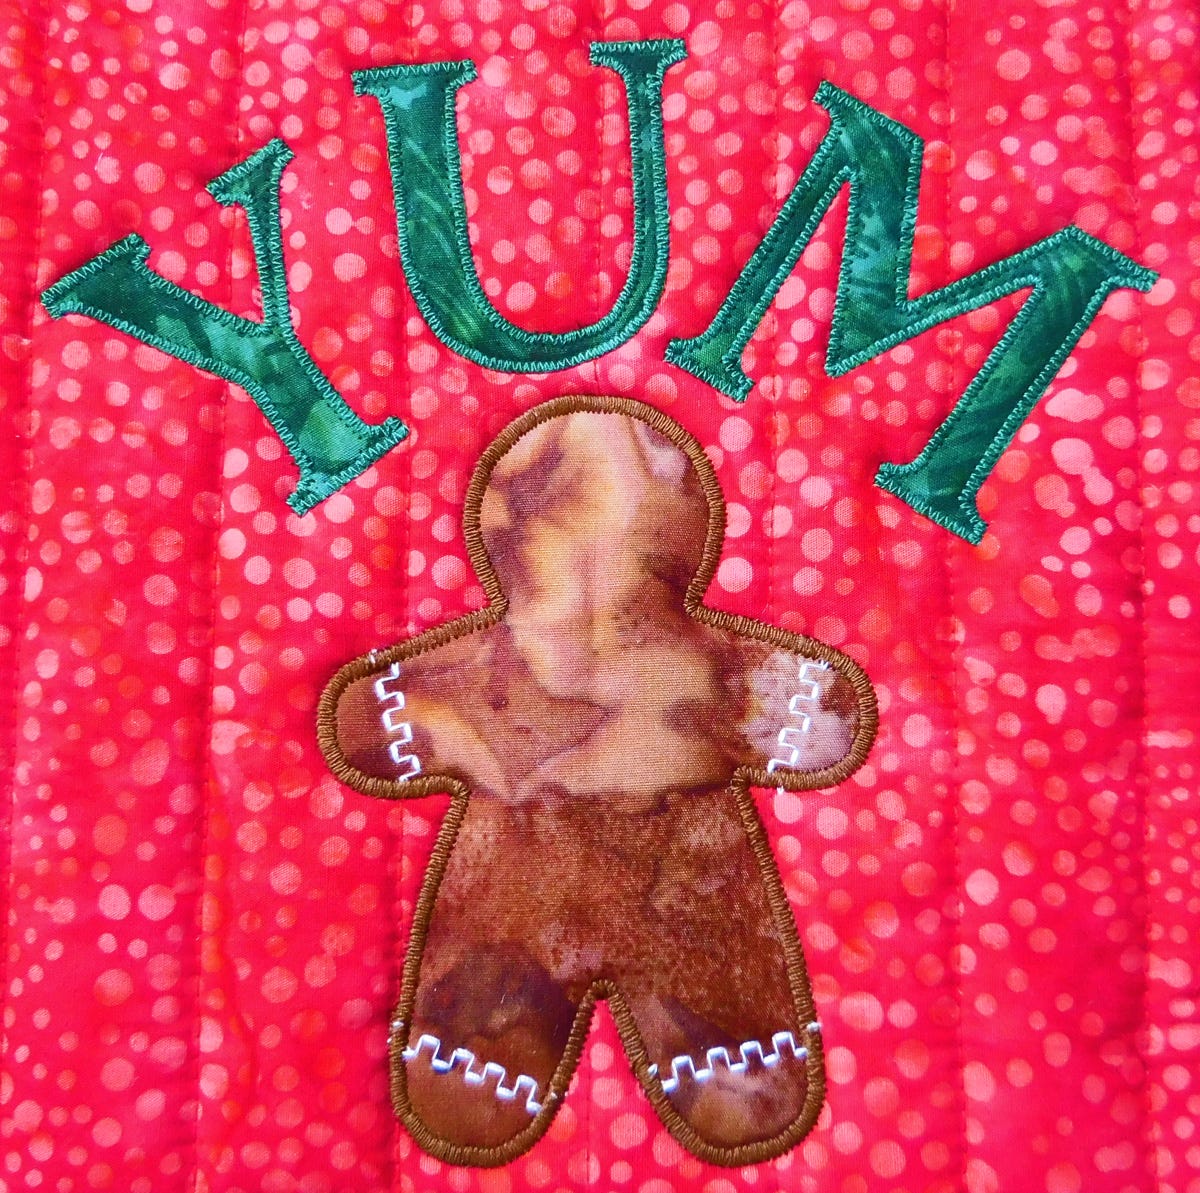
For the second potholder, after quilting, fuse the Cookie in place with the letters YUM in an arch over it. Once again keep in mind you will be trimming to 8".
Now it is time to trim up to 8" square. On the first potholder use the bottom of the rick rack as your cutting line. Bind using your favorite method.
You have your complete set done! Enjoy using or giving.

I hope you have enjoyed this tutorial. Hmmm what's that I smell? There is nothing like a fresh gingerbread cookie! Happy holiday baking, my friends! If you make this project I'd love to see it. Tag me @vickiscraftsandquilting and @AccuQuilt on Instagram or Facebook!
Happy Quilting
Vicki
{{cta('3af812e3-d556-48d1-969f-2064b383b135')}}


