
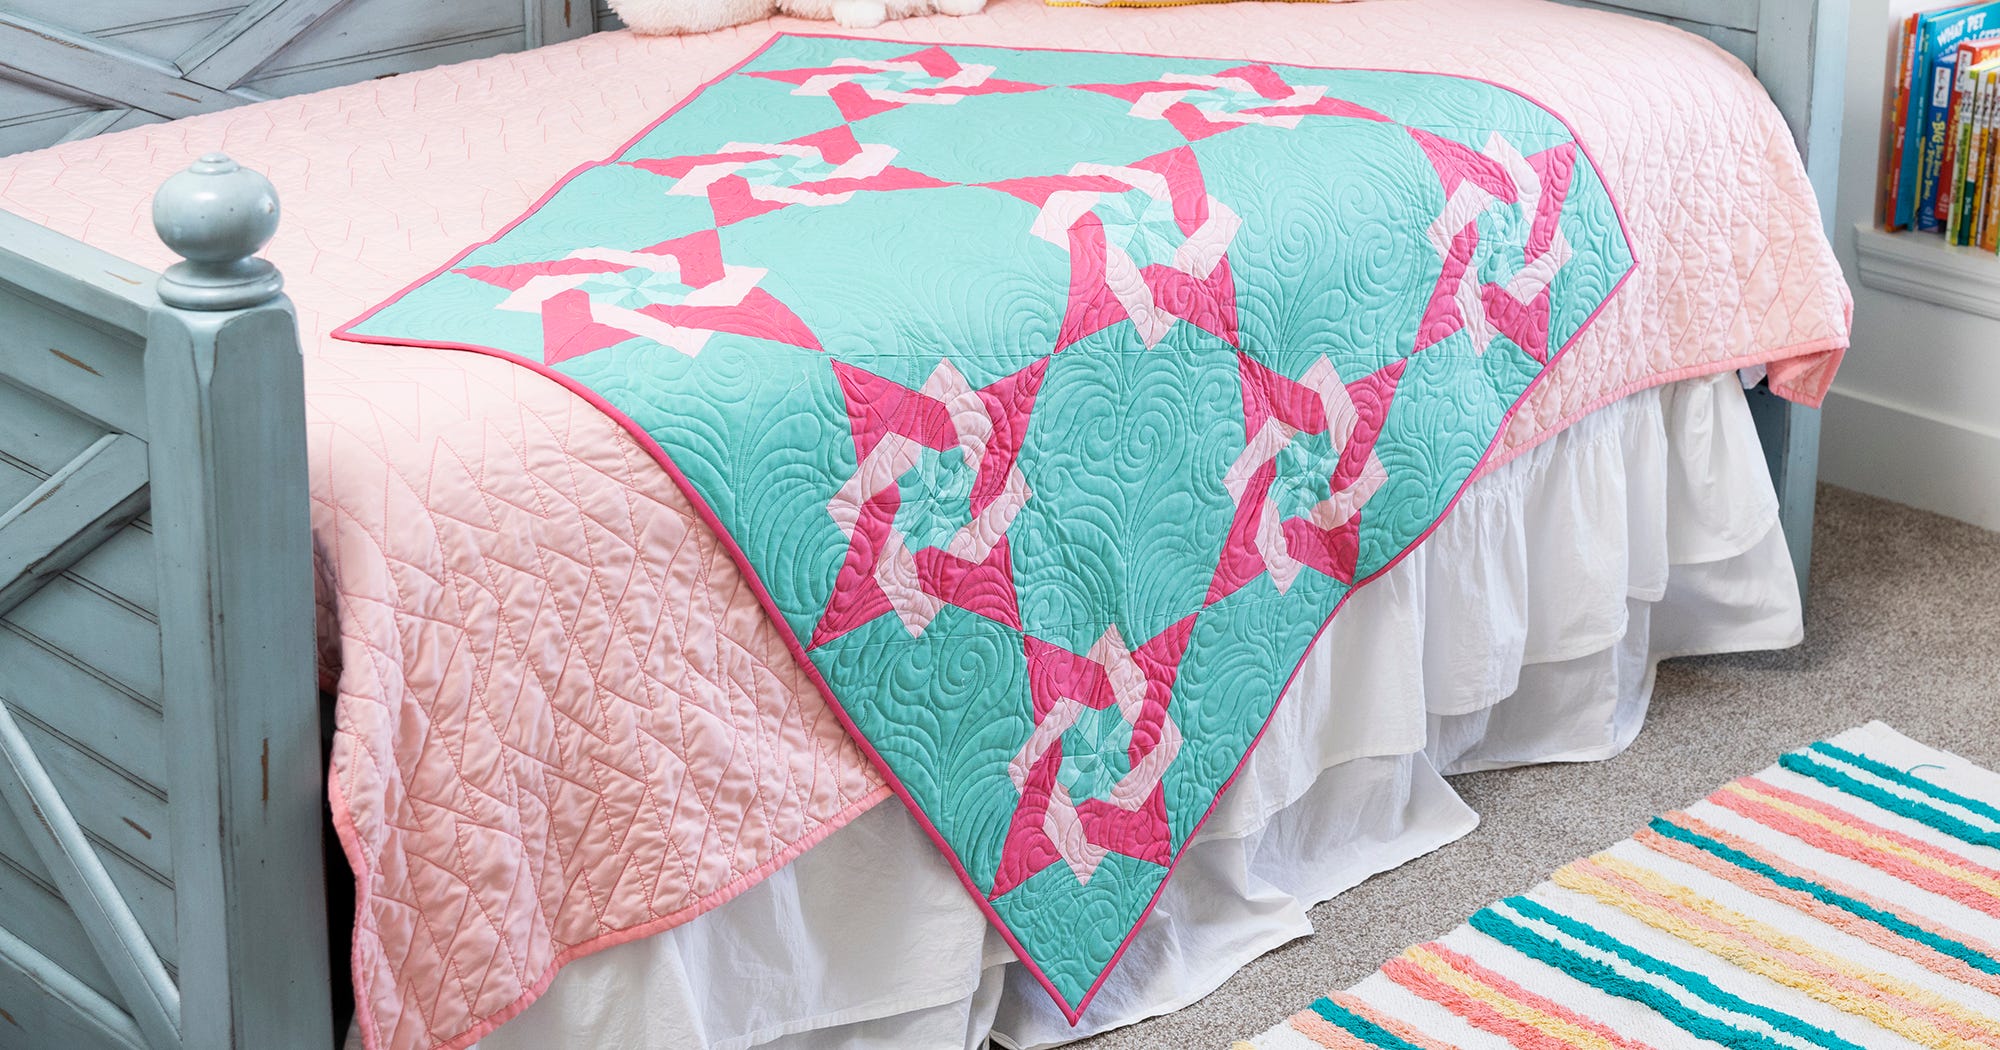
Welcome back to the first of the 2024 AQS & AccuQuilt-Alongs. We’re making the Grapefruit Slice Throw Quilt together to start the year. Last week we cut and organized our pieces, so now it’s time to sew!
If you missed last week’s live show or blog post, don’t worry! There’s still time to jump on into this AQS & AccuQuilt Along, so let’s review the basics!
We introduced this project in the AQS and AccuQuilt blogs and on the AccuQuilt Live show on January 31. You can go back and read those blogs at anytime and watch the show on our website, Facebook or YouTube. The blog posts included traditional cutting directions and free, downloadable templates to print and use if you don’t have an AccuQuilt system or the GO! Tangled Star die.
You’ll also want to download the free pattern on our website for the full assembly directions, no matter how you plan to cut out your project.
On Feb. 14, we celebrated Valentine’s Day by starting our Quilt-Along. We cut the 9 Tangled Star blocks and got our pieces organized so we would be ready to sew today. Again, you can find information on that step by reading our blog post and watching (or even re-watching) the Feb. 14 show.
-
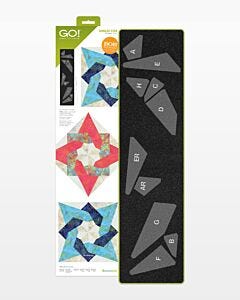 GO! Tangled Star-10" Finished DieSpecial Price $89.99 Regular Price
$104.99You Save $15.00
It's Sew Time
AccuQuilt Cutting Expert Pam Heller and I have been blown away by the number of quilters who’ve already completed blocks, including their test blocks. Making a test block is always a best practice before you cut into your “good” fabric, but now is “GO!” time and we are ready to start!
You’ll want to refer to the free, downloadable pattern for help in laying out your pieces and assembling your blocks. You’ll soon see how simple this block really is, even though it looks complex.
If you love to chain piece, this quilt is perfect for you! You’ll need 9 blocks and each is made up of 4 identical units. Following the directions, I started with sewing my Shape H and Shape ER pieces together. Again, you will want to refer to your pattern to make sure you have the pieces put together correctly, and here’s a tip: The dog ears are specially designed just for this block, and will help you line up every piece perfectly!

Here's another tip – press all your seams open with this project. There are many seams, and pressing seams open will really help cut down the bulk when you start to assemble this units in this block.
I love keeping a wool pressing mat and small iron right beside me when I sew, since chain piecing always leads to chain pressing! You could also use a June Tailor Cut’ n Press board – especially if you are taking your project with you to a retreat or open sewing event. If you have a wooden clapper, you may want to use that to help with getting those seams really flat.


With your H/ER units together, next will be sewing Shape G onto that unit, then sewing Sapes C and AR together, again pressing those seams open. Complete this unit by sewing the C/AR unit to the side of G for half of your basic unit! This unit is now the shape of a half square triangle, so let’s sew the other half.
The other half of the unit starts with sewing Shape A to Shape B. After you press that seam open, sew Shape D onto the A/B unit, again pressing that seam open.
Next, sew Shape E to Shape F, making sure to have the pieces the correct direction. This unit will be sewn to you’re A/B/D units to create the other half of your main units.


Once you are done with your 9 blocks, give them a nice press and do a little happy dance because you’re all done for the week!

Next Week
Next week, we will be cutting out setting squares and triangles so we can finish off this top! Be sure to share pictures of your progress all along the way with us on social media using #AQSews. You’ll also want to join the AQS Quilting Project Parade Facebook group. If you have any questions along the way, Pam and I will be popping on from time to time, but this is such a wonderful and supportive group that you may have another quilter send the answer your way before we even have a chance!
Have a great week, and happy stitchin’.


