


Hey, quilters! Laura Strickland here from Orange Blossom Quilt Design Studio, LLC. Today, I am going to show you how to enhance your quilting projects with magic binding!
Why I Enjoy Magic Binding
I have always loved when I get to the end of a quilting project and can sit and hand bind. For years, I always loved this relaxing last step. However, when I began creating quilt patterns, I needed to use a different method since I could no longer devote two evenings or more to binding my quilts.
After a ton of research, I found a piped, or magic, binding to be the technique I most favored. I love the way hand binding finishes on the back of the quilt, and magic binding gives a clean, finished polished look, just like the traditional hand-bound edge.
How Easy Is Magic Binding?
Magic binding can be put on entirely with a sewing machine. Applying the binding is fast, but creating the binding strips using a GO! Fabric Cutter and GO! Strip Cutter Dies makes this process lightning fast.
How To Utilize Magic Binding In A Quilt
One of my favorite projects using magic binding is the GO! A Walk in the Woods Throw Quilt. I am going to show you how to recreate it yourself!
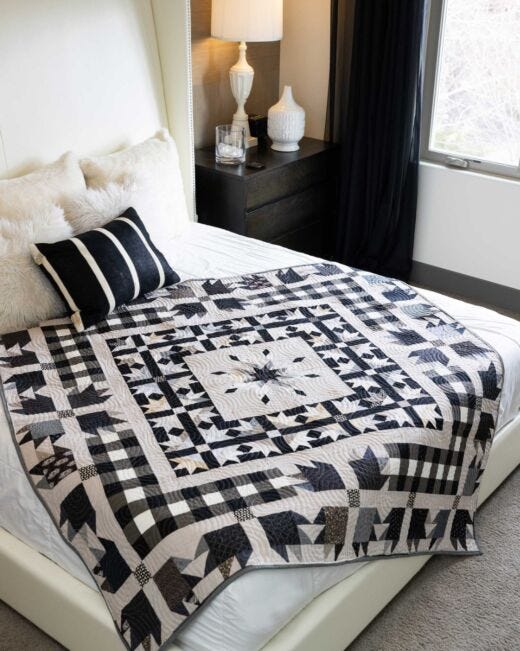
I just love how the Bear's Paw and Prairie Star blocks come together, and this intricate design is so easy to make!

Sorry, Quilters! There's A Bit of Math To Begin
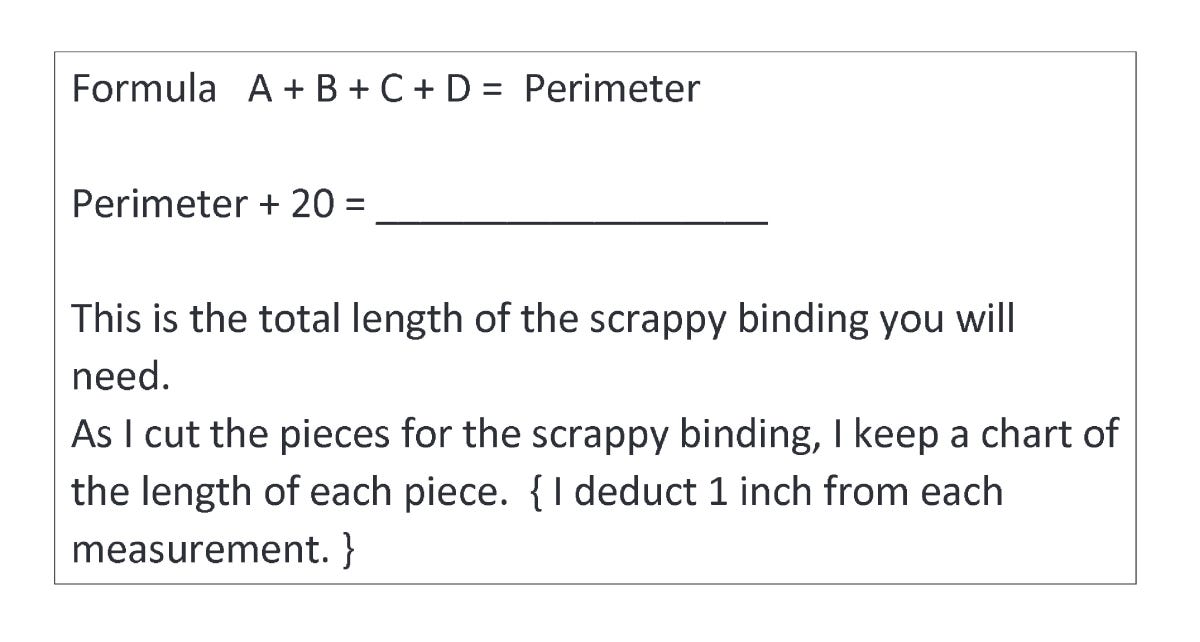
For magic binding, you need to first know how much binding you need. Here is the quick formula for determining that: to find the total inches of binding needed, you need to add the measurements of all four sides.
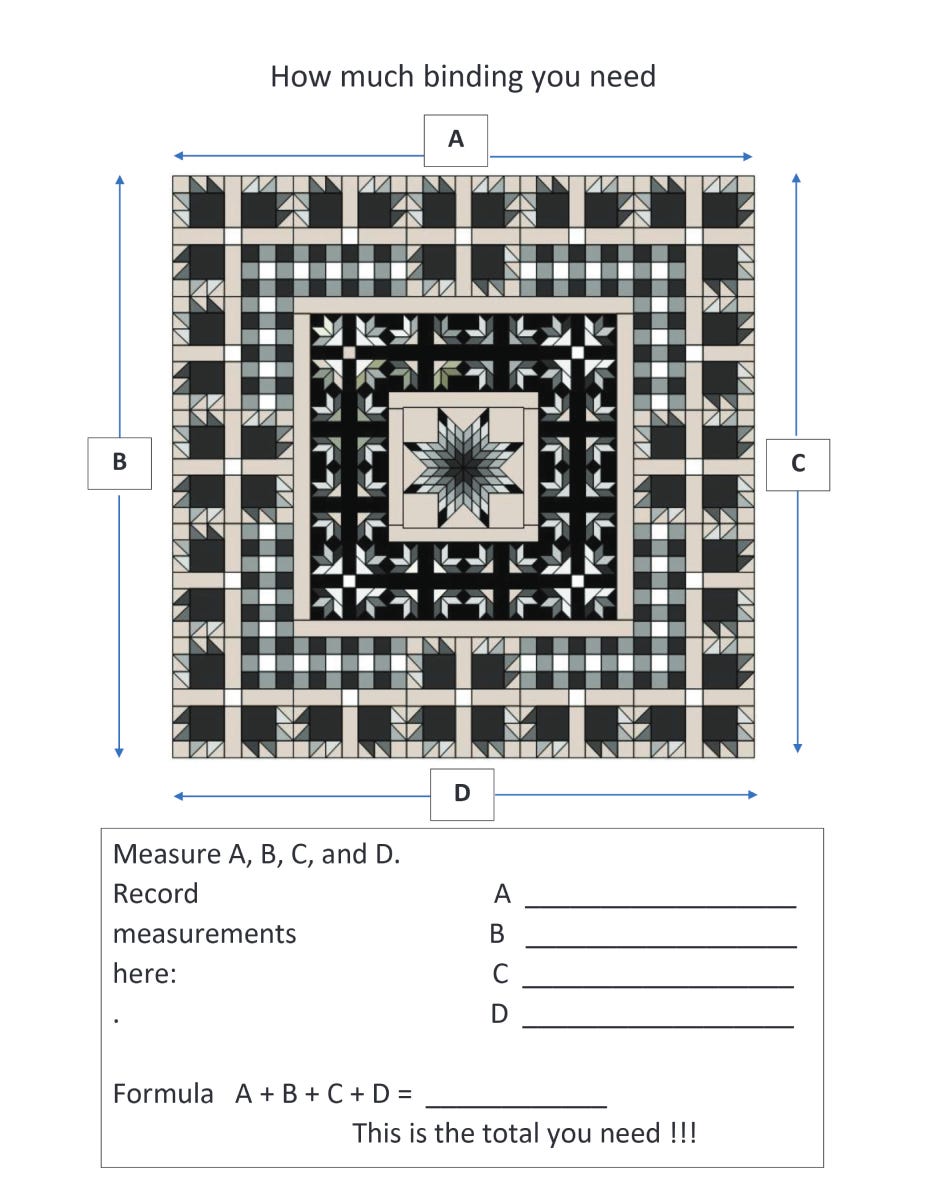
Once you have the total number of inches around the perimeter of the quilt, you need to decide if you are using one fabric or a scrappy binding. In the picture above, I used the yardage of one fabric for the main part of the binding, and I made the piping scrappy by using leftover fabric scraps from the quilt's construction. You can do both pieces using fabric yardage.
You can also make either the piping or the binding scrappy. However, making both the piping and the binding scrappy is too much and I advise against this look. It won't turn out the way you envision it.
For whichever piece or pieces you are using fabric yardage, this is the next formula to use:
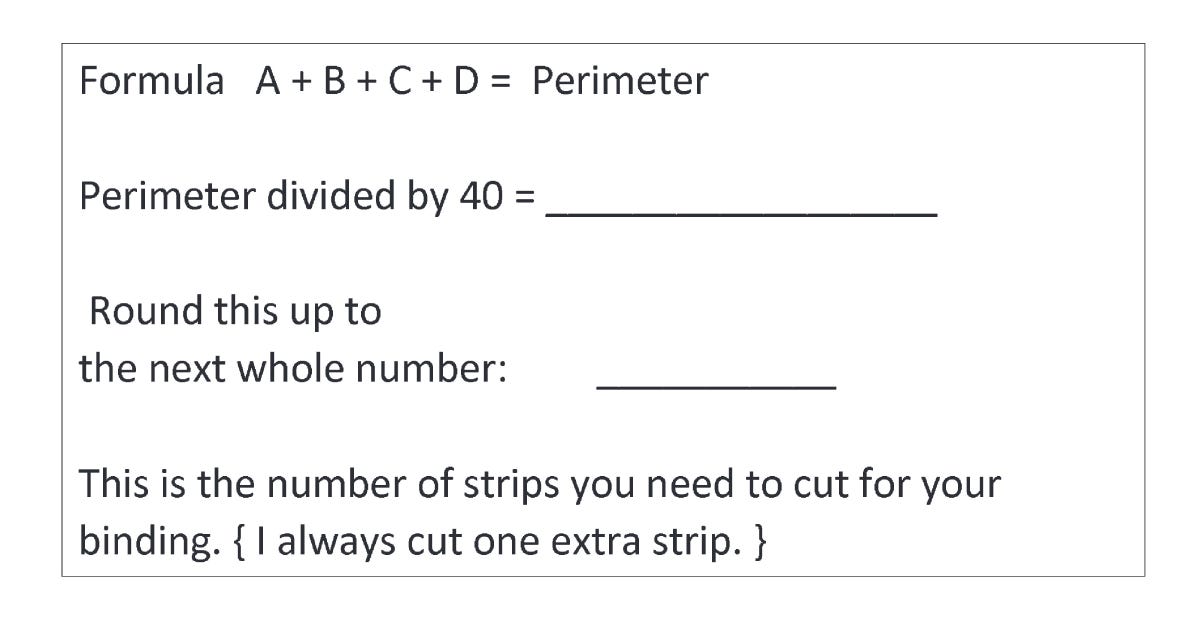
If you are choosing to make either piece scrappy, then use this formula:
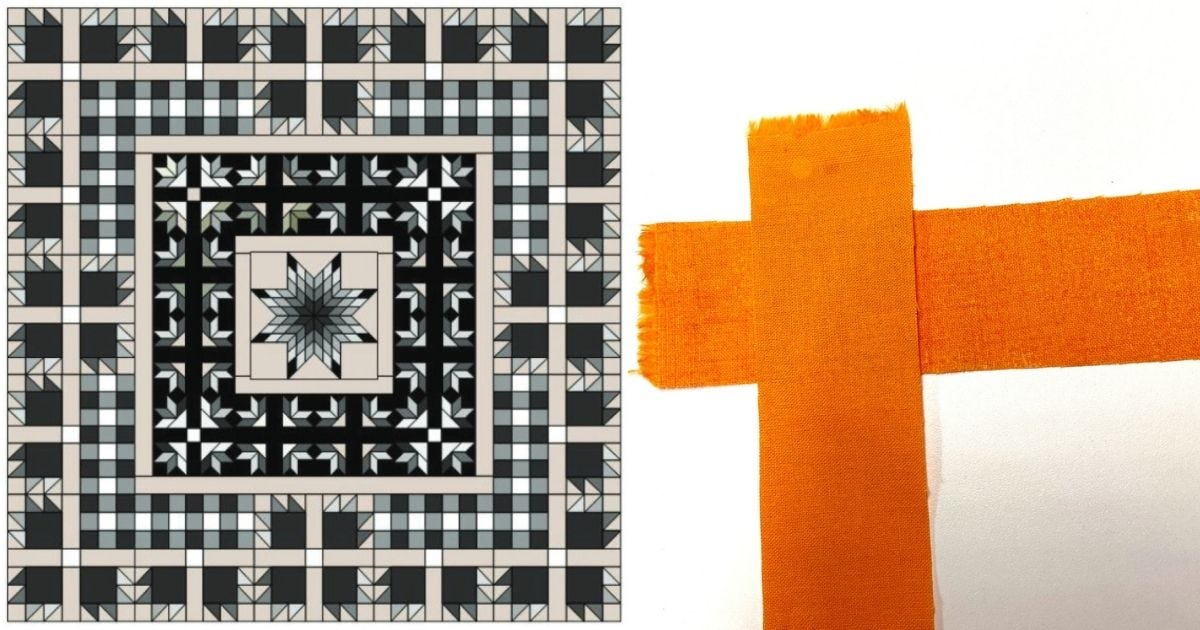
In traditional piecing, the binding strips are cut either 2 1/4" or 2 1/2". For magic binding, you will use skinner strips. The outer binding strips are cut 1 1/2" wide. This is cut thinner, but more of it will show.
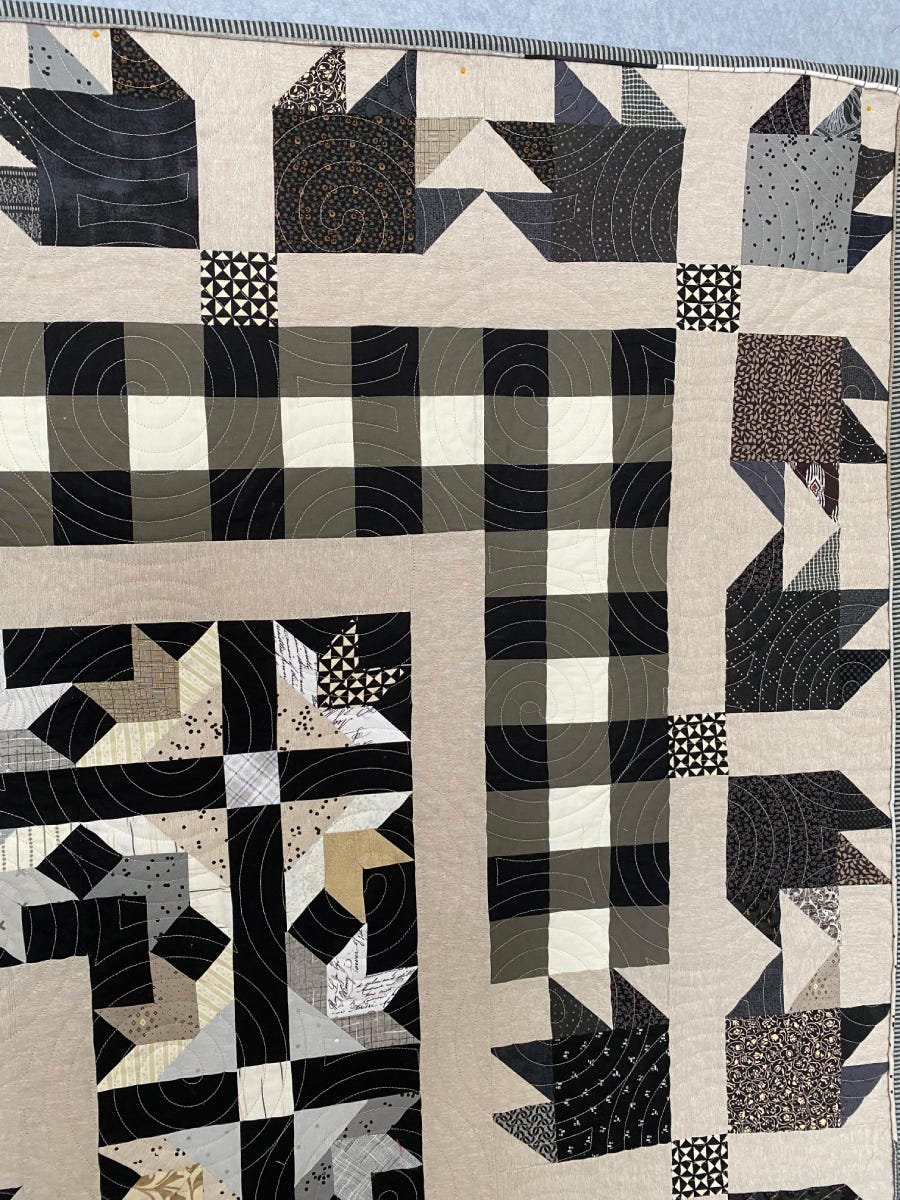
In the picture above, this is the striped fabric. The piping part of the binding is actually cut wider. This piece will be cut wider, but only a 1/4" of it will show once the quilt is bound. In the photo above, this is the scrappy piping. This part is cut 1 3/4" wide.
Instructions:
Now that you know what width the binding and piping are, step 1 is cutting your fabric. For the piping on this quilt, I used is the GO! Strip Cutter-1 3/4" (1 1/4" Finished) Die. For the outer binding, I used the GO! Strip Cutter-1 1/2" (1" Finished) 5 Strips Die.
-Die-1.jpg)
-5-Strips-Die-1.jpg)
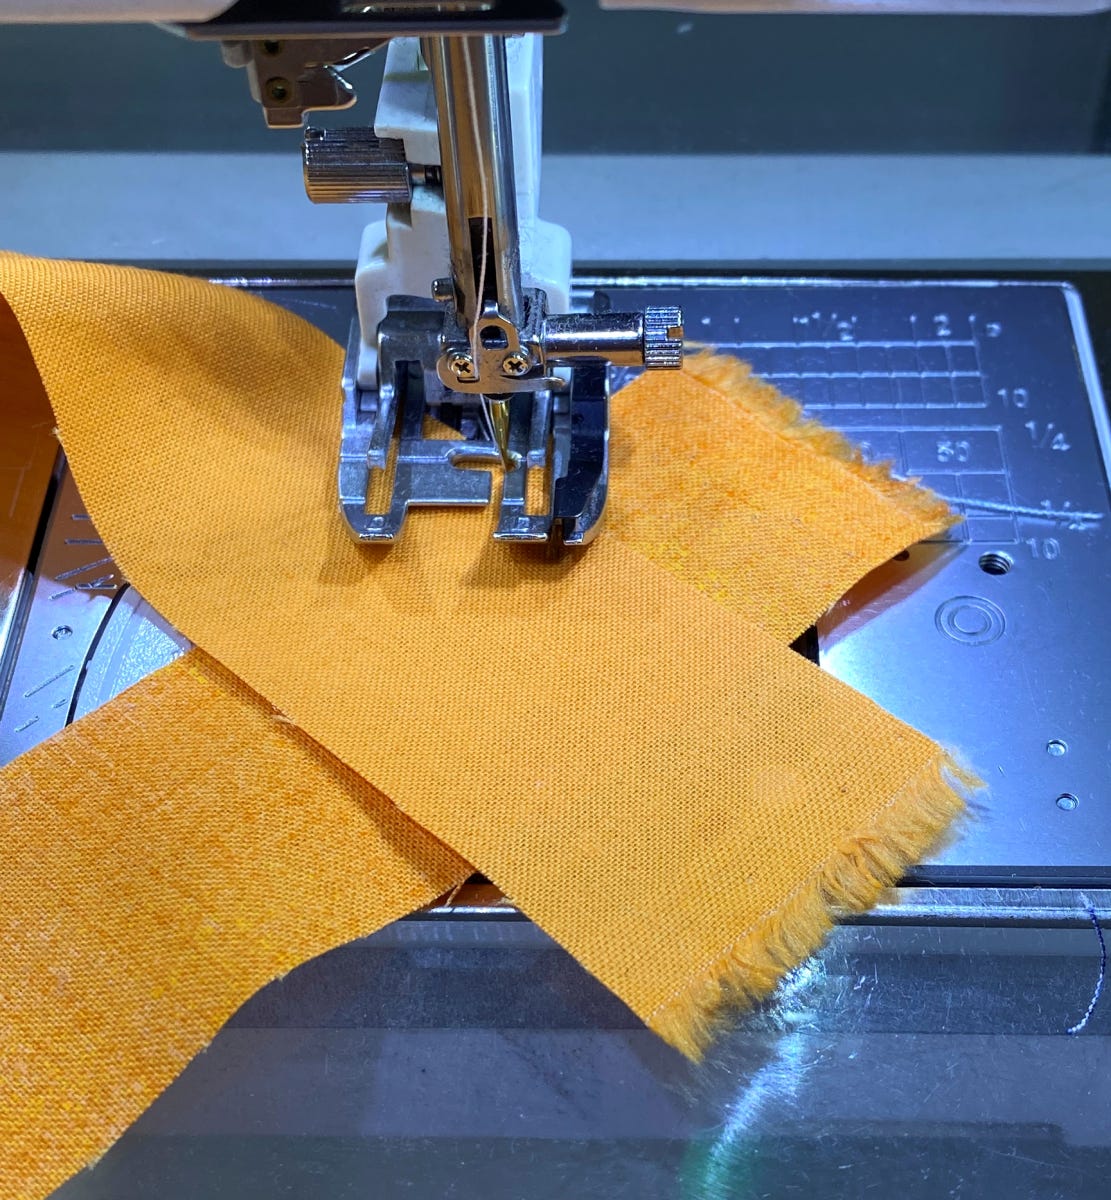
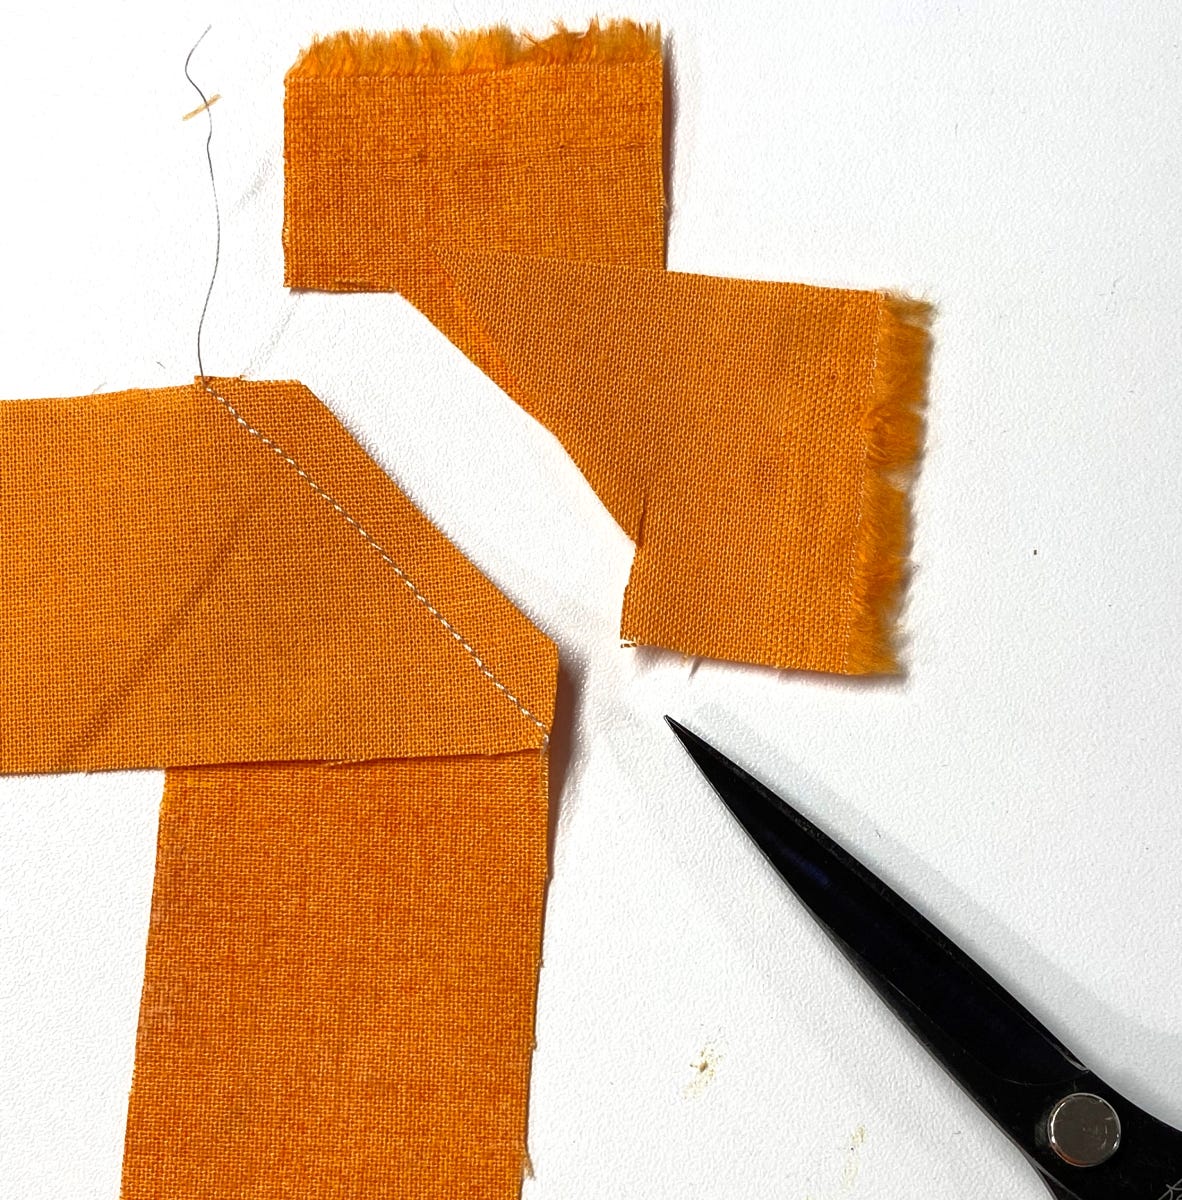
2. Once you have cut out all of the strips you need, you will need to join them into one long strip. I usually join the strips with a diagonal seam, like this:
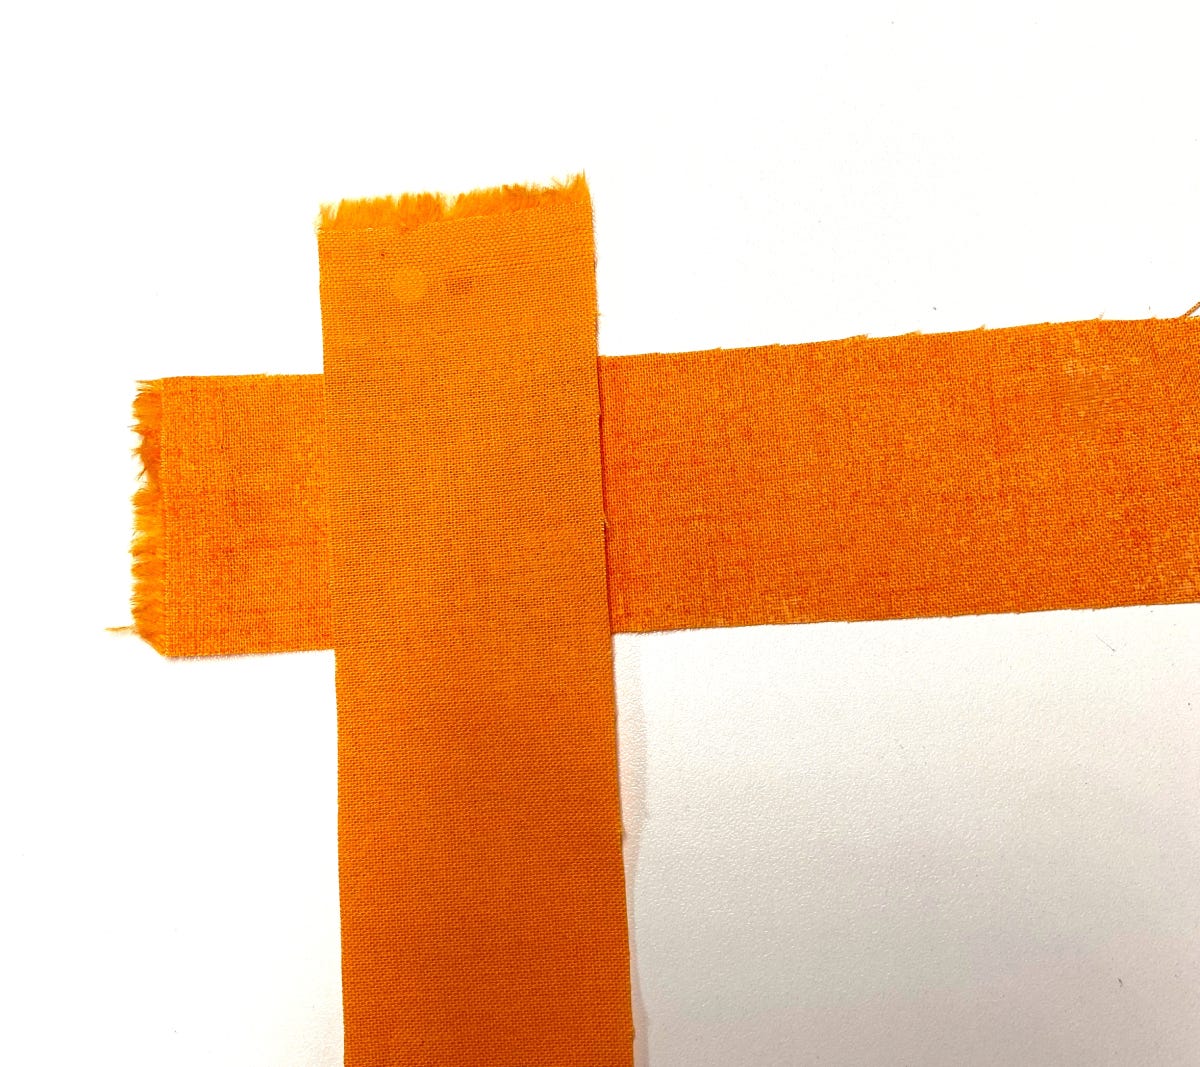
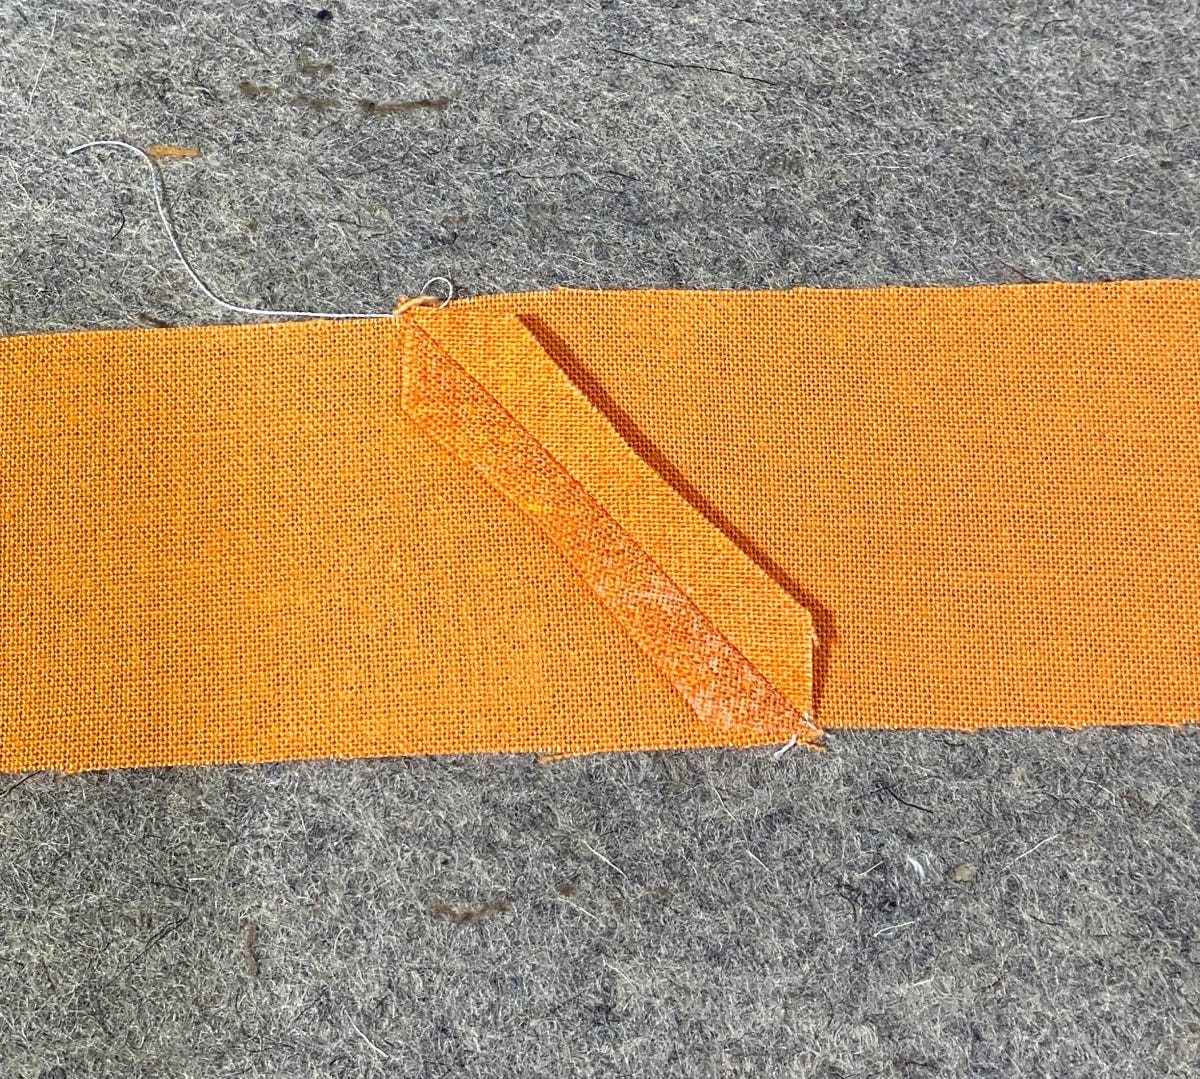
3. If the strips have stripes or need a seamless join, sew the strips together using a perpendicular seam (pictured below).
4. Trim the strips as needed.
5. Once the strips are all joined press the seams open. Use this technique for both the piping piece and the outer binding piece.
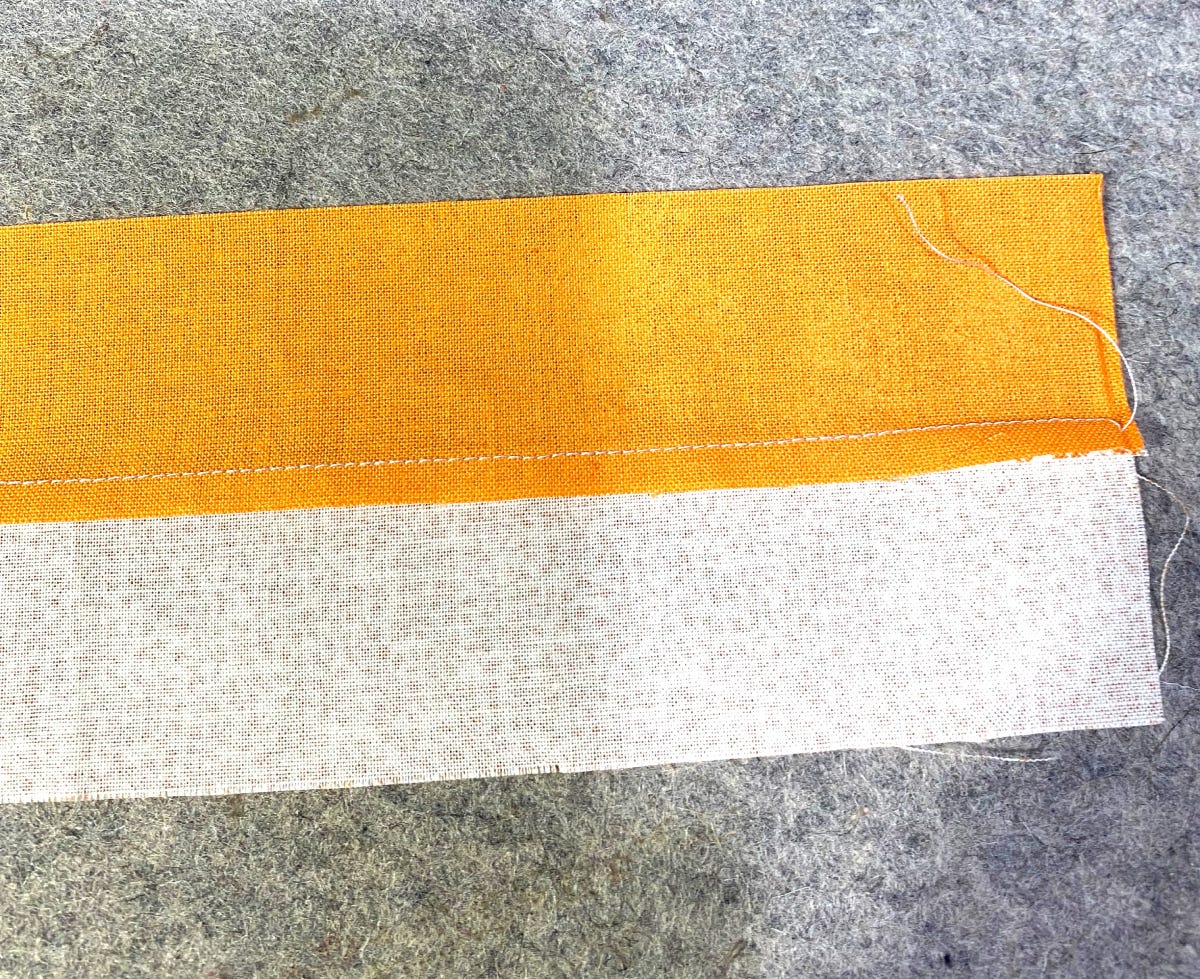
6. Once both the piping and outer binding pieces are each one long strip, sew these together to form the binding. Use 1/4" seam allowance to join them.

7. Once the two strips have been sewn to form the binding, press the joining seam. I press it open or toward the wider strip. You can press the seam however you find most effective for you.
8. Once the seam is pressed, fold the binding in half with the right side out.
9. Press the entire binding.
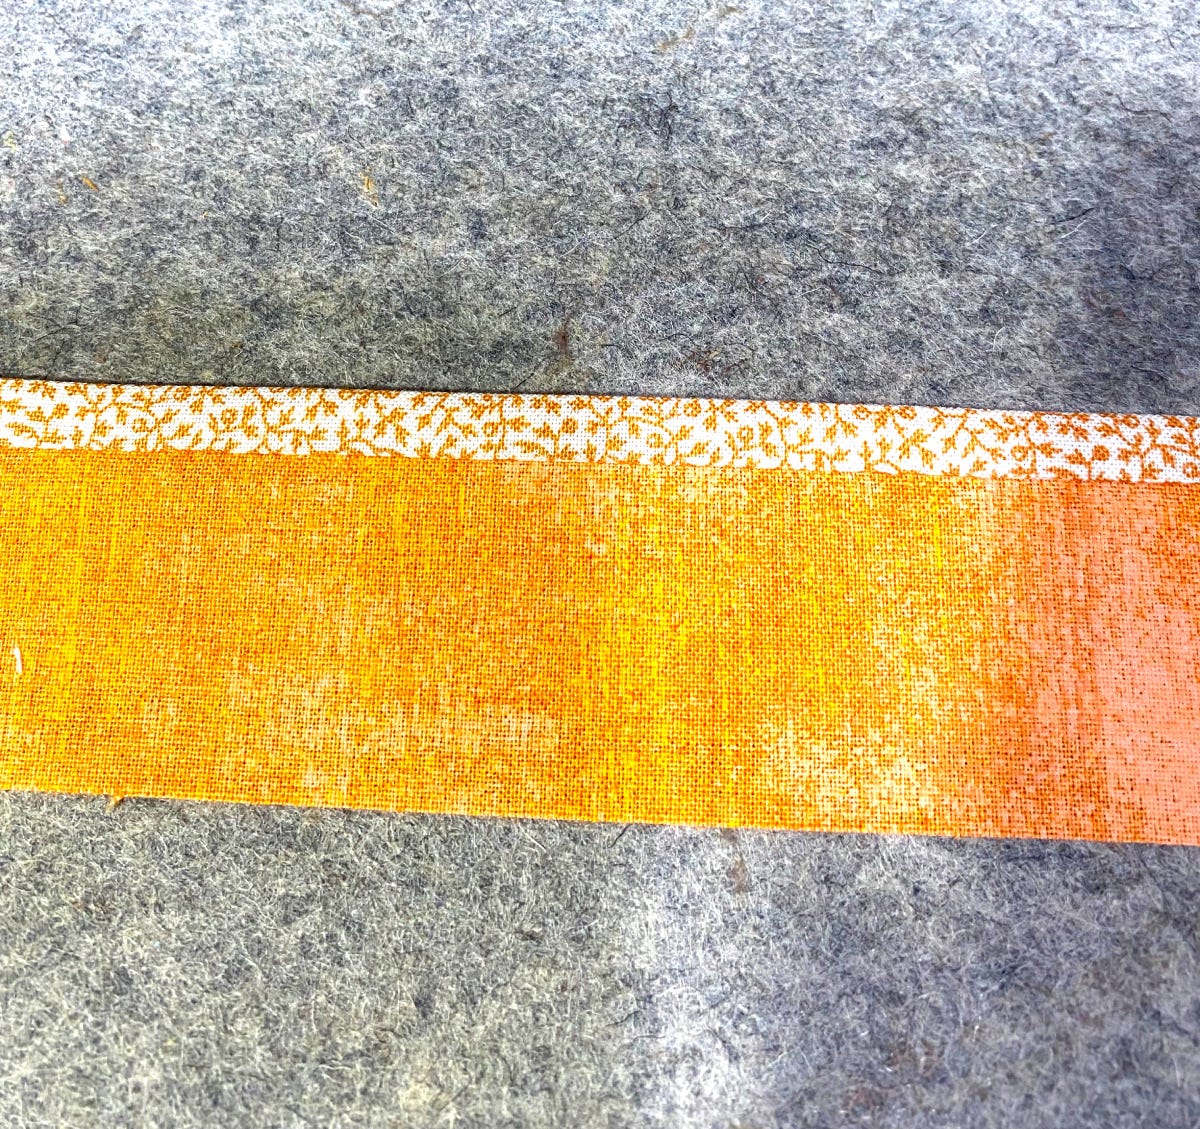
10. To apply the binding to the quilt, sew it to the back of the quilt. Line up the open side of the binding with the edge of the quilt. The binding should be laid with the piping side up. The quilt should be laid with the backside up.
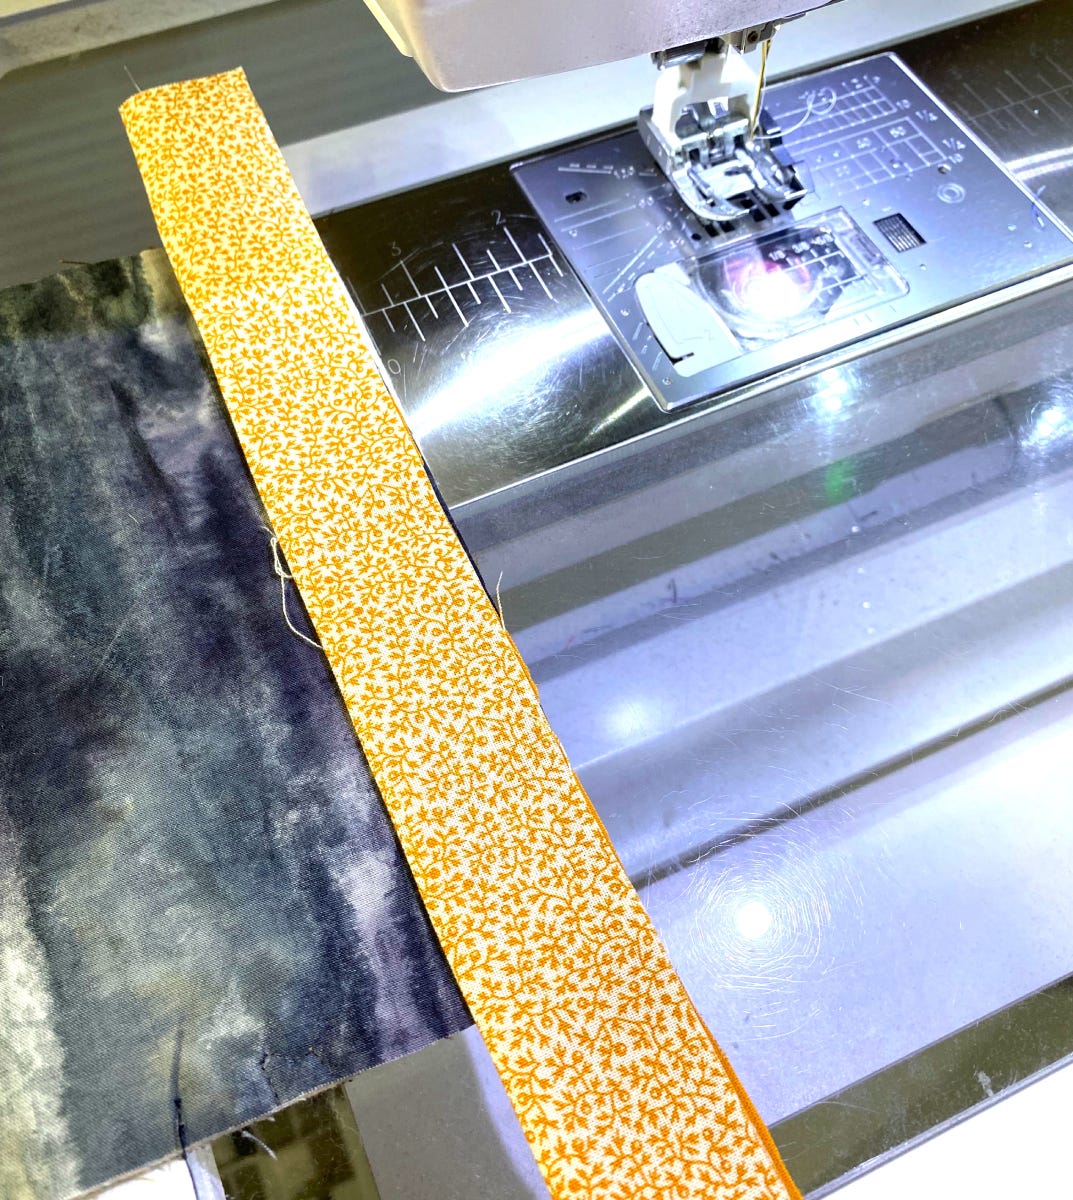
11. Sew the binding to the quilt using a 1/4" seam allowance. Leave a tail end when you start. Lock the stitch and then sew toward the first corner. Sew until you are 1/4" away from the corner. Stop and lock the stitch.
12. Fold the binding away from the quilt and parallel to the side you are going to start sewing. This will create a 45° angle in the binding.
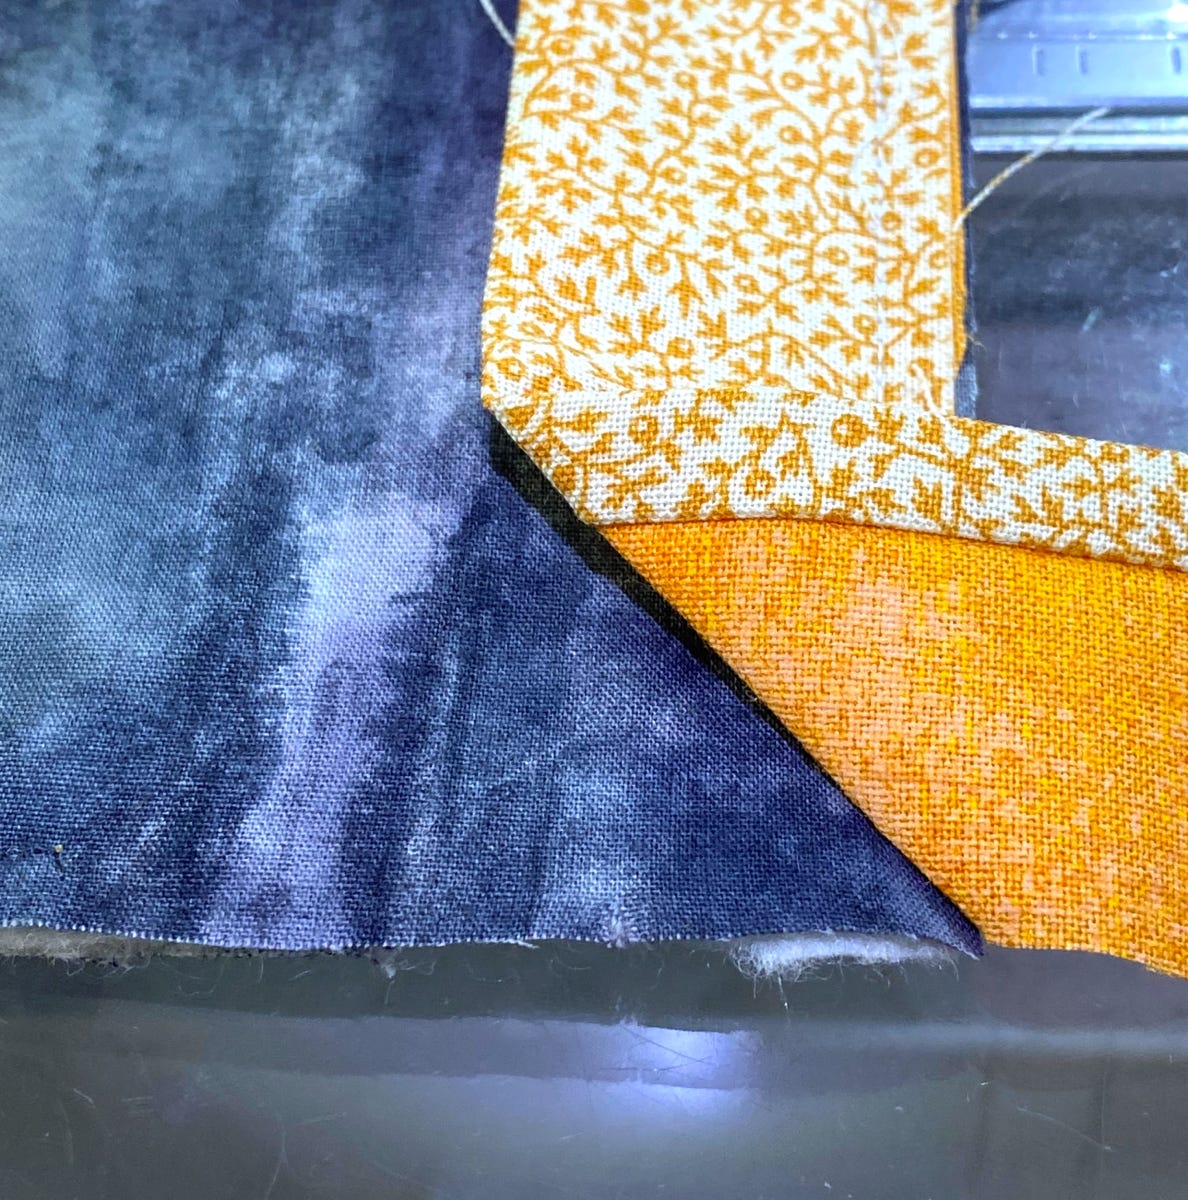
13. Now, fold the binding back down to begin the second side of the binding. Lock the first stitch 1/4" away from the top edge. Sew down this side. When you get to the end of this side, stop 1/4" from the bottom edge and lock the stitch as you did on the first corner.
14. Repeat steps 11, 12, and 13 at all four corners.
15. When you are back to the side you started on, leave a space about 8" to 9" between where you started and where you stop. There should be a tail from where you started. Leave a tail when you stop.

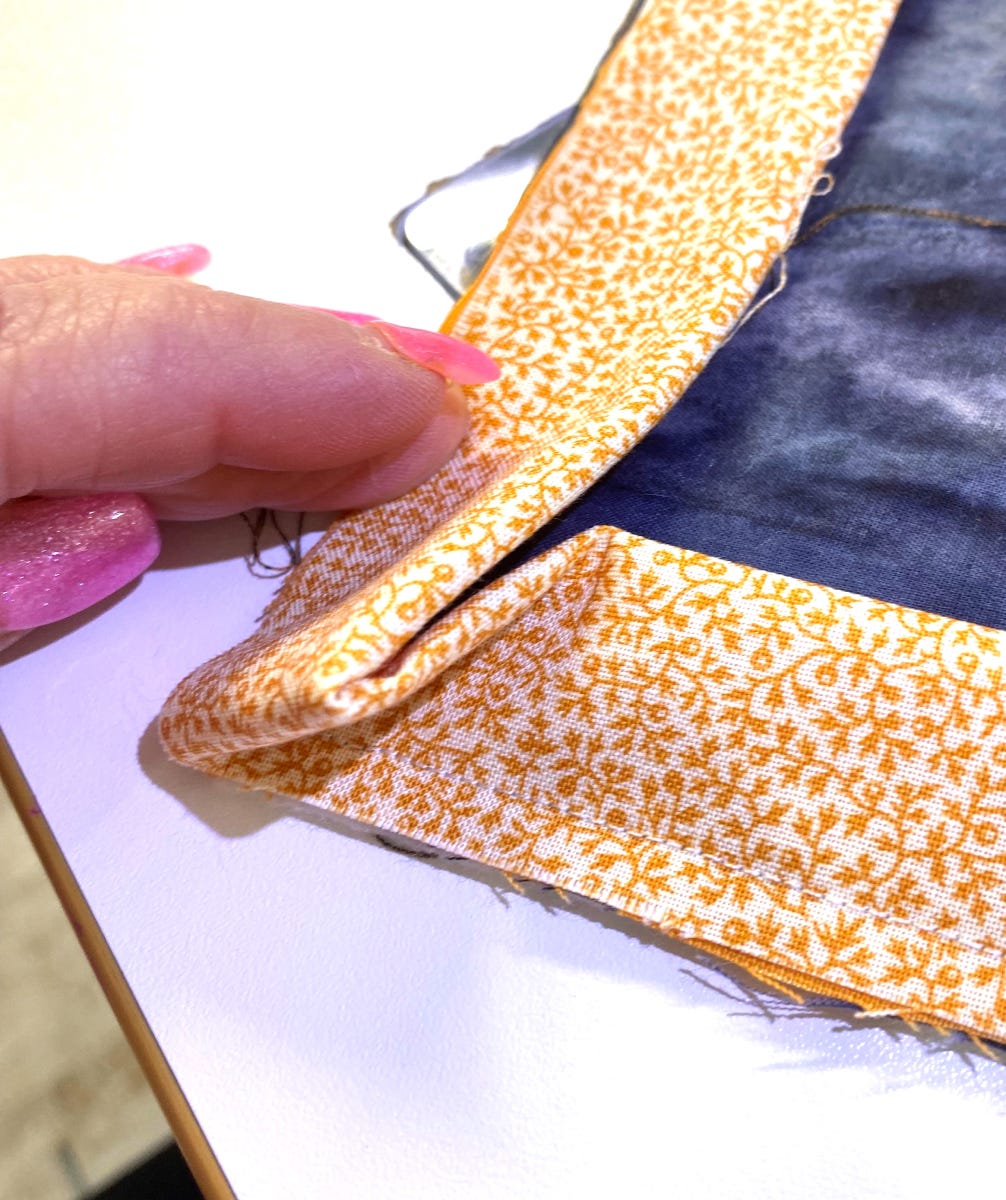
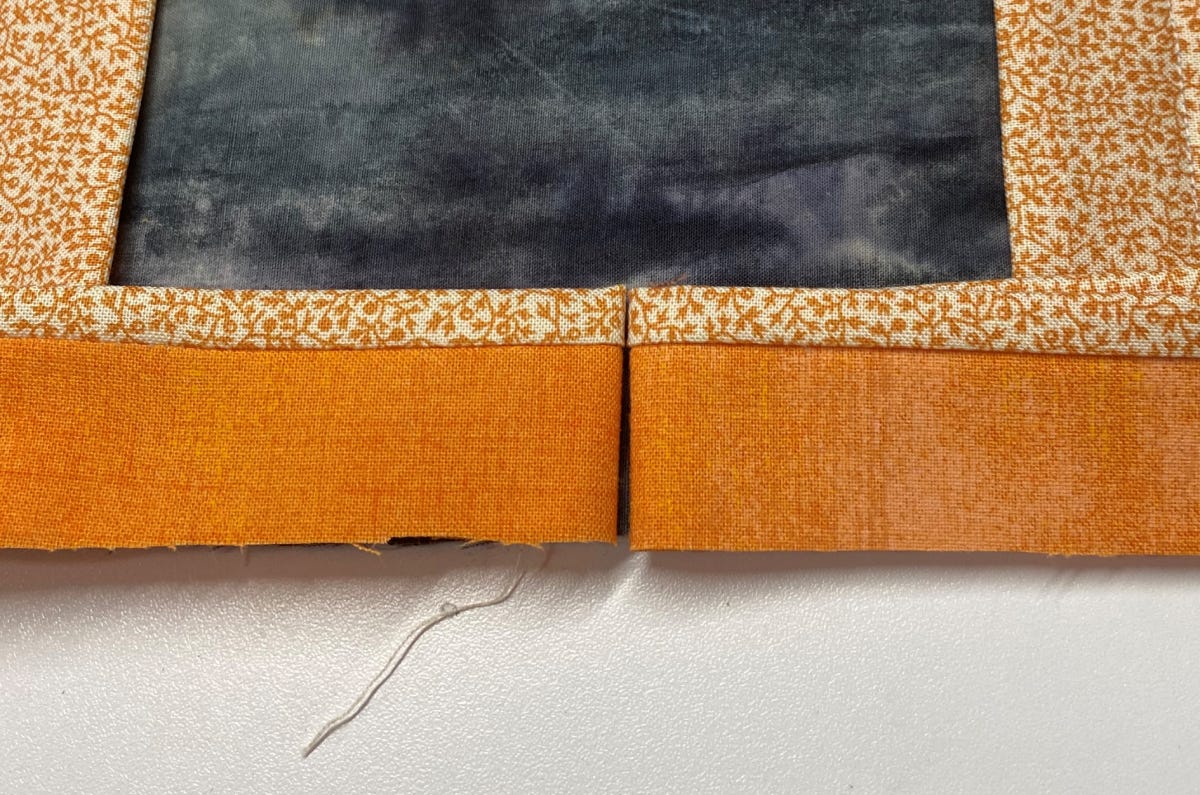
16. Bring the tails together until they touch. Then, fold each back into itself. Press them to make a crease in each.
17. Open the tails. Pin the open tails together at the pressed seams. Pin with the right sides facing each other. Sew along the crease or just shy of the crease toward the quilt side and not the tails.
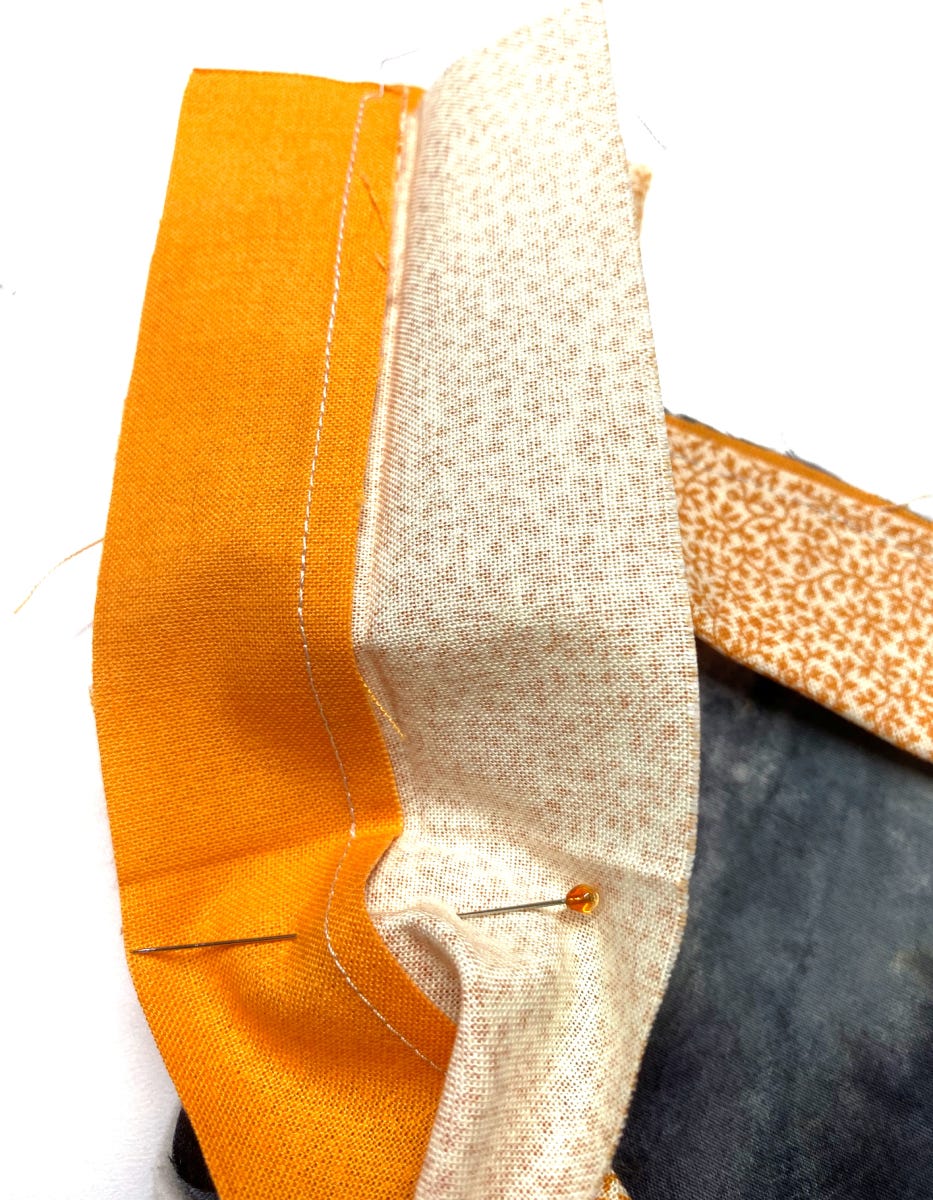
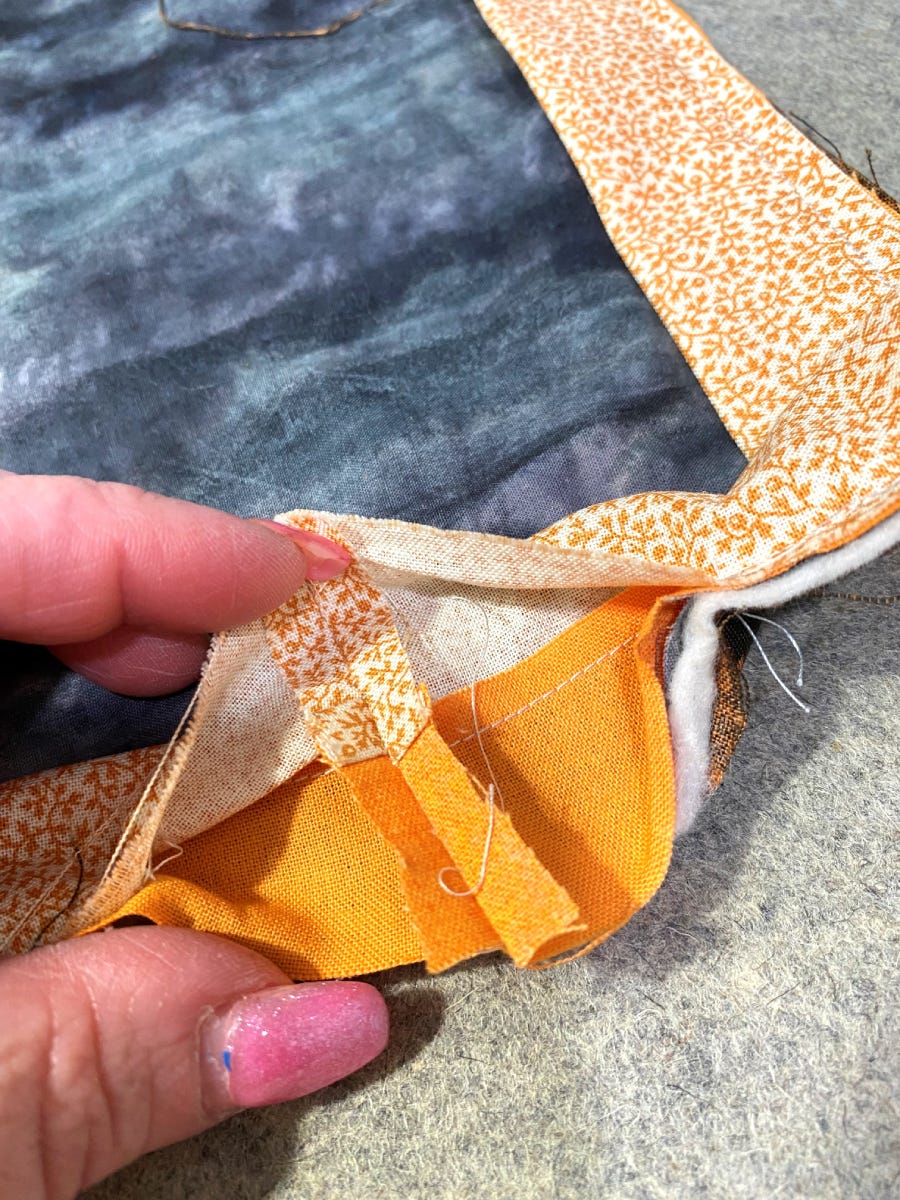
18. Once this seam is sewn, press the seam open and fold the binding back to the right sides out.
19. Press the binding.
20. Finish attaching the binding by sewing this section in place between where you started attaching the binding to the quilt and where you finished attaching the binding. Use your 1/4" seam allowance. The binding should be exactly the same length as the part of the quilt it is being sewn to.
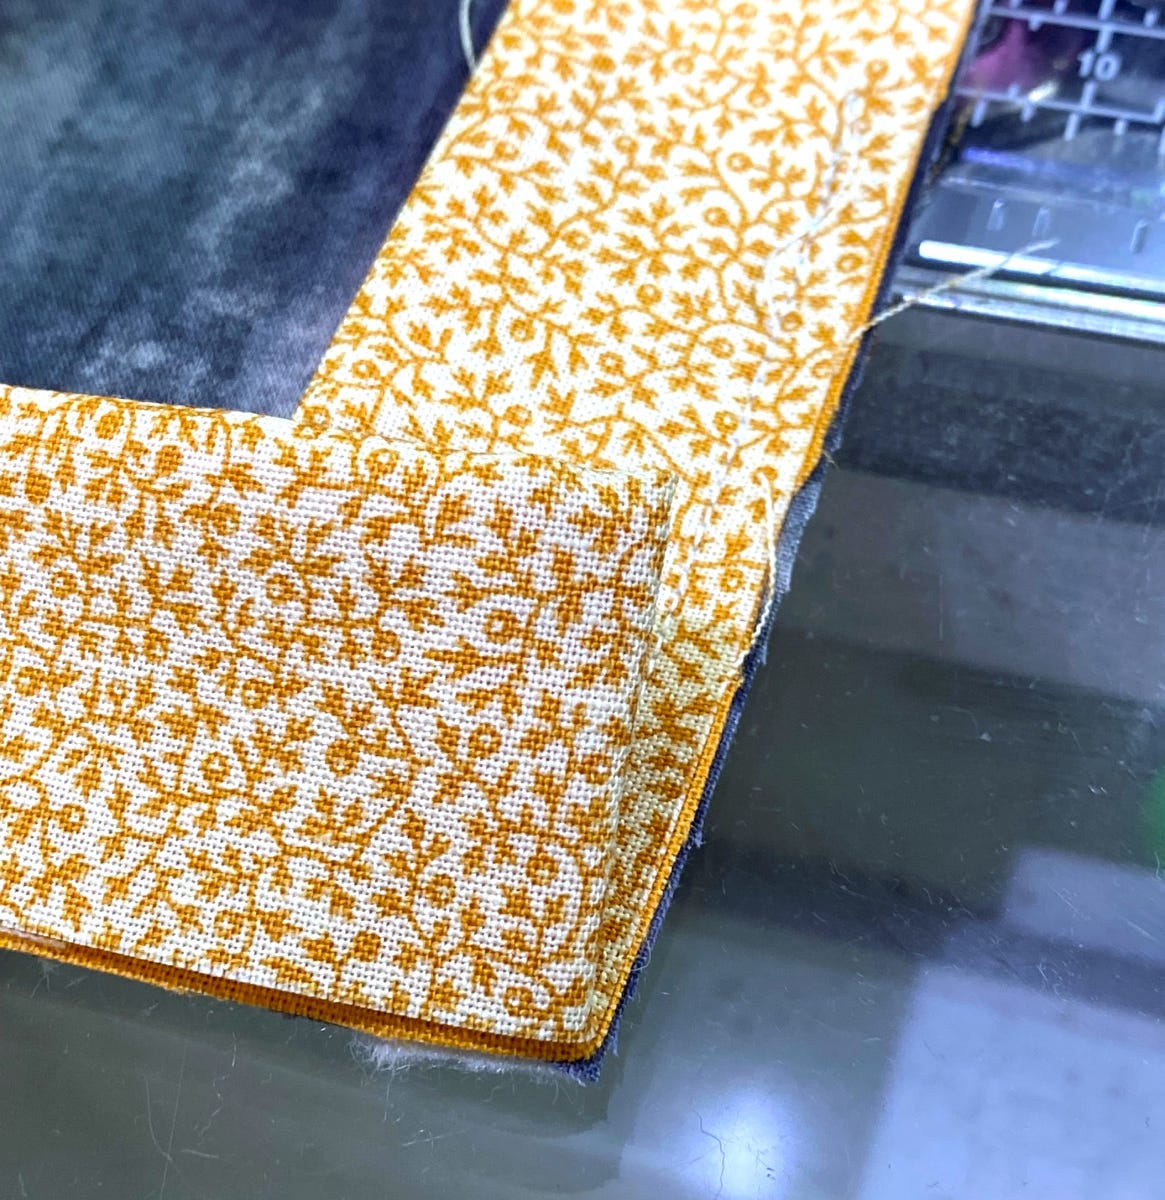
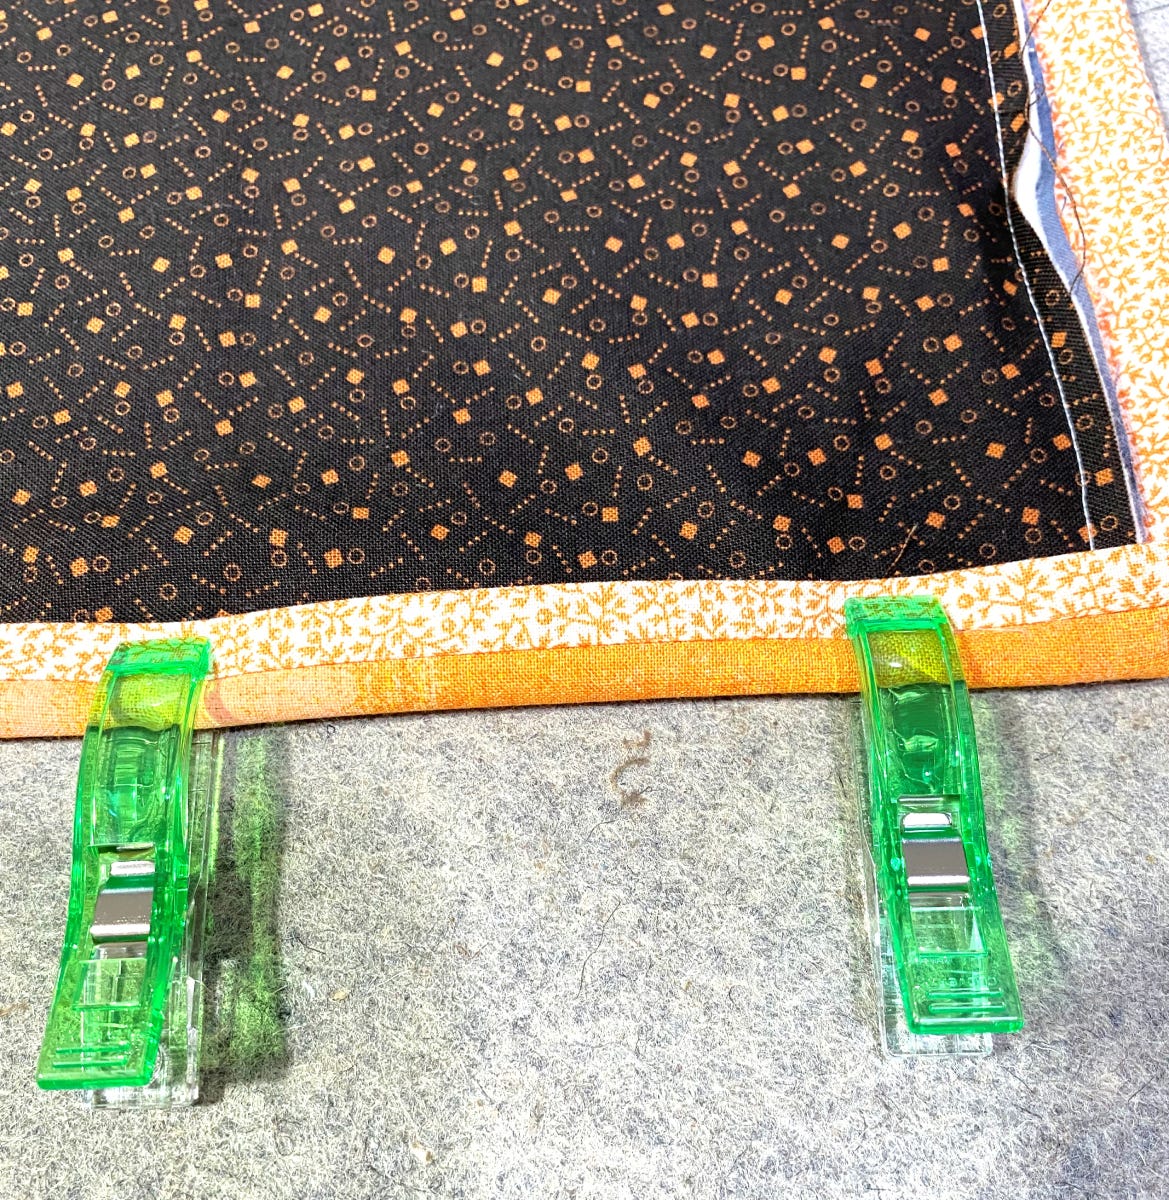
21. Once you have attached the binding all the way around the quilt, press the binding away from the quilt center. Wrap the binding around to the front of the quilt and hold it in place using binding clips.
22. Load a bobbin with a thread that matches your quilt backing. Load the thread on the top of the machine that will not be seen when stitched. A thin or bobbin weight thread in both is advisable. Most threads used in quilting are between 40 weight and 60 weight. For this step, I use a very fine thread - 90 to 100 weight thread.

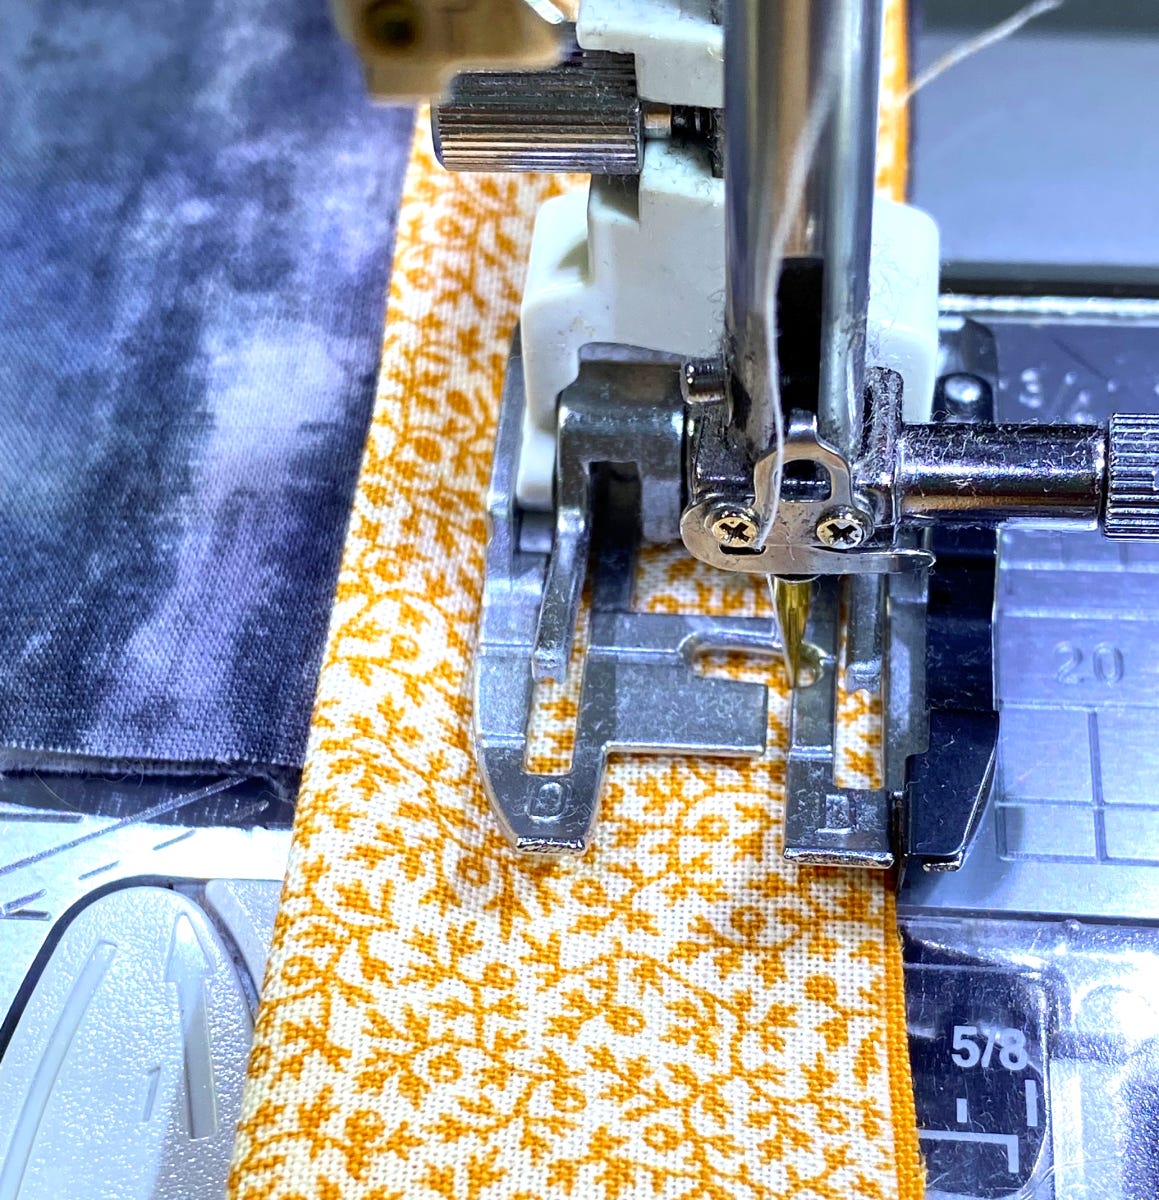
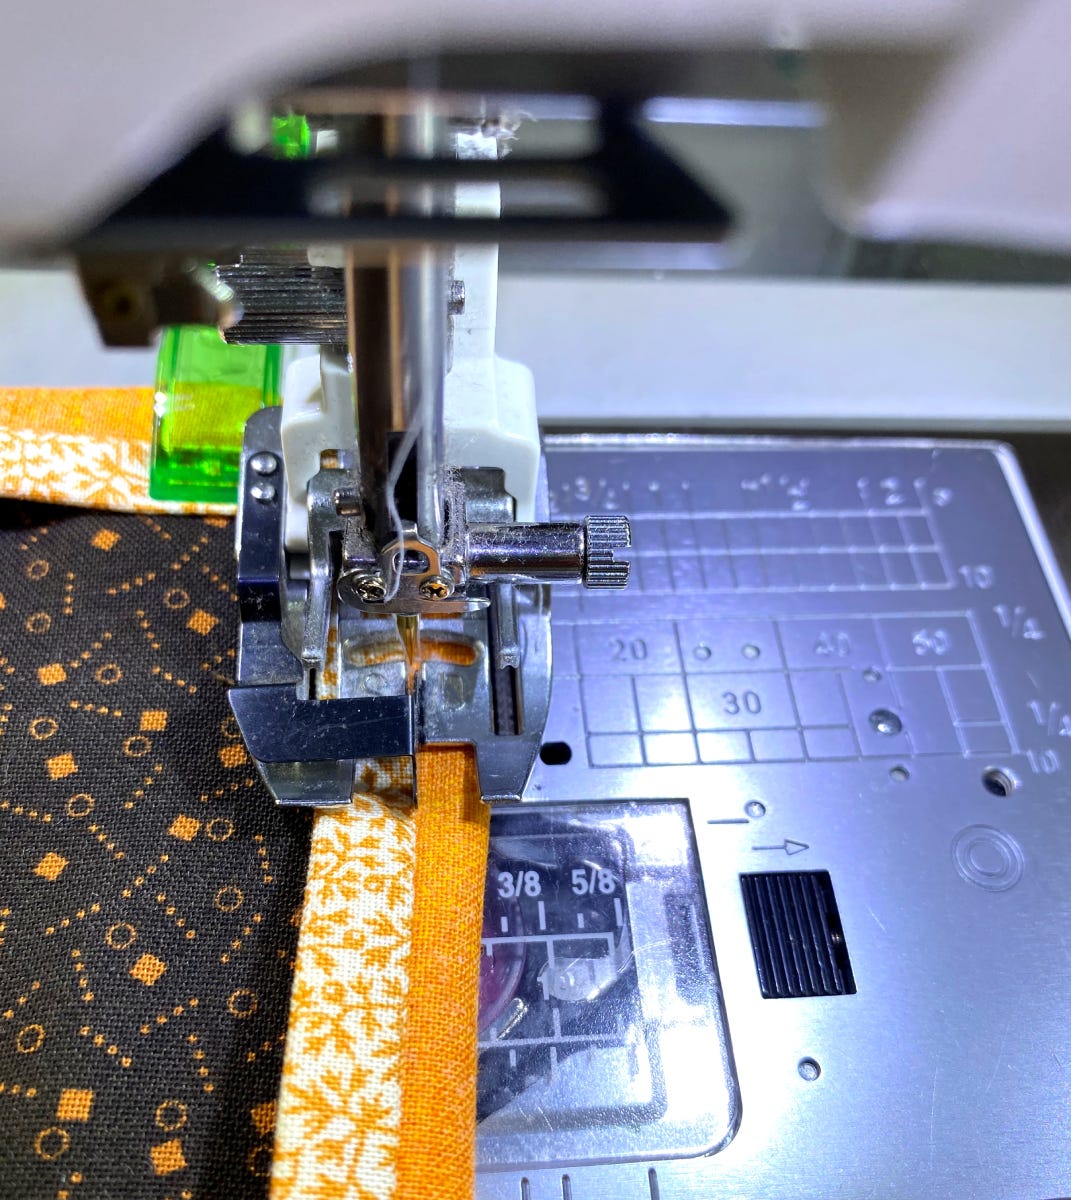
23. Use a "stitch in the ditch" foot to help maintain the stitching between the piping and the outer binding.
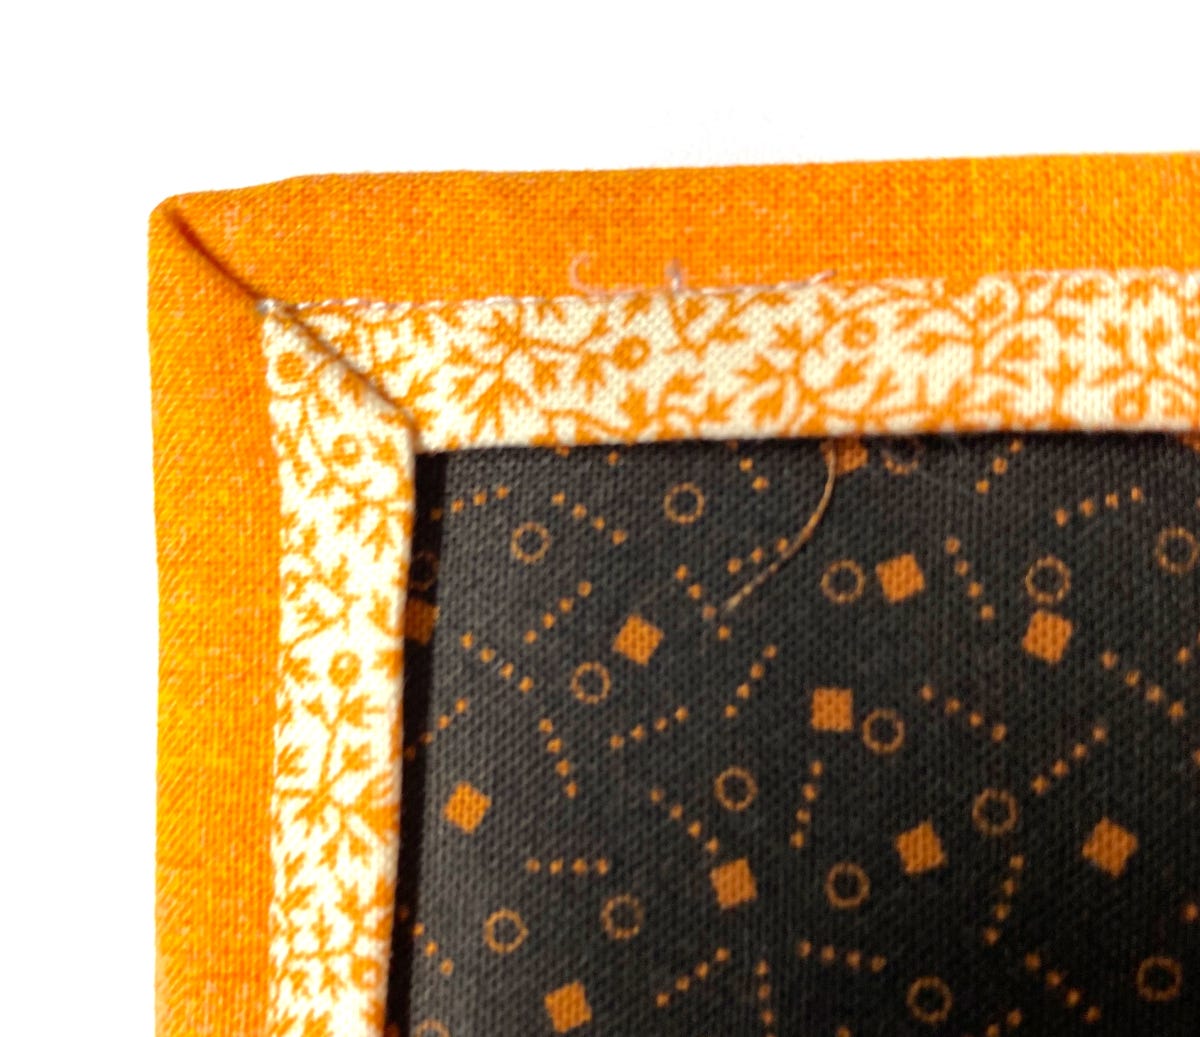
24. The corners are mitered the same way you miter them when you are hand sewing the binding. You will stitch all the way around.
25. Your binding will be complete and the stitches will be strong and basically invisible from both the front and back. The stitches will lay in the seam between the piping and the binding.
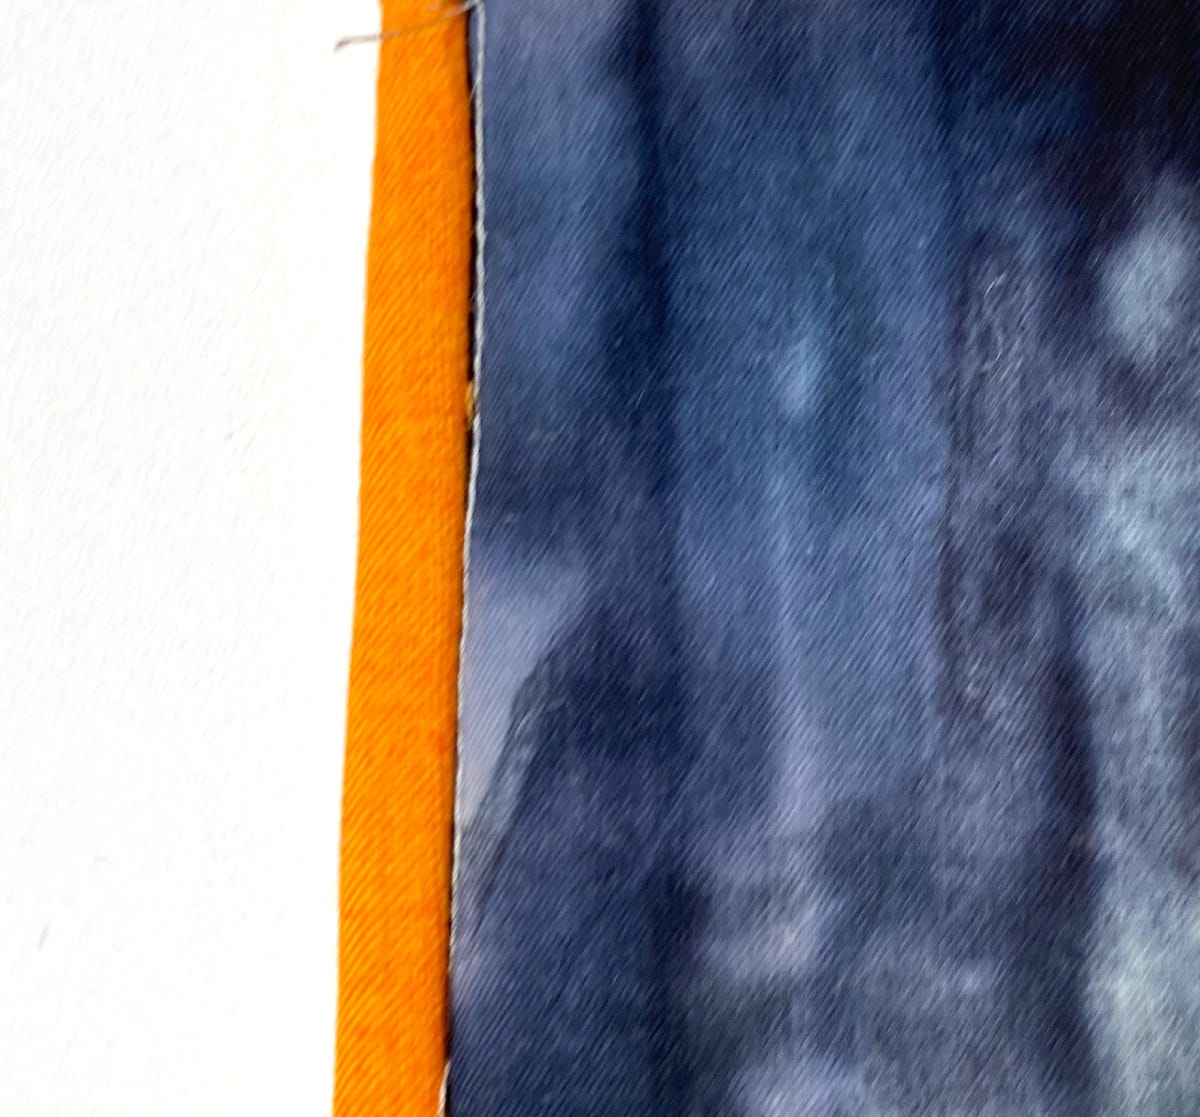
26. On the back, if you sew carefully, your stitches will line up with the seam between the quilt back and the binding. If you stray off this seam, your stitches will still be camouflaged by using a thin matching thread.
Add Magic Binding To Your Next Quilt
When you don't have time to hand bind your newest creation, add magic binding! Once you get the hang of it, it is so easy to do using a GO! Quilting Pattern, your GO! Fabric Cutter, and a couple of GO! Strip Cutter Dies.


