
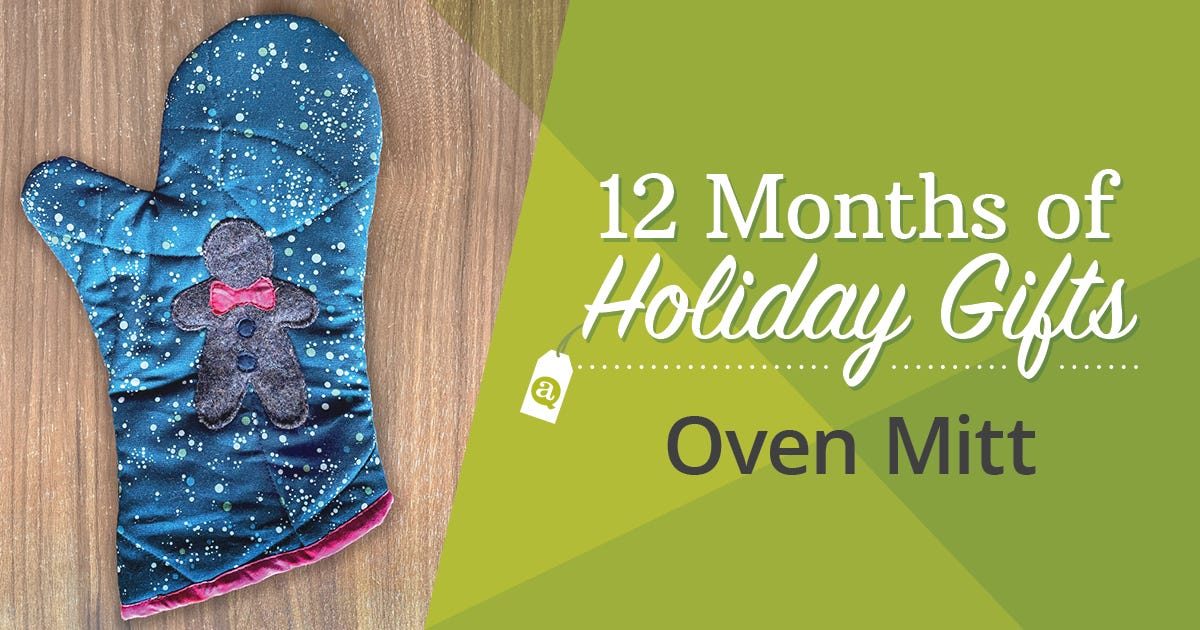
Today, we are going to put together an absolutely adorable oven mitt. Who in your life wouldn’t enjoy a seasonal oven mitt to spruce up their kitchen? (Truth be told, I’m considering keeping this guy for myself. He’s just too cute.)
I might have to make a few more of these, with my other favorite applique dies. The Penguin would be hysterical. Oh, or maybe an Owl for my owl-loving friend. Some sparkly Snowflakes would be pretty, too. Uh oh. I better finish with this one before this project never gets done!
Ready to get started? For this project you will need the following GO! Dies:
You'll also need these supplies:
- One Fat Quarter for the exterior
- One Fat Quarter for the lining
- 18” x 20” piece of Insul-Bright
- 18” x 20” piece of cotton batting
- 5” square wool felt for the Gingerbread Cookie*
- Threads to match applique and lining
- Scraps of red and black for bowtie and buttons
- Glue or fusible
- Wonder Clips
*I use wool felt because I love the texture. Of course, you can use quilting cotton, craft felt or have some fun and experiment with something textured, like corduroy.

Cutting & Assembly Instructions
NOTE: For this one, I didn’t do a separate binding or hanging loop. You can find instructions for those in other blog posts, or some of the PDF pattern instructions. I let the lining stick out a bit, and made a faux binding. It’s easy, and I think it looks great.
1. Layer the batting, Insul-Bright and exterior fabric. Pin in place with a few pins. Quilt the entire piece with the quilting pattern of your choice. For my version, I did some swirly lines that cross over each other.


2. Fold the piece in half along the width, so you will have two pieces about 10” x 18”. Cut in half along the fold.
3. One piece at a time, place the quilted panel half over the blades of the GO! Oven Mitt Die and run it through your GO! Fabric Cutter. Make sure one is batting side up while the other is batting side down, so you will get mirror image pieces.
NOTE: You MUST cut your pieces in two - the bulk of the batting and Insul-Bright layers are too much to send through the cutter with both sides at once.

4. Fold the lining fabric in half along the width, so it is about 10” x 18”. Place it over the blades and run it through the cutter to cut two lining pieces.
5. Using the GO! Gingerbread Cookie Die, cut out a Gingerbread Cookie shape from the brown wool felt. Cut out two buttons and one bowtie, or the Cookie Decorations of your choice.
6. Decide which mitt side will be your front. Place the Gingerbread Cookie and pin in place. Using a straight stitch or your preferred applique stitch, attach the Gingerbread Cookie to the oven mitt.
7. Apply the decorations. I like to use a dab from the Fabric Glue Stick to attach my pieces before sewing.

8. Use clips to align the oven mitt sides, right sides together, and stitch around the outside. When you get into the area between the thumb and fingers, shorten the seam allowance until you are nearly at the point of the notch. This will make it easy to turn your oven mitt and get a crisp inner point. I’ve marked the lines here, so you can see where I plan to stitch.


9. Take the two lining fabrics and stitch them together, following the same stitch line at the thumb joint.

10. Take the lining and turn it right side out, and slip it into the inside-out oven mitt. The two "pretty" sides should be touching. Pin or clip the raw edges of the lining and oven mitt in place, being careful to line up the seam lines. Leave a gap of 3" to 4" unsewn for turning.

11. Stitch around the opening of the oven mitt, backstitching at your start and stop points.

12. Pull the lining and then the oven mitt through the hole you have left open. It will take a little bit of patience. Just keep working at it and pulling a little at a time through until you have the oven mitt right side out.
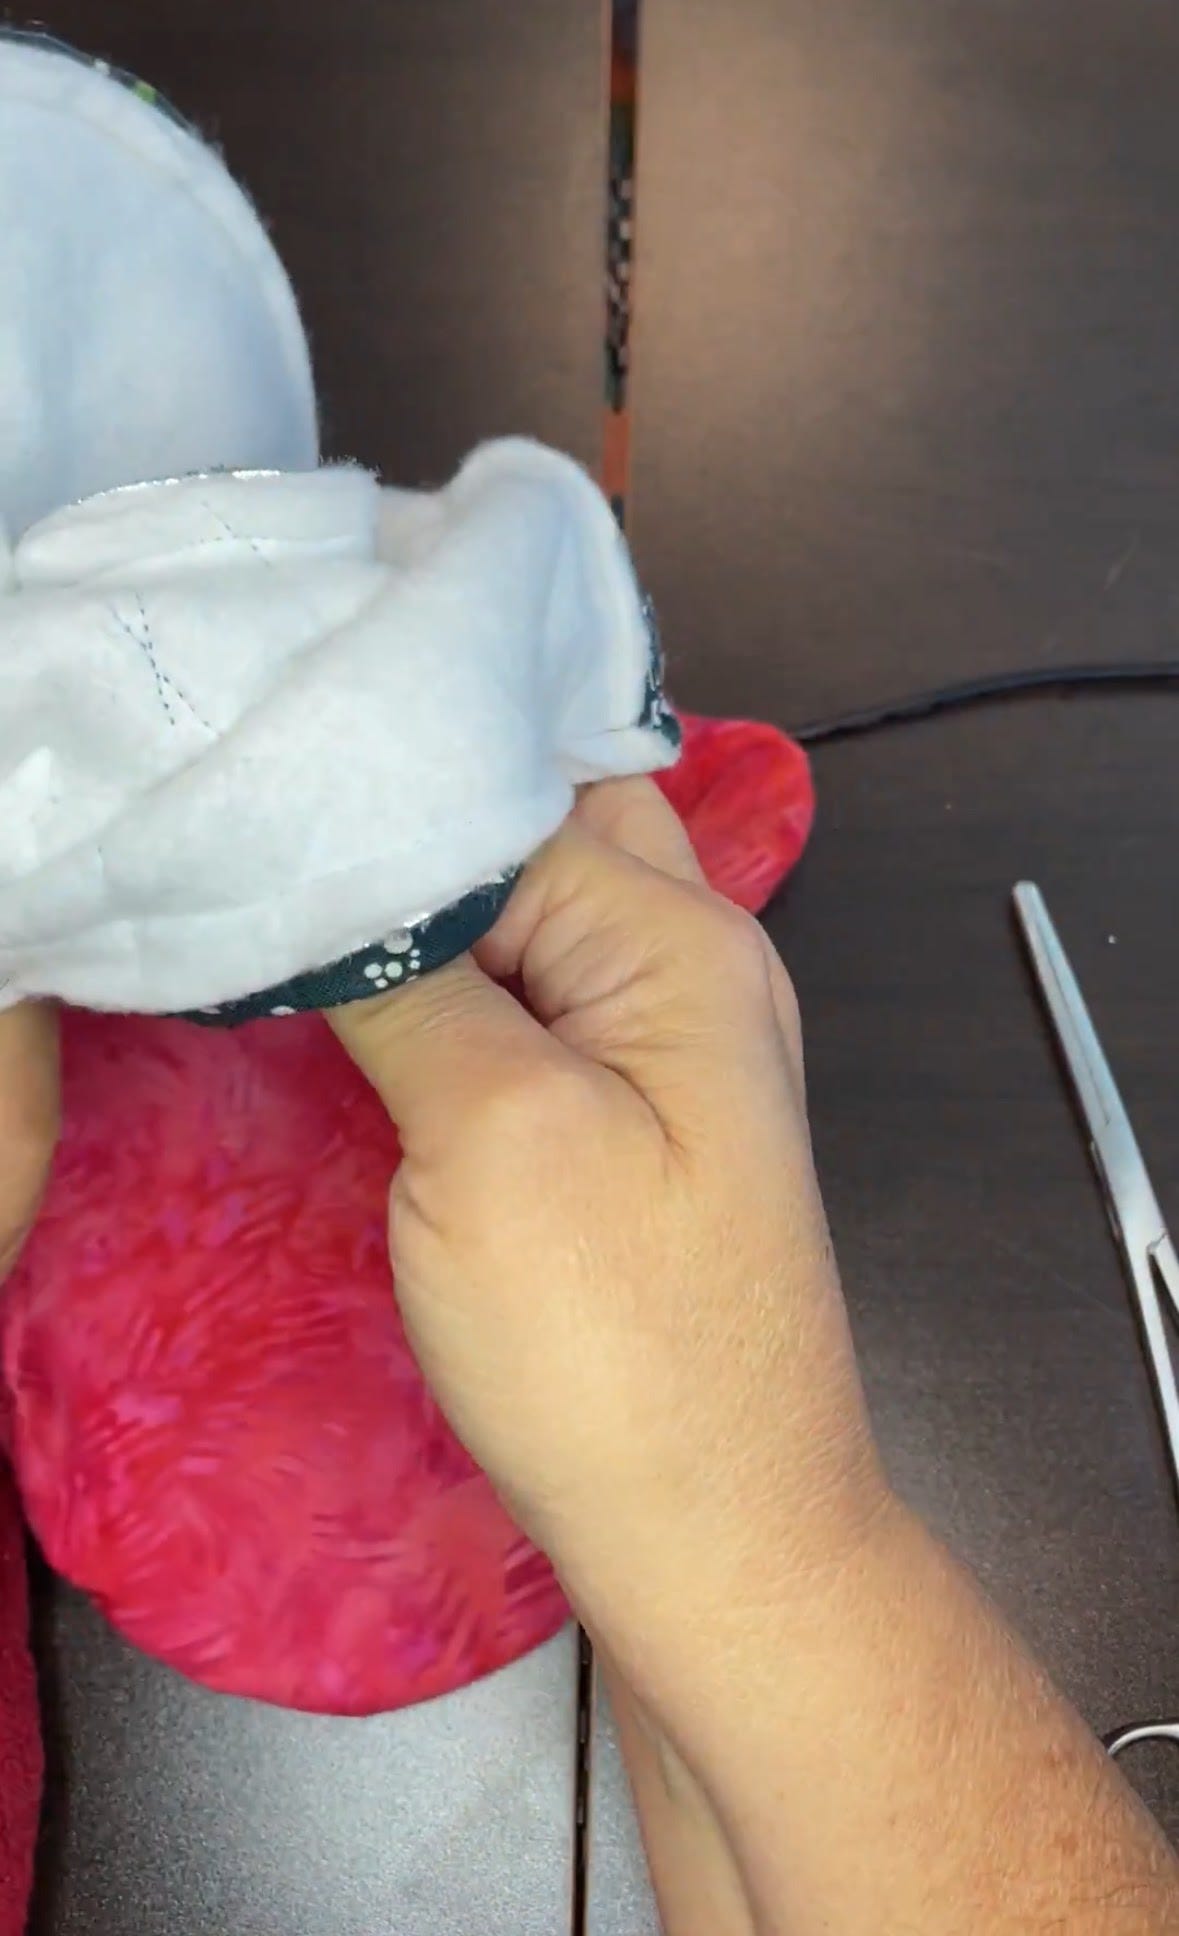
13. Tuck the lining inside, but not all the way. We are going to leave about 1/4” exposed to make a faux binding.

14. Turn the edge of the unstitched opening, pinning to make sure the lining is positioned evenly. Top stitch around the edge of the oven mitt to secure.

15. Turn the edge of the unstitched opening, pinning to make sure the lining is positioned evenly. Top stitch around the edge of the oven mitt to secure.

16. Add the finished Oven Mitt to your stash of Holiday Gifts!

If you make your own version of this tutorial, please share pictures on social media and tag @jenstrauser and @AccuQuilt. Don't forget to use the hashtag #AccuQuiltBuilt so that we can see how your Oven Mitt turned out!


