

If you’re just joining us, we kicked off the GO! Shoo Fly Spin Throw Quilt with an introduction as a part of the AccuQuilt Live program on Wednesday, July 19. On August 2, we got started by cutting and organizing our pieces. If you missed that show, be sure to watch it here.
AccuQuilt Cutting Expert Pam Heller and I are making the original GO! Qube Mix & Match 5” Block version. The introduction blog post has traditional rotary directions from our partners at AQS. You can also download the pattern instructions using the 4”, 6”, 8” or 9” GO! Qube Mix & Match Blocks from that same post.
Along with your cut pieces and your pattern, here’s a few things I suggest you have handy. I promise they will make the process easier!
- Sewing machine with thread and extra bobbins (l love the pre-wound bobbins we sell on our website)
- Iron (I use a small Steamfast Travel Steam Iron, but Pam uses a Clover Mini Iron)
- Pressing surface, such as a Wool Pressing Mat or a June Tailor Cut ‘n Press
Let's Sew
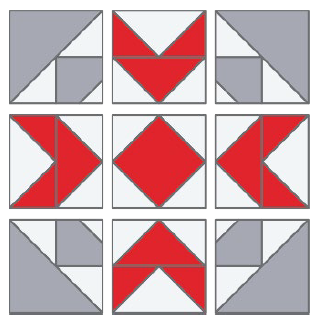
We’re starting by making the Spin block this week. You will need a total of 18 Spin blocks for this pattern. It may look complicated at first, but it breaks down into three different units, so let’s take a look.
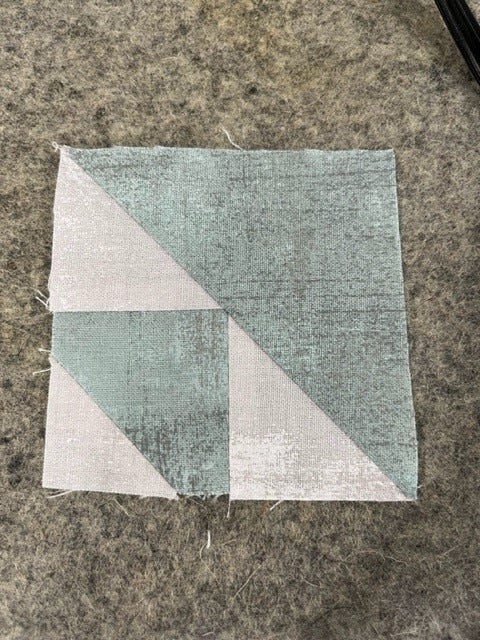
Let’s get started with the corner units, and you’ll need four of these units per block. This is a great chain-piecing opportunity. We’re going to start this one with the Shape 11.1 and 12.1 Bow Tie squares, sewing the small half square triangle onto the corner (some quilters call this a snowballed corner) and pressing the seam open.
Next up is the shape we call our GO! Qube “workhorse,” the Shape 5 small half square triangles! We’re sewing them onto the Bow Tie/single snowballed square. Refer to the diagram in the pattern to be sure the shapes are facing the correct way. We’re creating larger half square triangles here that we’ll be sewing onto Shape 3 half square triangles – isn’t that slick?
Geese For Days
The next unit is made up of two Flying Geese. Flying Geese use our friend Shape 5, the small half square triangle, with the Shape 4 quarter square triangle. Yep, more chain-piecing fun here.
Flying Geese are a basic unit for quilting and one that many quilters struggle with, so let’s take a detailed look at how to put these together:
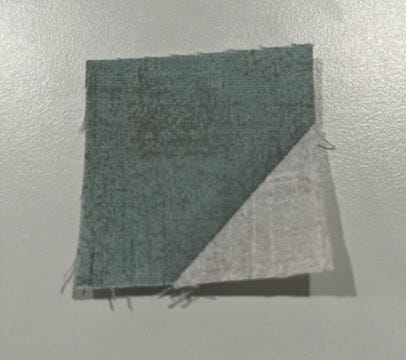
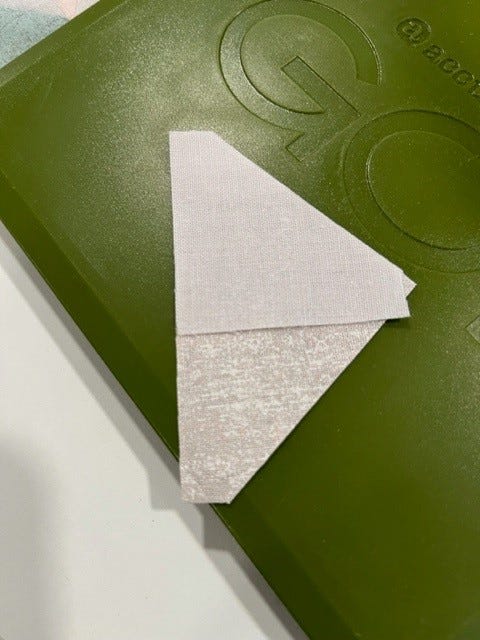
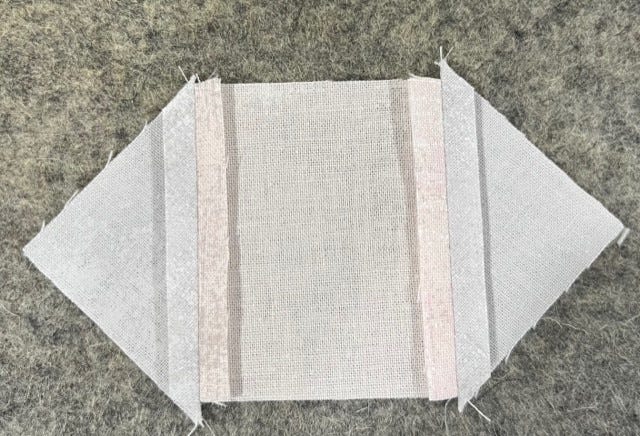
- Start with laying out a Shape 4/quarter square triangle on your worktable with the right side facing up.
- Now, take one of the Shape 5/half square triangles and lay it right side down over one side.
- You’ll see that the bottom dog-eared corners match up perfectly.
- Now, you will also see a tiny tip of the quarter square tringle peeking out at the top – don’t panic! Just leave it there and sew that first 1/4” seam.
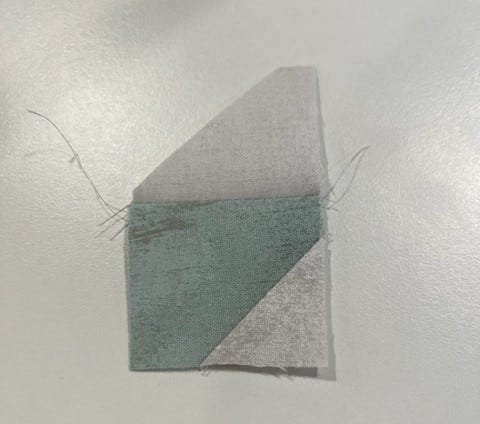
Press this seam open, and when you place the second half square triangle across the other corner, both dog-eared ends will line up perfectly.
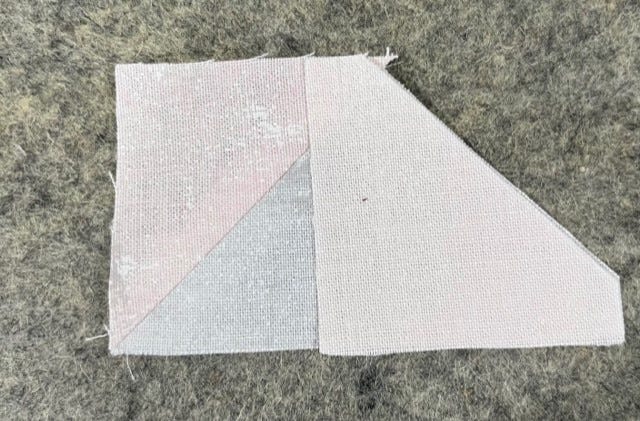
You can press this seam open or press it to the outside. The key is that when you look at the backside of the unit, you want to be able to see the center tip of the quarter square triangle clearly!
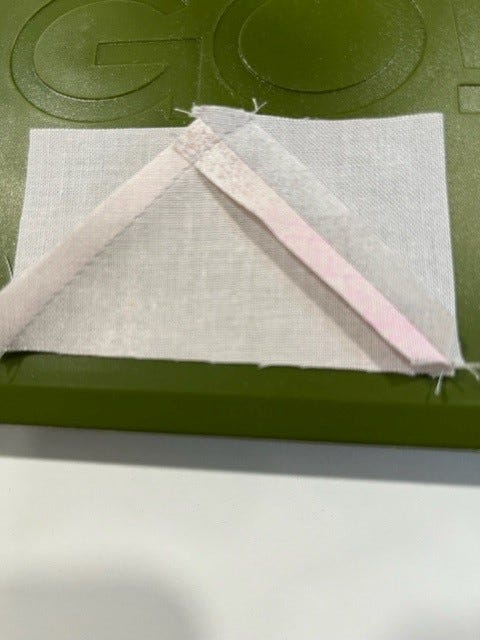
You’ll be creating two types/colors of Flying Geese for these blocks. Once they’re all together and pressed, you’ll be sewing one of each together to create a chevron unit. Be sure to follow the diagram in your pattern to ensure that you have your color placement correct!
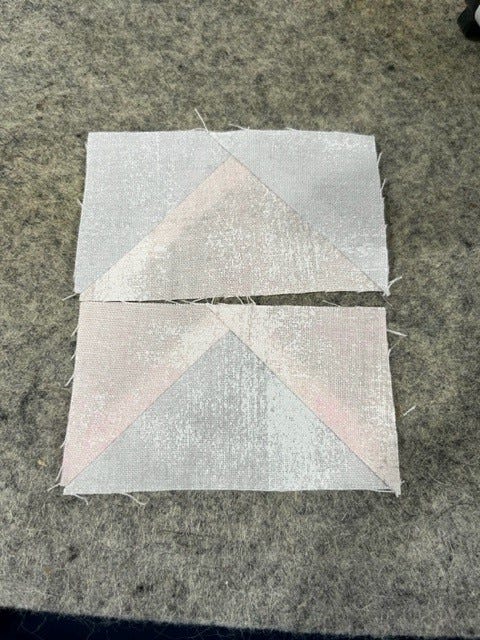
Here’s my tip for sewing the two Flying Geese together: sew them so that the bottom half of the block is on top as it goes under the needle. This way, you will see exactly where the center tip is, so you can be sure that you don’t lose it in your seam!

Square in a Square Time
The center of the Spin block is a Square on Point unit, also known as a Square in a Square. This is made using Shape 6 for the center and the Shape 5 small half square triangles on the four sides. You’ll be sewing onto opposite sides of the square. Note that when you place the first two triangles, you’ll see a tiny tip of the square below – don’t panic! Once you press those first two seams open, the next two will line up perfectly, just like we saw with the Flying Geese above.
While I fully support pressing all the seams on this block open, there are a few that make sense to press to one side. With the goal of reducing bulk, I suggest pressing the second set of seams on this unit to the outside.

Makin' Blocks
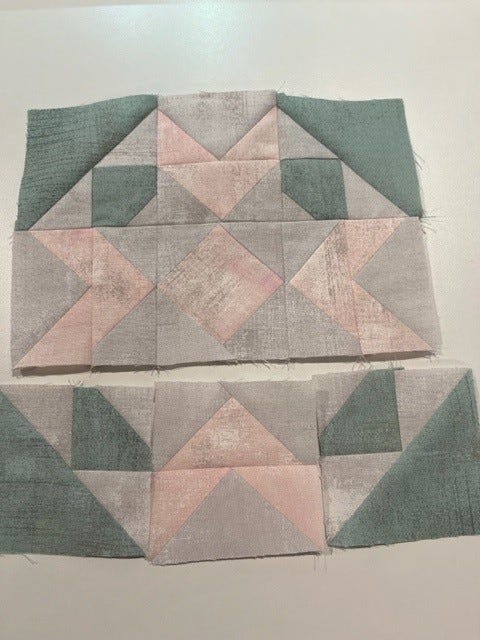
Once you have all your units sewn and pressed, it’s time to pull all your units together to sew your Spin blocks!
Be sure to follow the pattern for the correct placement of the pieces. With all your units sewn together, this 9-Patch block will now come together easily.
I love pressing my seams in opposite directions, so I can “nest” my seams, but with the number of seams in this one, I’m going to suggest pressing them all open and using a pin or two maybe to line up the intersections.
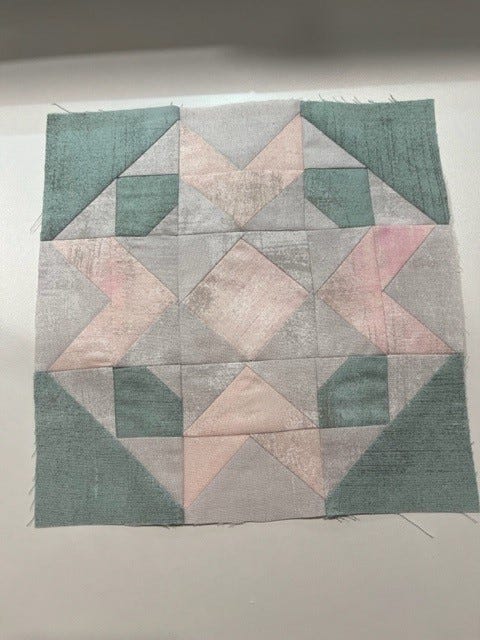
Once the Spin blocks are done, give them a good pressing and set them aside because you’re done and ready for next week!
Don’t worry if it takes you longer than a week to complete these blocks either! This quilt-along is about enjoying the process of quilting alongside everyone else. The Spin blocks are the most complicated part of this project, so take it easy on yourself here!
What's Next?
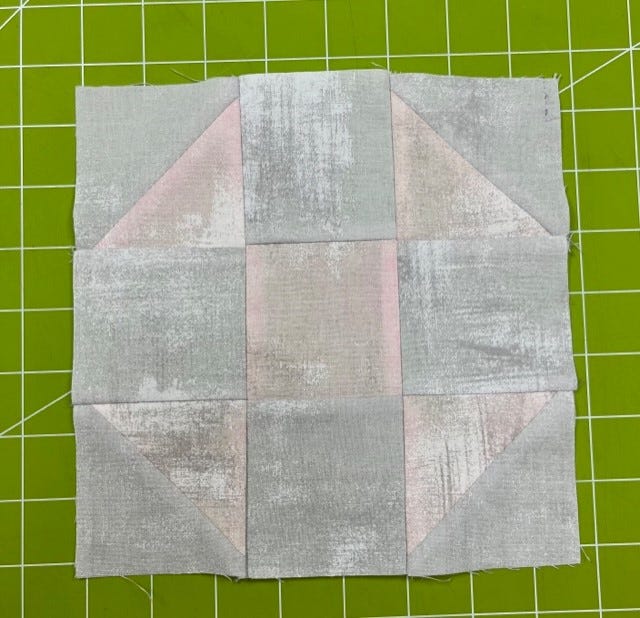
Next week, we’ll be making the Shoo Fly blocks. These blocks will come together quickly for you, I promise.
Be sure to share pictures of your progress with all of us on the AQS Quilting Project Parade Facebook Group page using the hashtag #AQSews. AccuQuilt Cutting Expert Pam Heller and I will be popping on there to share our progress and answer your questions during the week.


